AnimateDiff ComfyUI Workflow/Tutorial - Stable Diffusion Animation
Updated: 4/24/2024
Hey there! Have you ever marveled at the idea of turning text to videos? This isn't brand new, but it's getting spicier all the time. Today, let's chat about one of these cool tools, AnimateDiff in the ComfyUI environment. Whether you're a digital artist or just love exploring new tech, AnimateDiff offers an exciting way to transform your text ideas into animated GIFs and videos.
We will cover:
- How does AnimateDiff work?
- ComfyUI AnimateDiff Workflow - No Installation Needed, Totally Free
- AnimateDiff V3 vs. Animatediff SDXL vs. AnimateDiff v2
- AnimateDiff V3: New Motion Module in Animatediff
- AnimateDiff SDXL
- AnimateDiff V2
- AnimateDiff Settings: How to Use AnimateDiff in ComfyUI
- AnimateDiff Models
- CheckPoint Models for AnimateDiff
- Beta Schedule
- Motion Scale
- Context Batch Size Determines Animation Length
- Context Length
- Motion LoRA for Camera Dynamics (AnimateDiff v2 Only)
- AnimateDiff Prompt
- AnimateDiff Prompt Travel / Prompt Scheduling
- ComfyUI Hires Fix - Enhancing Your Animations
- Ready-to-Use ComfyUI AnimateDiff Workflow: Exploring Stable Diffusion Animation
1. How does AnimateDiff work?
The core of AnimateDiff is a motion modeling module. Think of it as the brain of the operation, learning all about movement from various video clips. It's like having a dance teacher who knows every move in the book. This module seamlessly integrates into pre-trained text-to-image models. So, you're not just limited to static images anymore – your creations can dance, jump, and twirl!
2. ComfyUI AnimateDiff Workflow - No Installation Needed, Totally Free
Check out the video above which is crafted using the ComfyUI AnimateDiff workflow. Now, you can dive straight into this Animatediff Workflow without any hassle of installation. We've got everything set up for you in a cloud-based ComfyUI, complete with the AnimateDiff workflow and all the essential models and custom nodes of Animatediff V3, Animatediff SDXL, and Animatediff V2.
Feel free to experiment and play around with it. Or you can continue reading this tutorial on how to use AnimateDiff and then give it a try later.
3. AnimateDiff V3 vs. Animatediff SDXL vs. AnimateDiff v2
Let's take a stroll through the different versions of AnimateDiff. Each version has its own charm, so buckle up for a quick tour!
3.1. AnimateDiff V3: New Motion Module in Animatediff
AnimateDiff V3 isn't just a new version, it's an evolution in motion module technology, standing out with its refined features. The motion module v3_sd15_mm.ckpt is the heart of this version, responsible for nuanced and flexible animations.
let's break down the tech magic behind it. The star player here is the Domain Adapter LoRA module, which is essentially a primer for the motion module. By training on static frames from the video dataset, this LoRA module equips AnimateDiff to be more adept at handling motion. Pretty cool, right?
When using AnimateDiff V3, you'll notice it doesn't necessarily outshine Animatediff V2 in every aspect. Instead, it offers different types of motions, adding more tools to your creative arsenal.
Positive Prompt:masterpiece, best quality, girl with rainbow hair, really wild hair, mane
Negative Prompt: (low quality, nsfw, worst quality:1.4), (deformed, distorted, disfigured:1.3), easynegative, hands, bad-hands-5, blurry, ugly, text, embedding:easynegative
CheckPoint:
toonyou_beta6
3.2. AnimateDiff SDXL
If you're into high-res videos, AnimateDiff SDXL might be a choice. Running on the mm_sdxl_v10_beta.ckpt motion module, it's designed for crafting 1024x1024 resolution animations with 16 frames. Just a heads-up though, it's still in Beta, so it might be wise to wait a bit before diving in.
Use the same Positive Prompt and Negative Prompt with AnimateDiff V3
CheckPoint:
dreamshaperXL10_alpha2Xl10
3.3. AnimateDiff V2
AnimateDiff V2 is the classic! With mm_sd_v15_v2.ckpt, this version offers MotionLoRA for eight essential camera movements: Zoom In/Out, Pan Left/Right, Tilt Up/Down, and Rolling Clockwise/Anticlockwise. Animatediff V2 is perfect if you're after dynamic camera movements to add drama to your animations.
Use the same Positive Prompt and Negative Prompt with AnimateDiff V3
CheckPoint:
toonyou_beta6
4. AnimateDiff Settings: How to Use AnimateDiff in ComfyUI
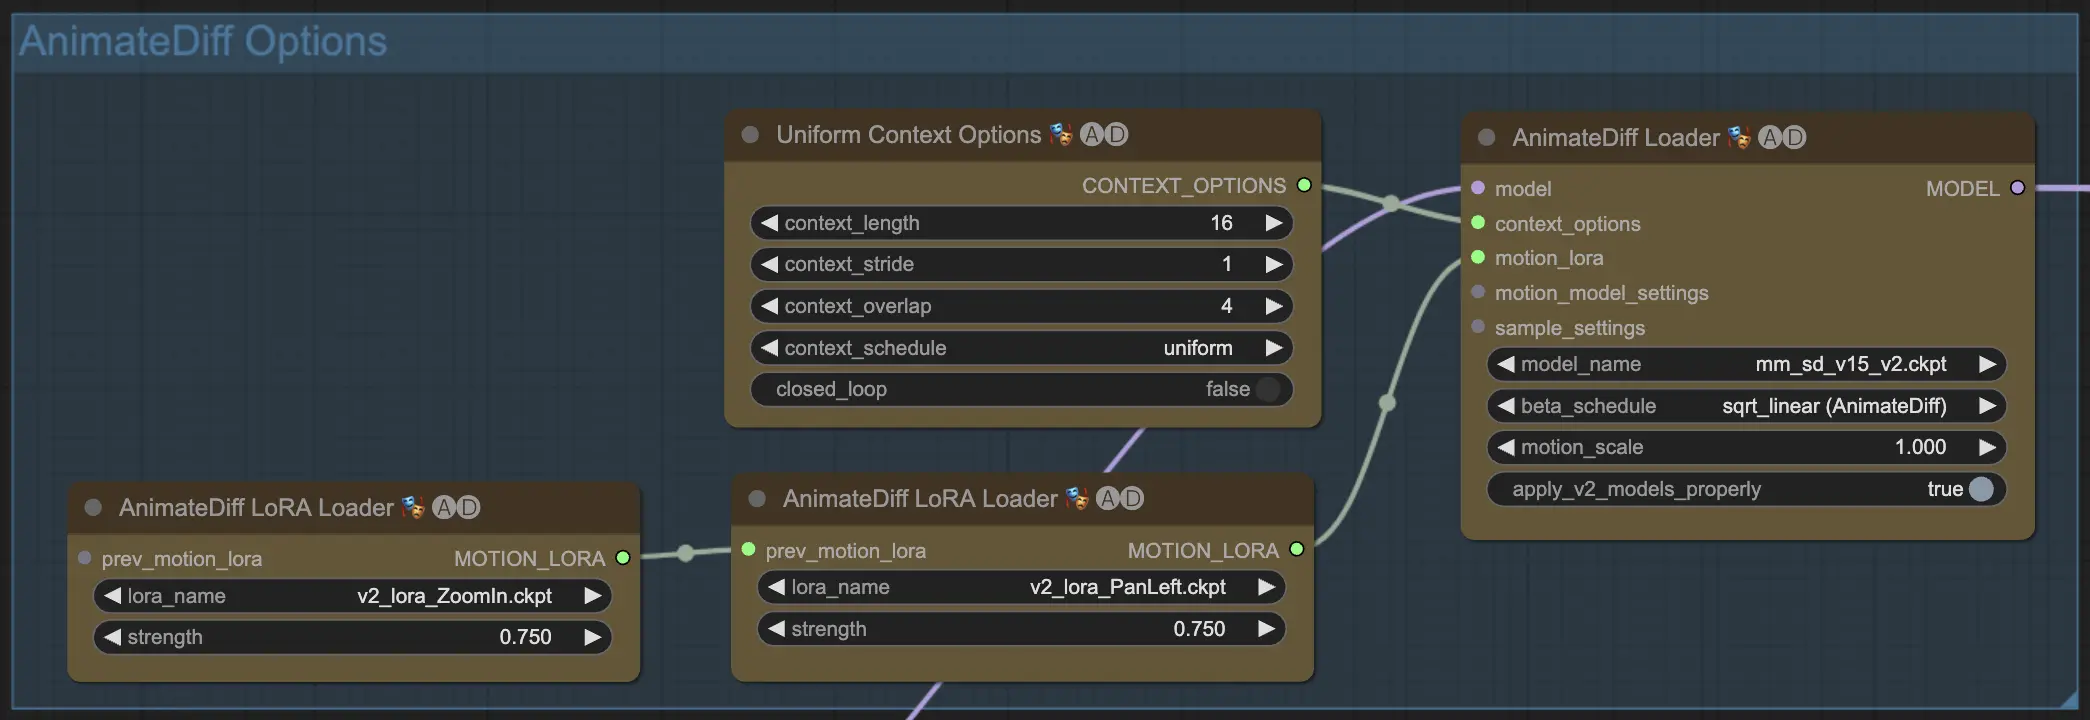
Once you enter the AnimateDiff workflow within ComfyUI, you'll come across a group labeled "AnimateDiff Options" as shown below. This area contains the settings and features you'll likely use while working with AnimateDiff.
4.1. AnimateDiff Models
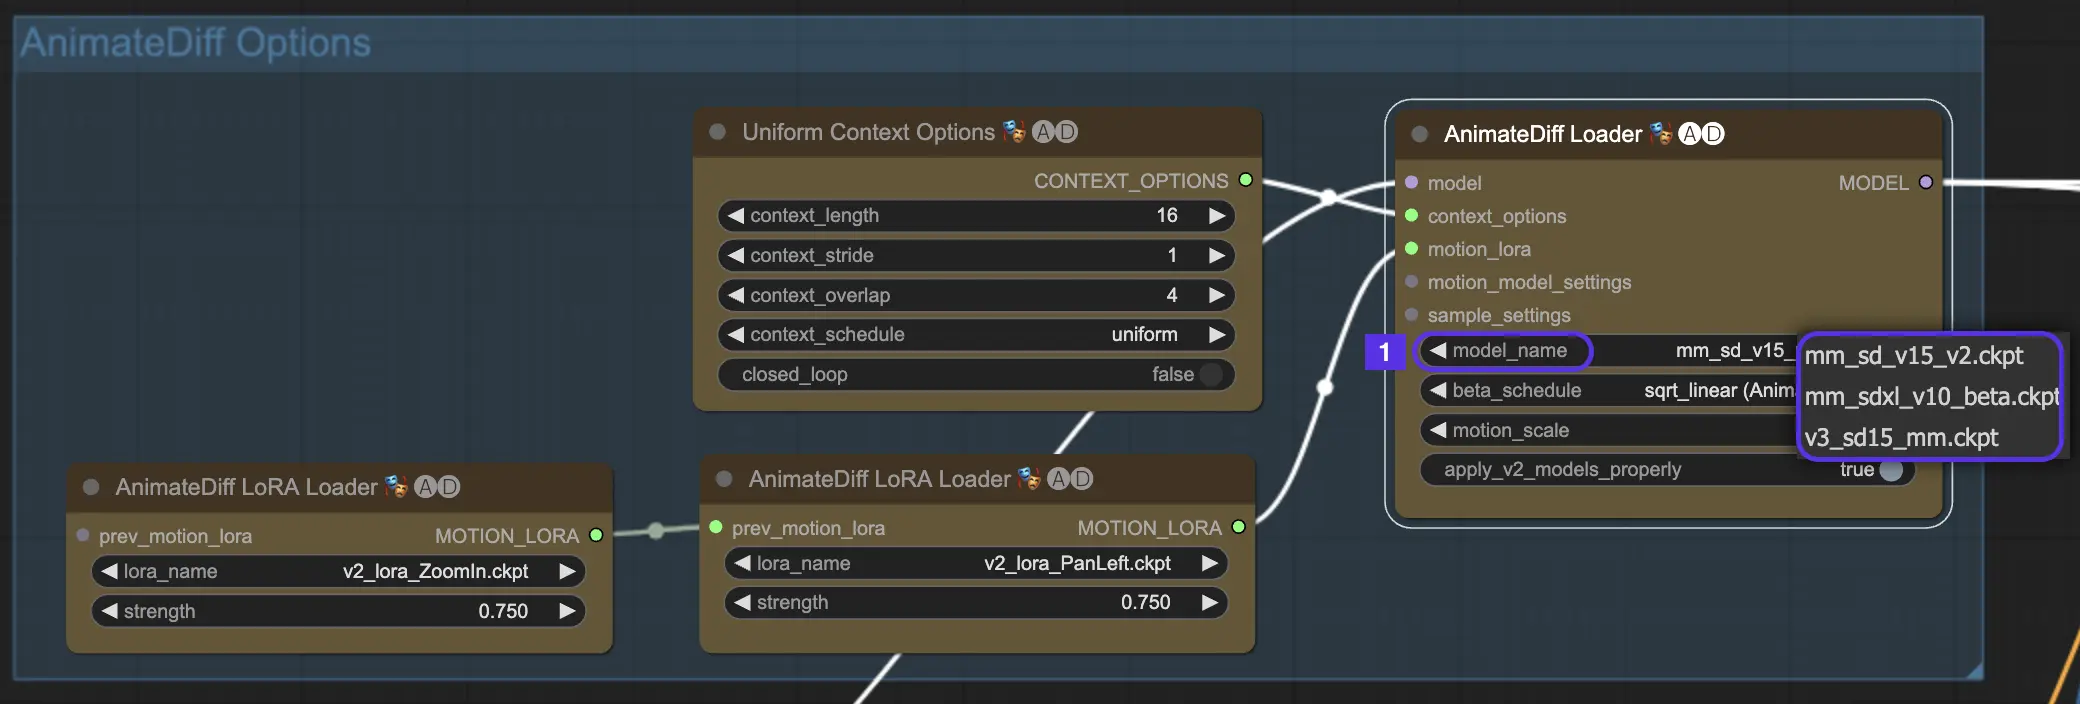
First things first, choose your AnimateDiff motion module you want to try in the model_name dropdown:
v3_sd15_mm.ckptfor AnimateDiff V3mm_sdxl_v10_beta.ckptfor AnimateDiff SDXLmm_sd_v15_v2.ckptfor AnimateDiff V2
4.2. CheckPoint Models for AnimateDiff
AnimateDiff needs a Stable Diffusion chickpoint model.
For AnimateDiff V2 and V3, your must use an SD v1.5 model. Models like realisticVisionV60B1_V51VAE , toonyou_beta6 and cardos_Animev2.0 are top picks.
If you're leaning towards AnimateDiff SDXL, aim for an SDXL model, such as sd_xl_base_1.0 or dreamshaperXL10_alpha2Xl10.
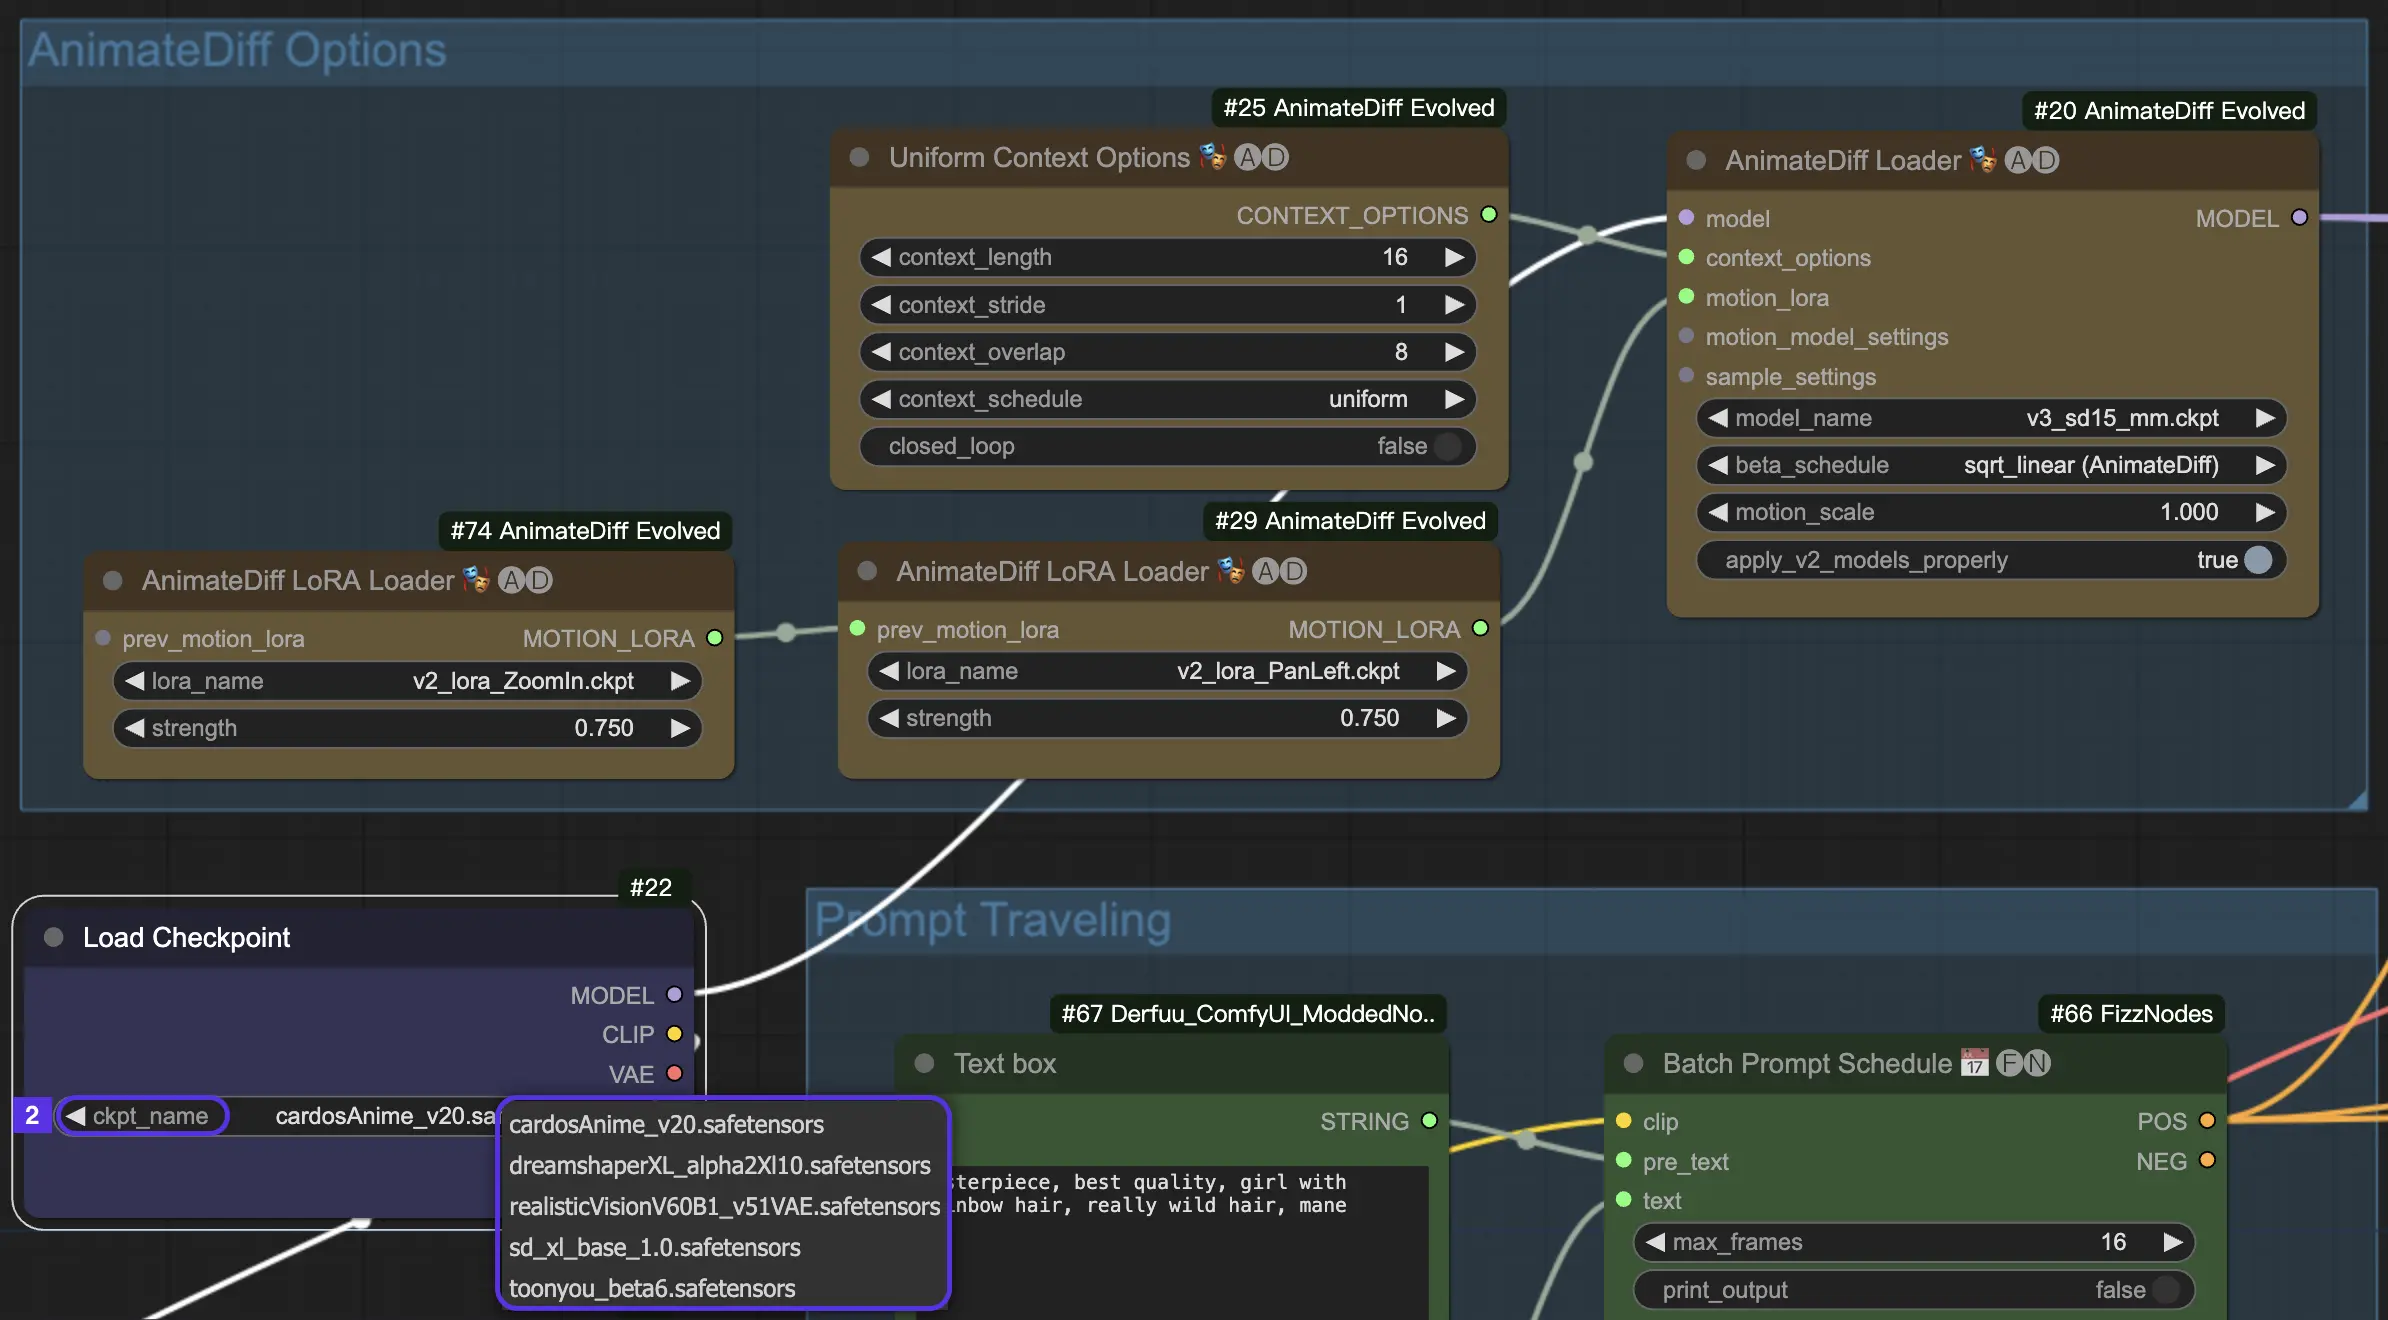
Within the RunComfy cloud environment, all motion modules and checkpoint models come pre-installed for your convenience.
4.3. Beta Schedule
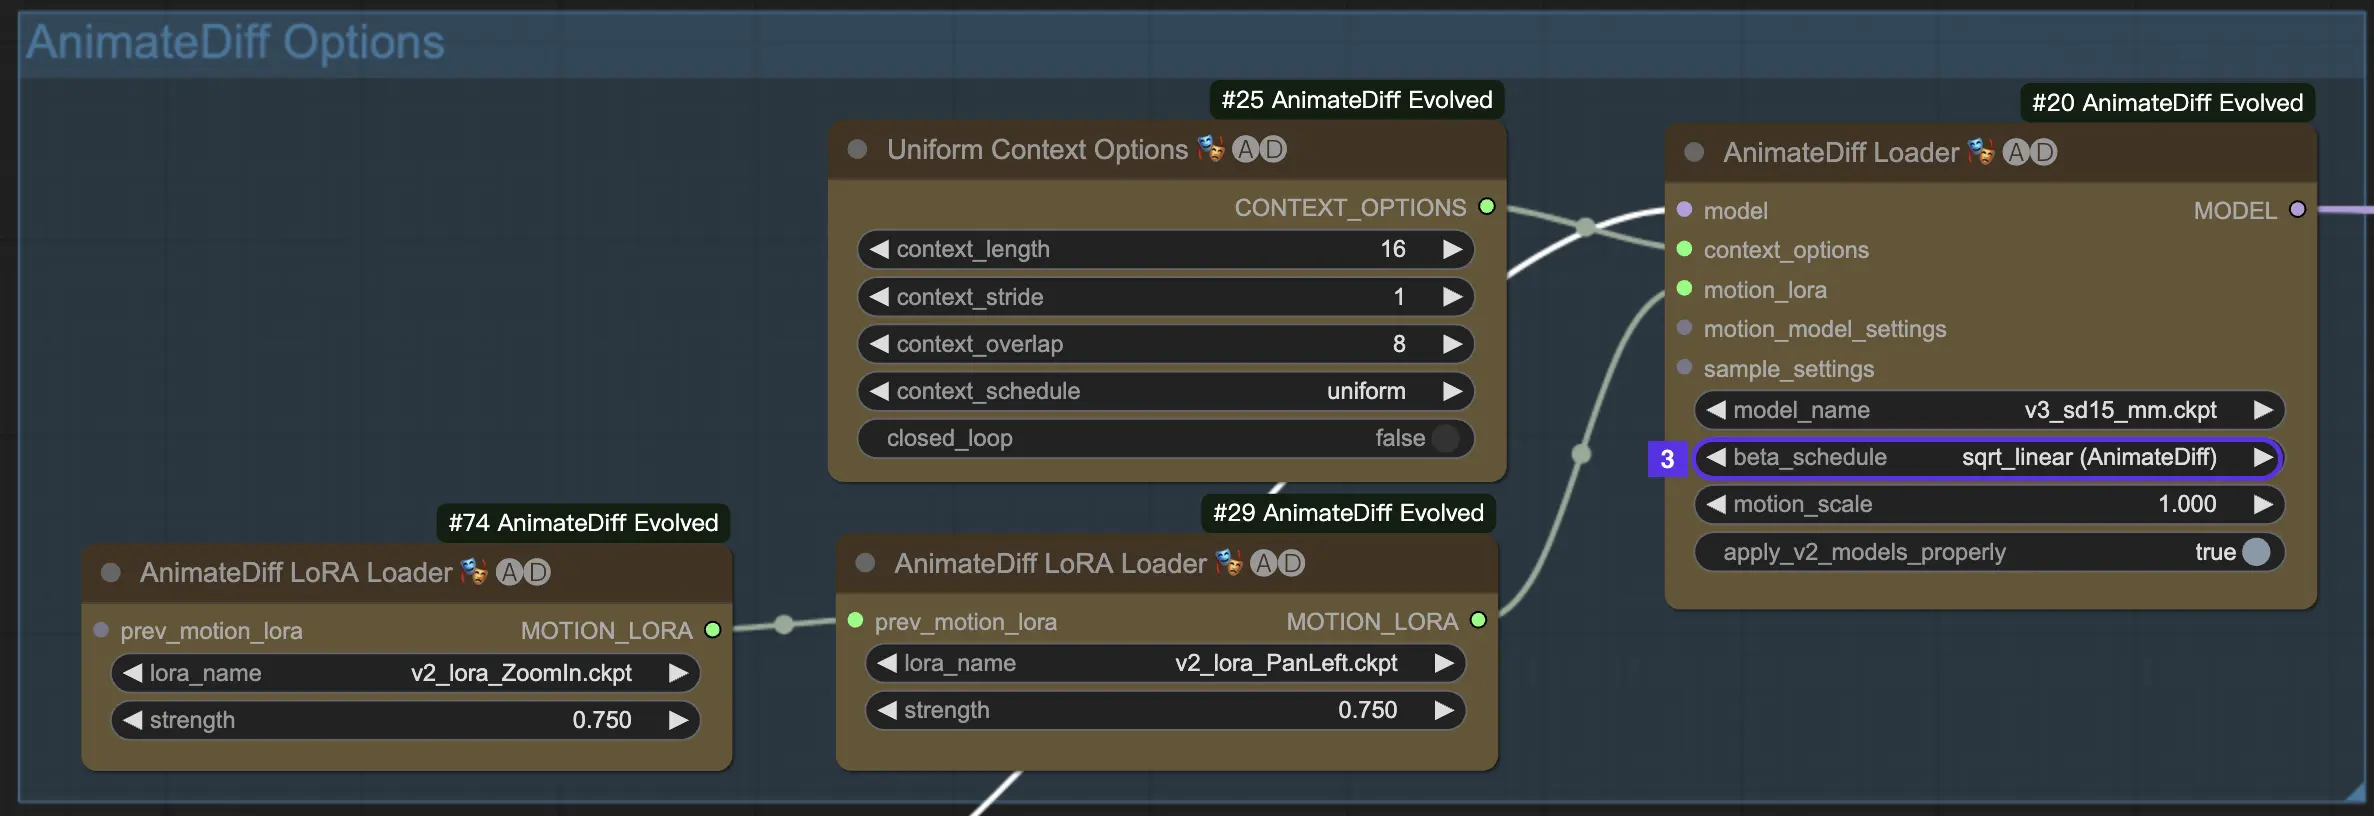
Beta Schedule in AnimateDiff determines the behavior of the noise reduction process during the animation generation.
For AnimateDiff V3 and V2, the sqrt_linear setting is generally the way to go, but don't shy away from trying out linear for some interesting effects.
For AnimateDiff XL, stick with linear (AnimateDiff-SDXL).
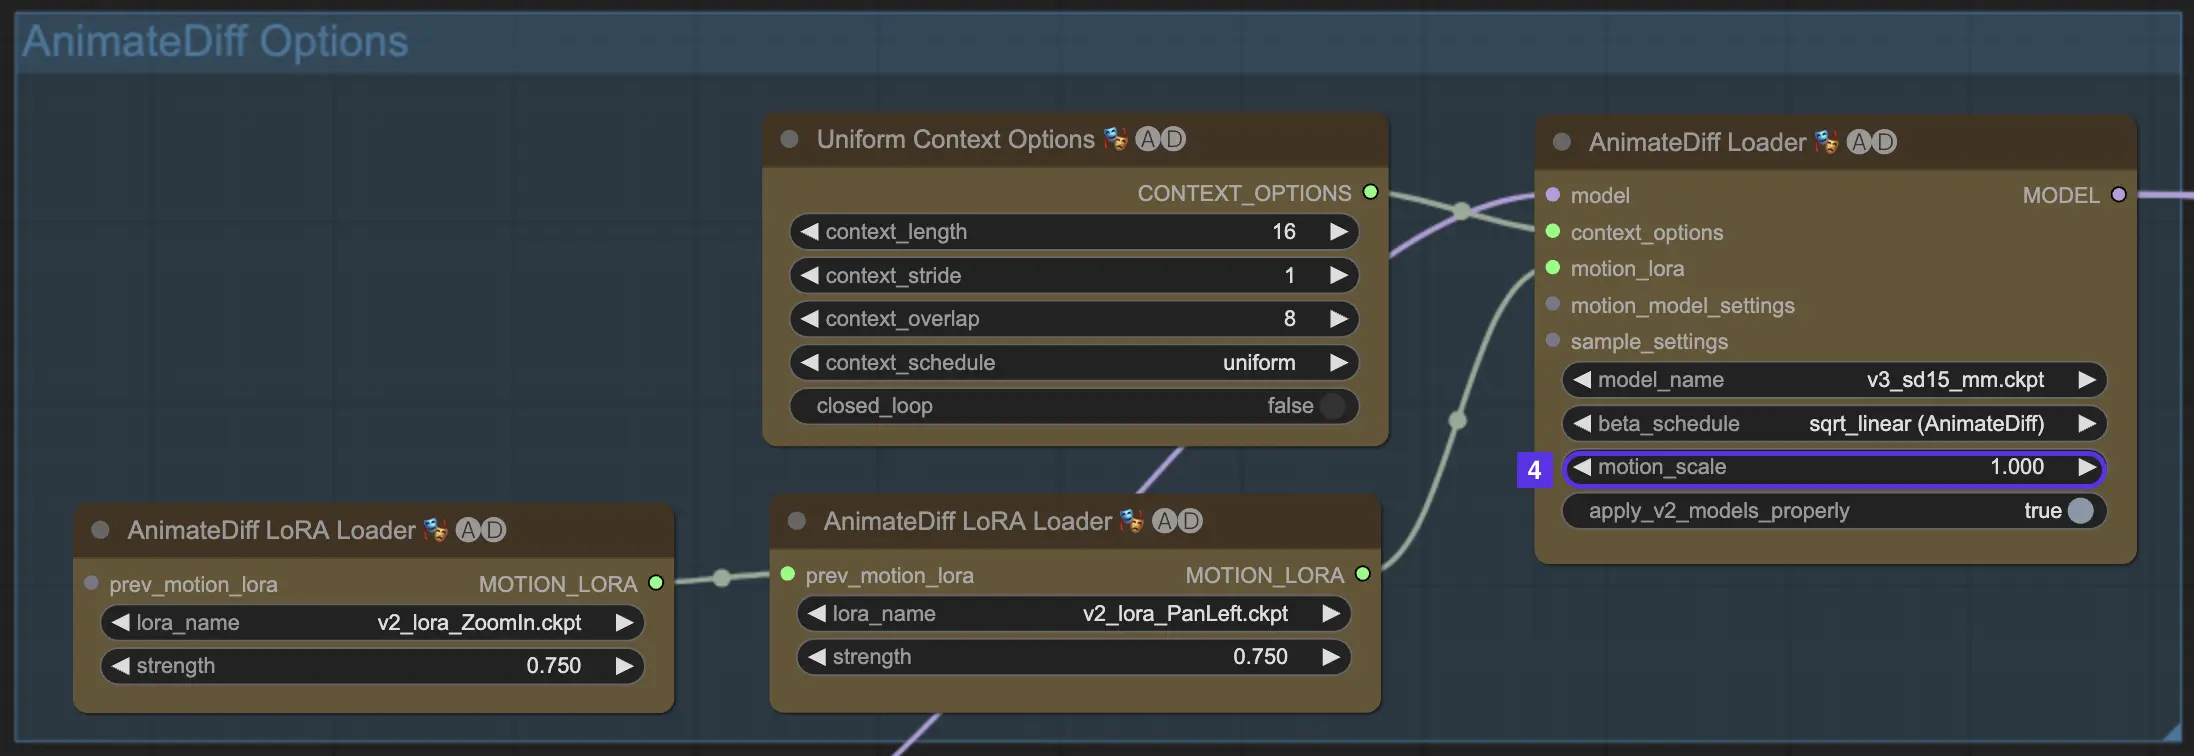
4.4. Motion Scale
Motion Scale in AnimateDiff lets you control the motion intensity. Under 1 means subtler motion; over 1 means more pronounced movement.
4.5. Context Batch Size Determines Animation Length
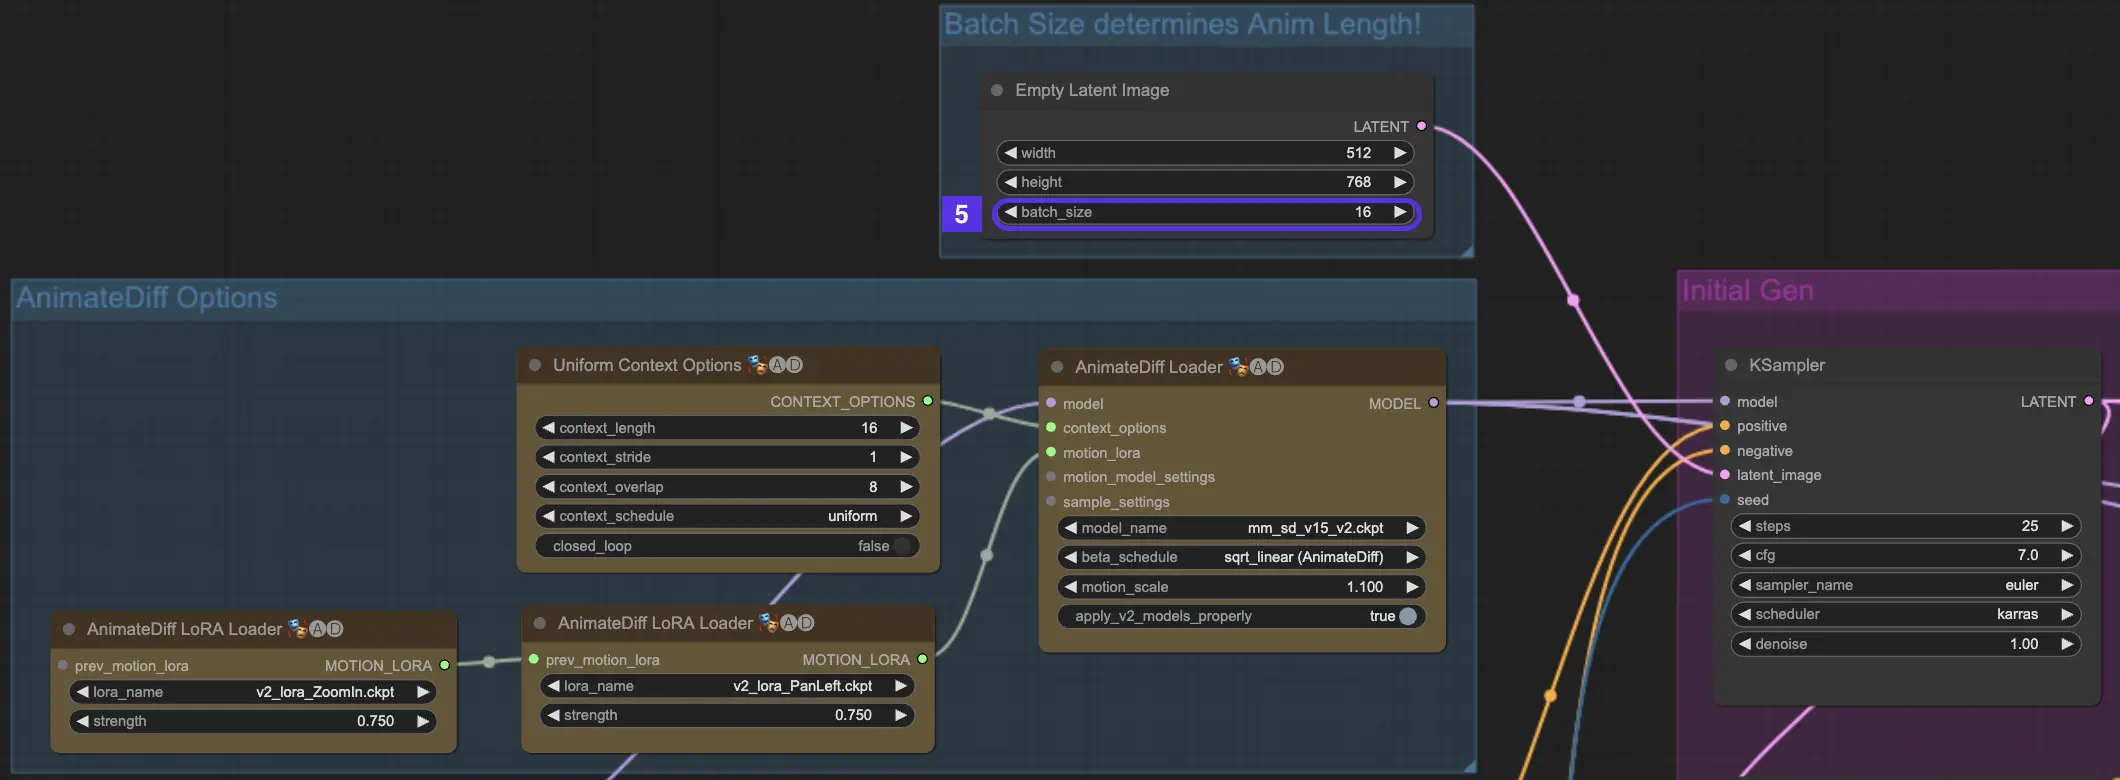
Batch Size in AnimateDiff represents the building blocks of your animation. It serves as the fundamental factor influencing the length of your animation. It determines the number of "scenes" or segments your animation will consist of.
Larger Batch Sizes lead to more scenes in your animation, allowing for a longer and more elaborate storytelling experience. There's no upper limit to the Batch Size, so you're free to create animations as long or as short as you wish. The default Batch Size is 16.
- 16 Batch Size = A quick, 2-second video
- 32 Batch Size = A brief, 4-second clip
- 64 Batch Size = A more extended, 8-second feature
4.6. Context Length
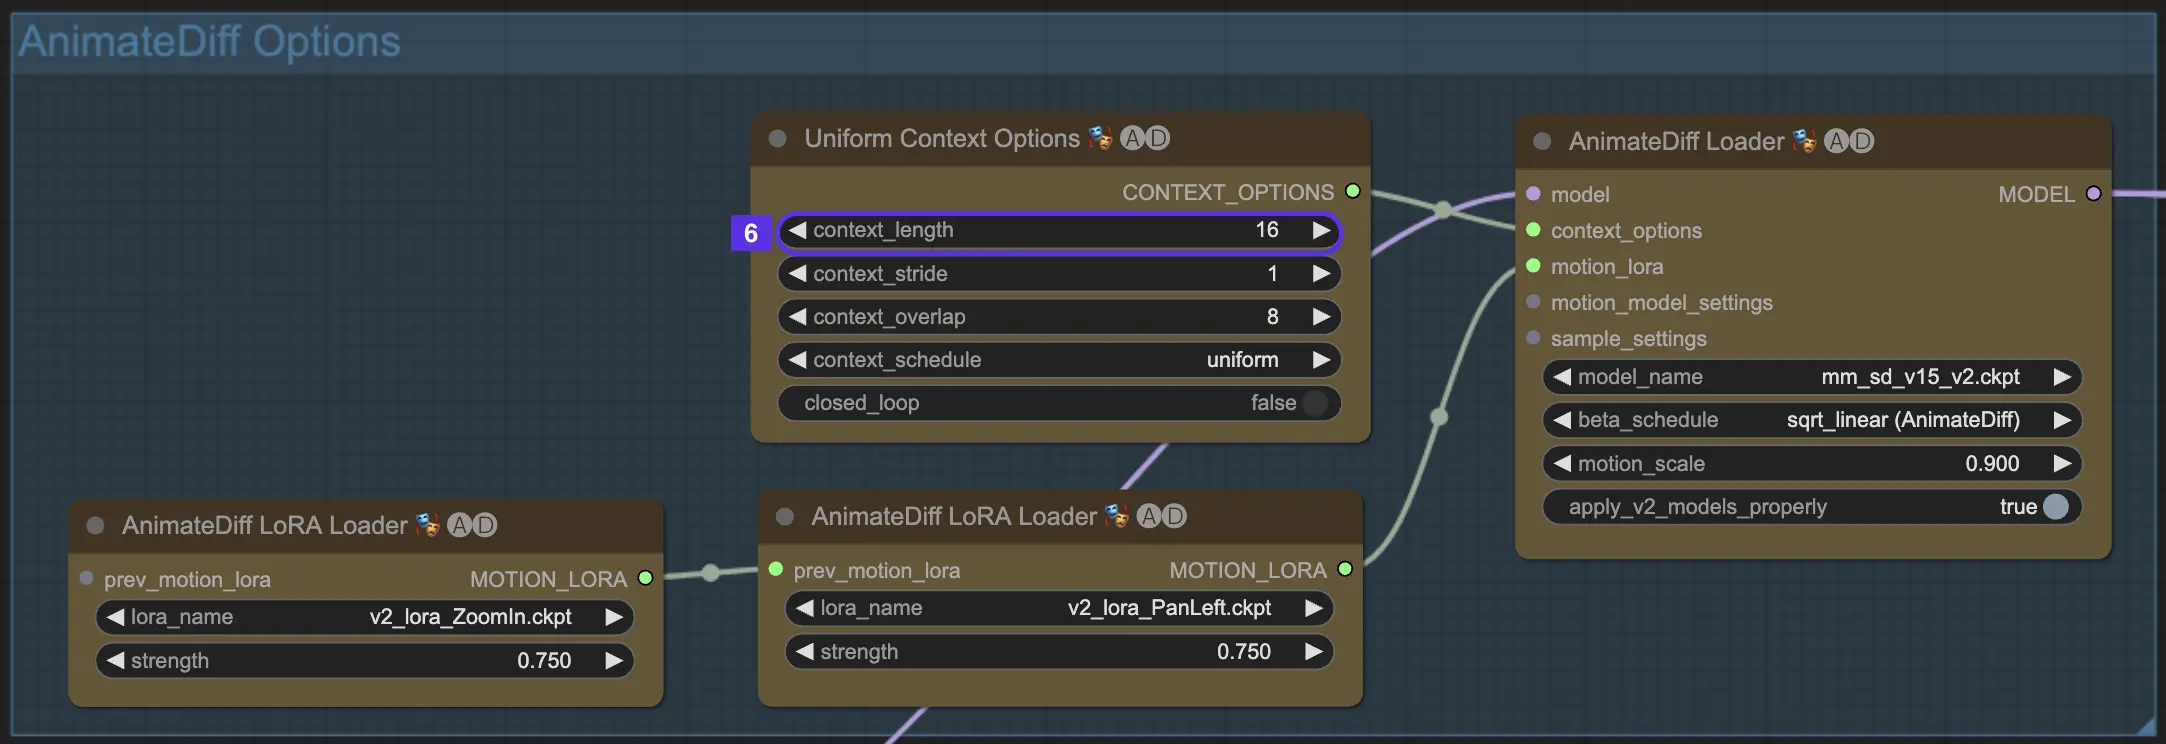
Uniform Context Length in AnimateDiff play a pivotal role in ensuring smooth transitions between the scenes set by your Batch Size. It's like having a skilled editor who knows exactly how to stitch scenes together for the most natural flow.
The length you set for the Uniform Context will dictate the nature of transitions between scenes. A longer Uniform Context Length leads to smoother, more gradual transitions, making the shift from one scene to another almost imperceptible. On the other hand, a shorter length will create quicker, more noticeable transitions, which might be ideal for certain storytelling effects. The default Uniform Context length is 16.
4.7. Motion LoRA for Camera Dynamics (AnimateDiff v2 Only)
Motion LoRAs are exclusively compatible with AnimateDiff v2. These nifty additions bring a dynamic layer of camera movement to your animations. When using Motion LoRAs, it's crucial to strike the right balance with the LoRA weight. Setting it around 0.75 tends to hit the sweet spot, giving you smooth camera movements without any pesky background artifacts.
What's more, you have the creative freedom to chain multiple Motion LoRAs. By strategically combining different Motion LoRA models, you can orchestrate complex camera movements, experiment, and find the perfect blend of motions for your unique animation vision, thus elevating your animation to a cinematic masterpiece.
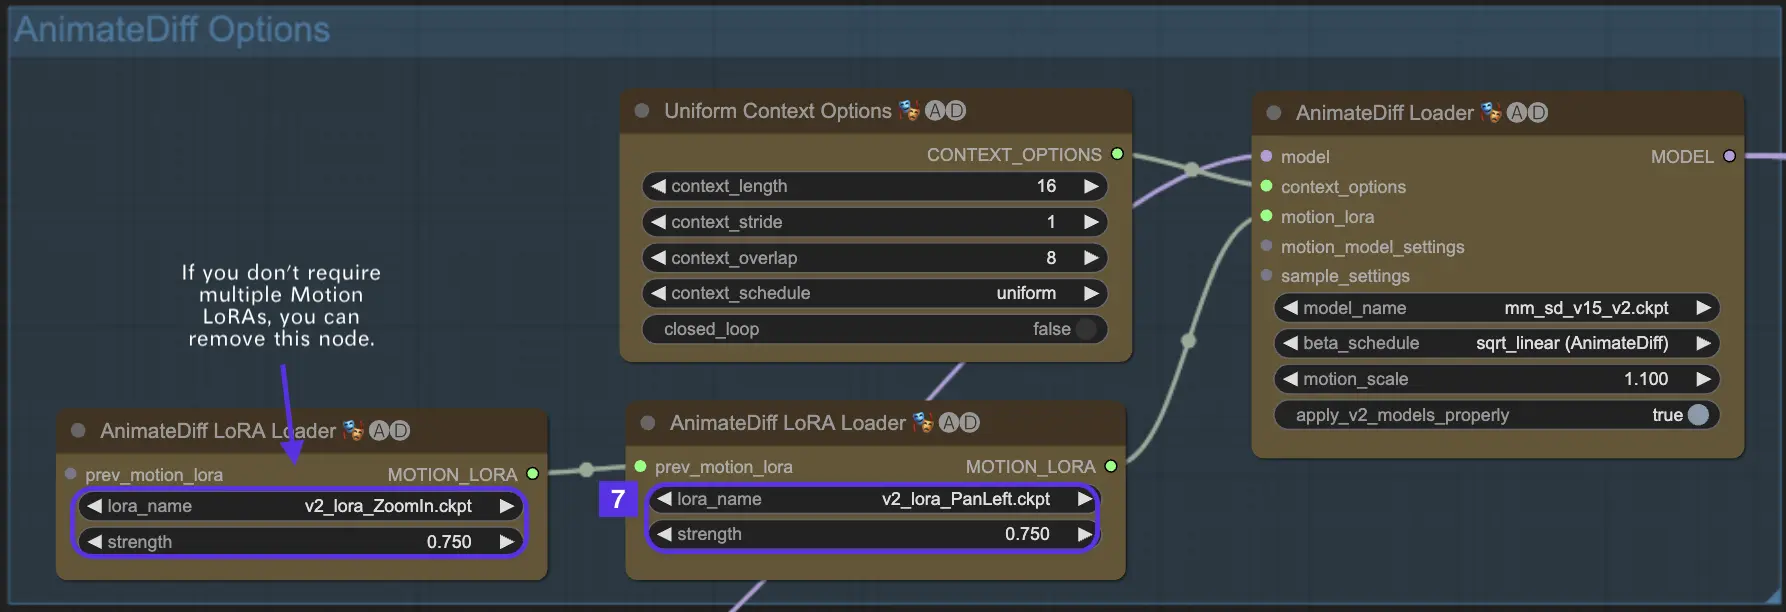
Here's an example of using Motion LoRa's "Pan Left" and "Zoom In" features together.
5. AnimateDiff Prompt
Alright, now that you've got your model and AnimateDiff settings all tuned up, it's showtime! This is where you turn your text into video animations.
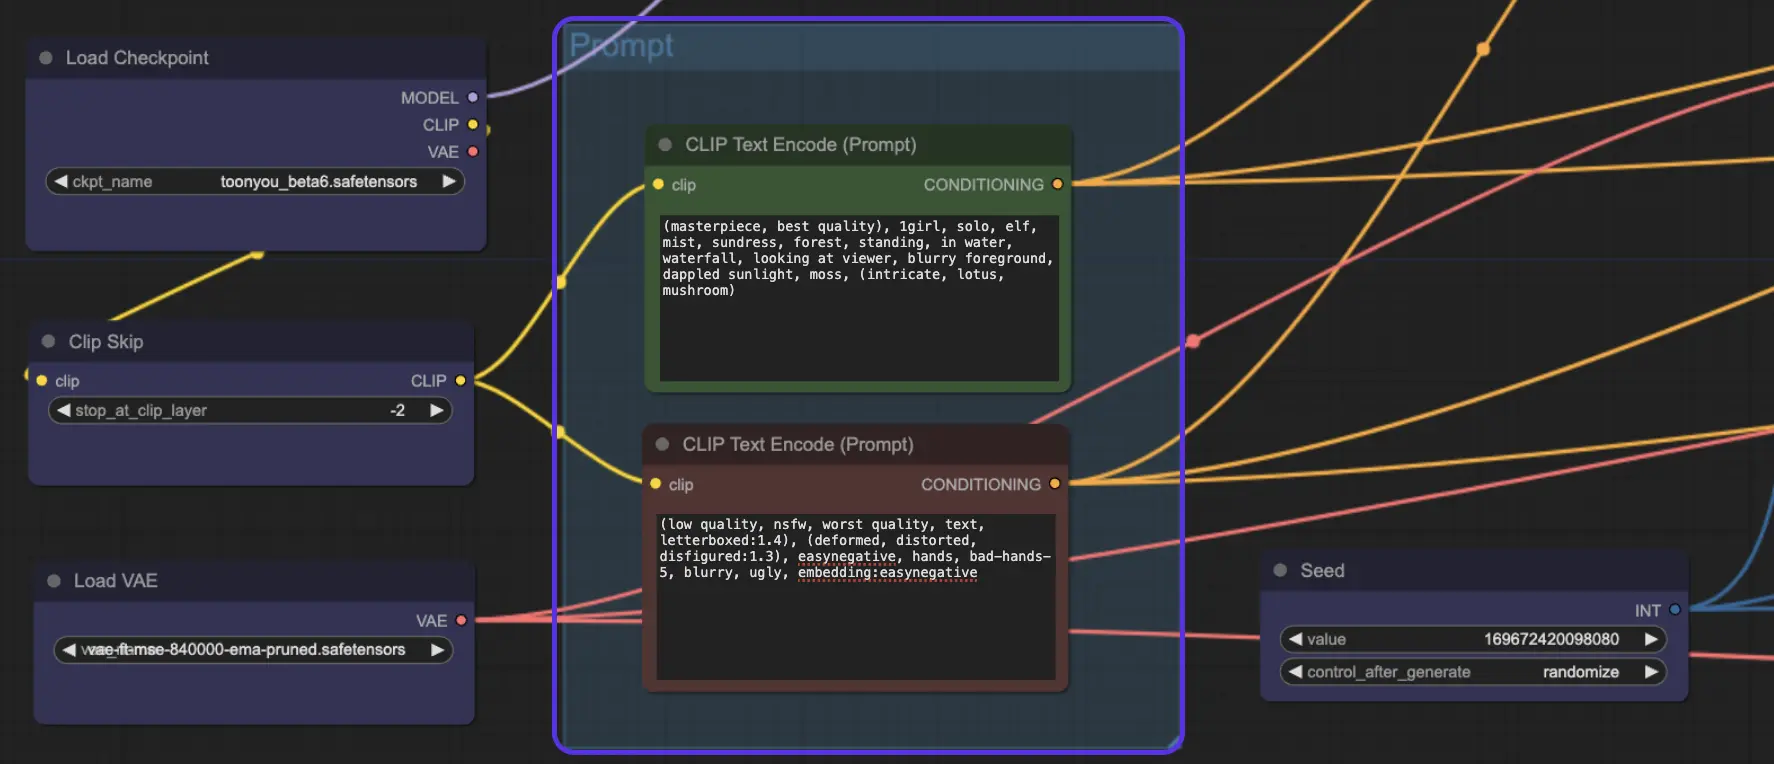
Here's an example of a positive prompt and a negative prompt:
Positive Prompt:(masterpiece, best quality), 1girl, solo, elf, mist, sundress, forest, standing, in water, waterfall, looking at viewer, blurry foreground, dappled sunlight, moss, (intricate, lotus, mushroom)
Negative Prompt: (low quality, nsfw, worst quality, text, letterboxed:1.4), (deformed, distorted, disfigured:1.3), easynegative, hands, bad-hands-5, blurry, ugly, embedding:easynegative
6. AnimateDiff Prompt Travel / Prompt Scheduling
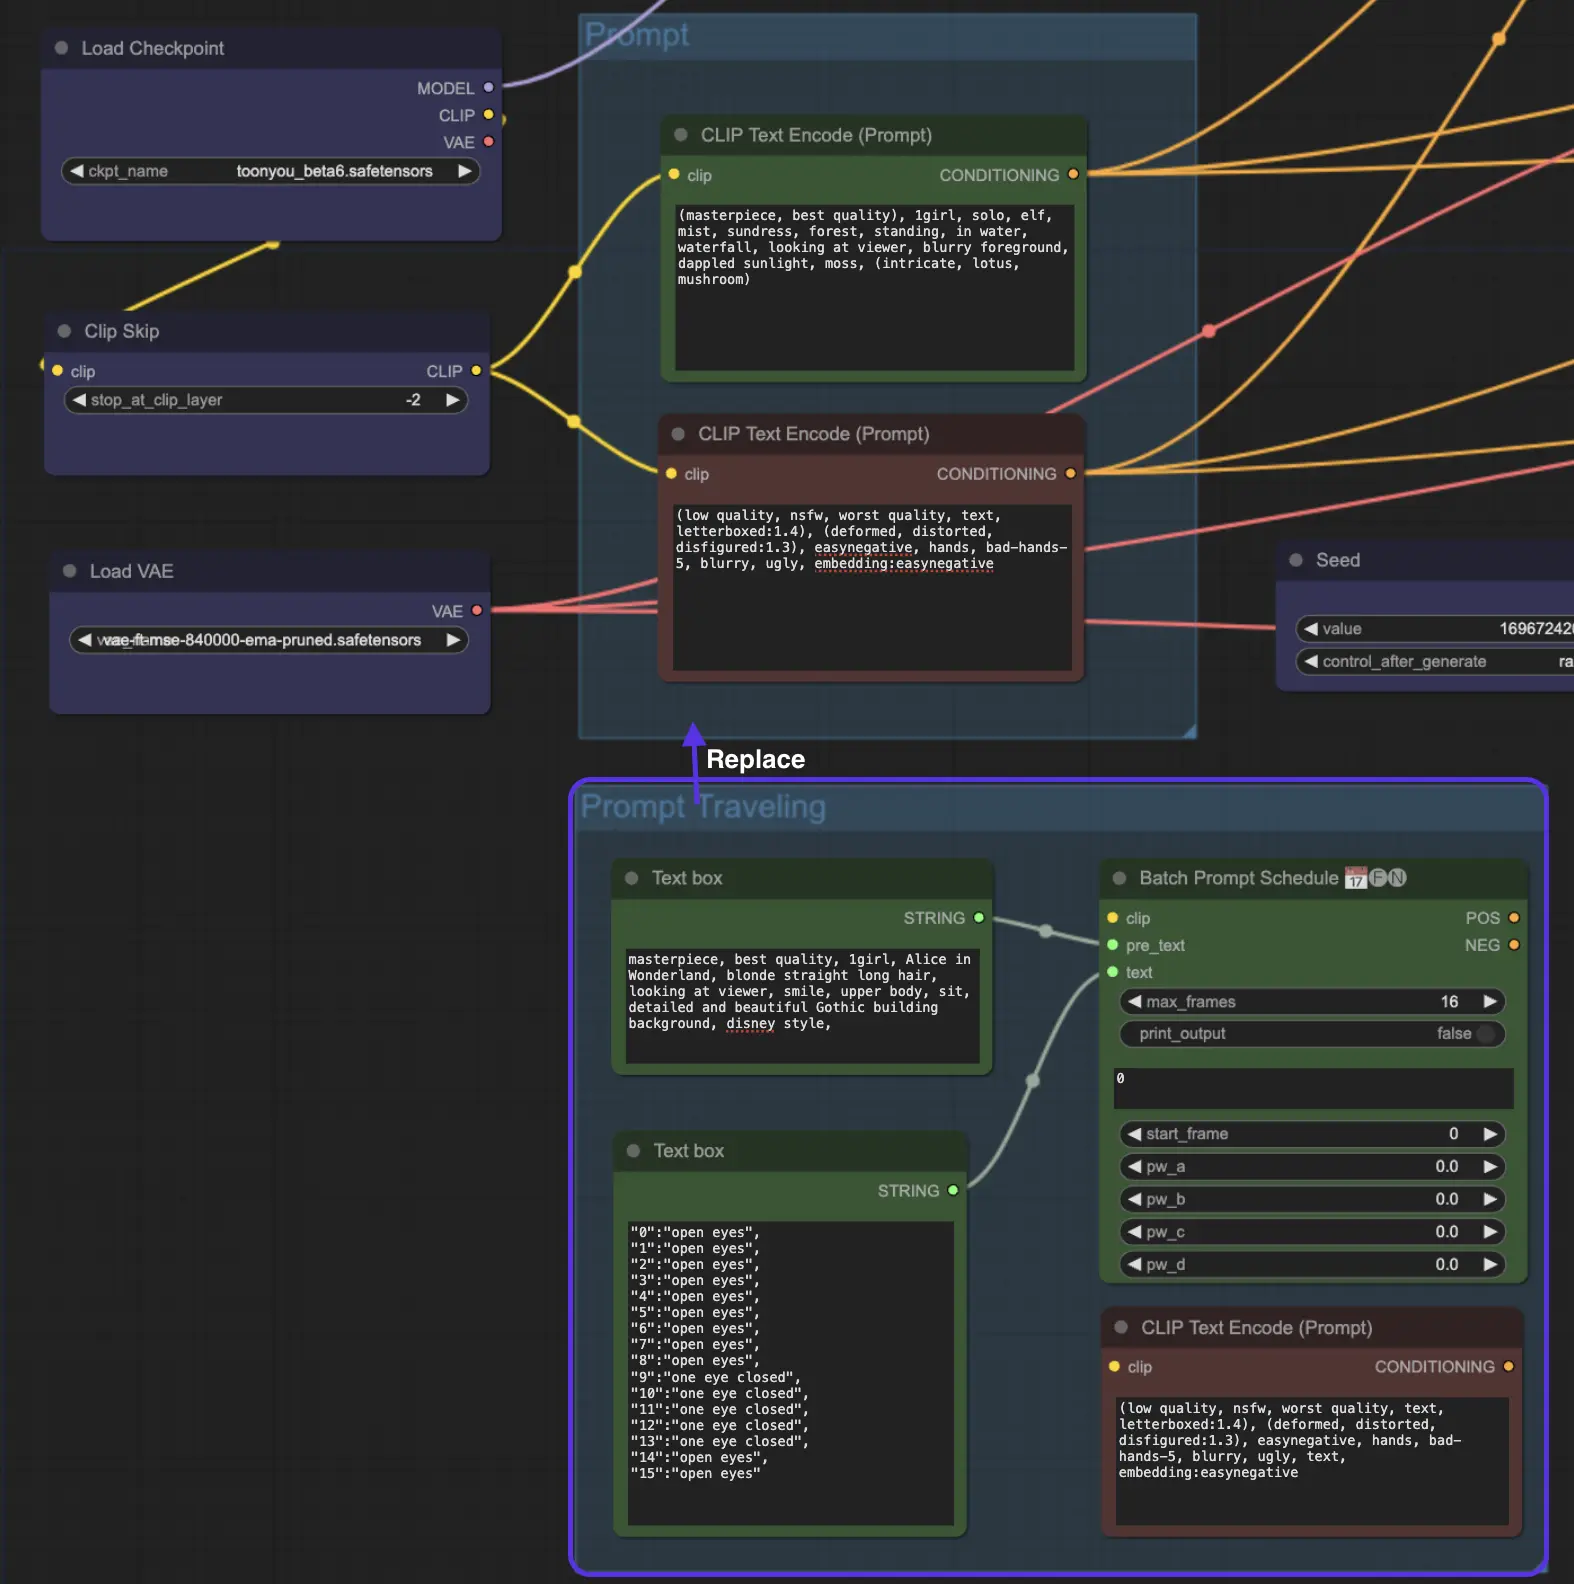
But wait, there's more! Have you tried Prompt Travel / Prompt Scheduling? Think of it as stepping into the shoes of a movie director. You're in control, crafting your story scene by scene. It's like piecing together a puzzle where each piece is a moment in your story.
How Does Prompt Travel Work?
Imagine you’re creating a mini-movie. You set Prompt 1 at Frame 1 and Prompt 2 at Frame 8, and so on. AnimateDiff will seamlessly blend these prompts, creating a smooth transition from Frame 1 to Frame 8.
Tip: While Prompt Travel can be intriguing, it's important to note that it's not always a surefire success. The effectiveness of Prompt Travel also depends on the checkpoint model you select. For instance, the cardos_Animev2.0 model is compatible with Prompt Travel, but this isn't the case for all models. Additionally, the outcome can be unpredictable - some prompts may not blend well, resulting in less than ideal transitions. This makes Prompt Travel more of an experimental feature rather than a guaranteed tool for seamless animation.
We've placed the "Prompt Travel / Prompt Scheduling" node at the end of the AnimateDiff ComfyUI workflow. If you're curious to experiment, you'll need to use "Prompt Travel" in place of the regular "Prompt" option.
7. ComfyUI Hires Fix - Enhancing Your Animations
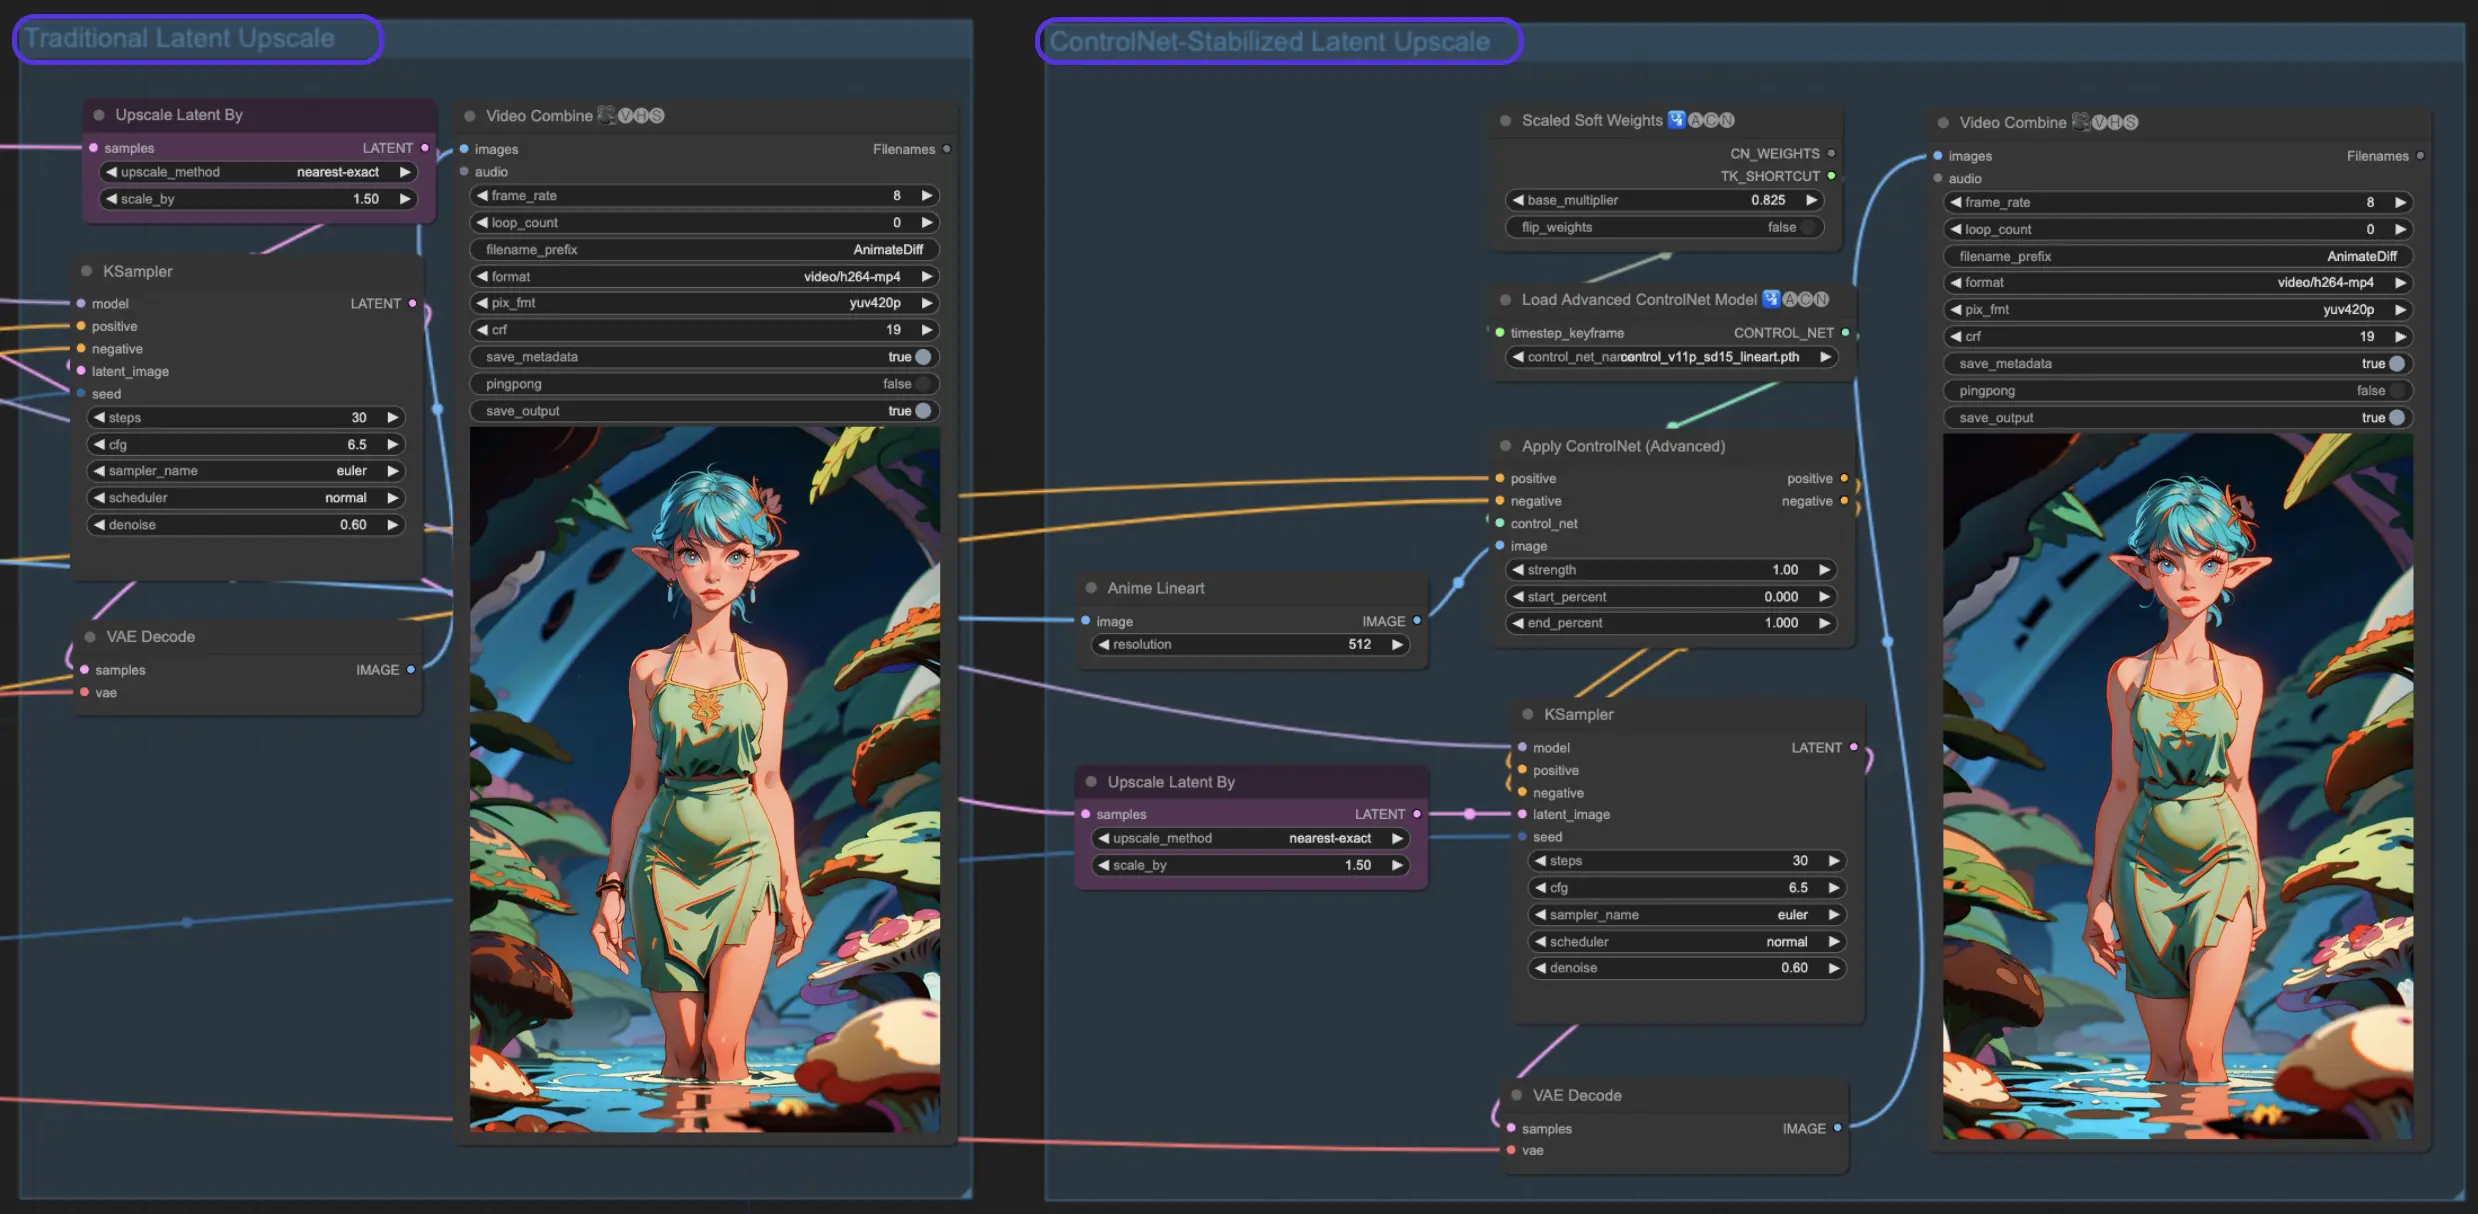
By employing AnimateDiff along with the Hi-Res fix, you can enhance the resolution of your images. This process transforms slightly blurry images into crystal-clear masterpieces. In this section, we will introduce two methods.
7.1. Latent Upscale
Traditional latent upscaling in ComfyUI. By applying settings like 0.6 denoising strength and choosing a 1.5x upscale, you'll see your animations transform with richer details and sharper clarity. It's like putting on glasses and suddenly seeing the world in high definition!
7.2. ControlNet Upscale
Traditional latent upscaling is cool, but let's level up with Control Net Assisted Latent Upscale. It uses ControlNets for a more precise upscale, ensuring your animation maintains its integrity. With the addition of a lineart preprocessor and the right controlnet model, you will enhance your art while keeping its soul intact.
8. Ready-to-Use ComfyUI AnimateDiff Workflow: Exploring Stable Diffusion Animation
We have delved into the exciting world of AnimateDiff in ComfyUI. For those eager to experiment with the ComfyUI AnimateDiff Workflow we've highlighted, definitely give RunComfy a try, a cloud environment equipped with a powerful GPU and fully prepared, including everything from essential models to custom nodes. No manual setup needed! Just a playground to unleash your creativity. 🌟
Author: RunComfy Editors
Our team of editors had been working with AI for more than 15 years, starting with NLP/Vision in the age of RNN/CNN. We had amassed tremendous amount of experiences on AI Chatbot/Art/Animation, such as BERT/GAN/Transformer, etc. Talk to us if you need help on AI art, animation and video.
RunComfy is the premier ComfyUI platform, offering ComfyUI online environment and services, along with ComfyUI workflows featuring stunning visuals. RunComfy also provides AI Playground, enabling artists to harness the latest AI tools to create incredible art.
