ComfyUI Vid2Vid Dance Transfer
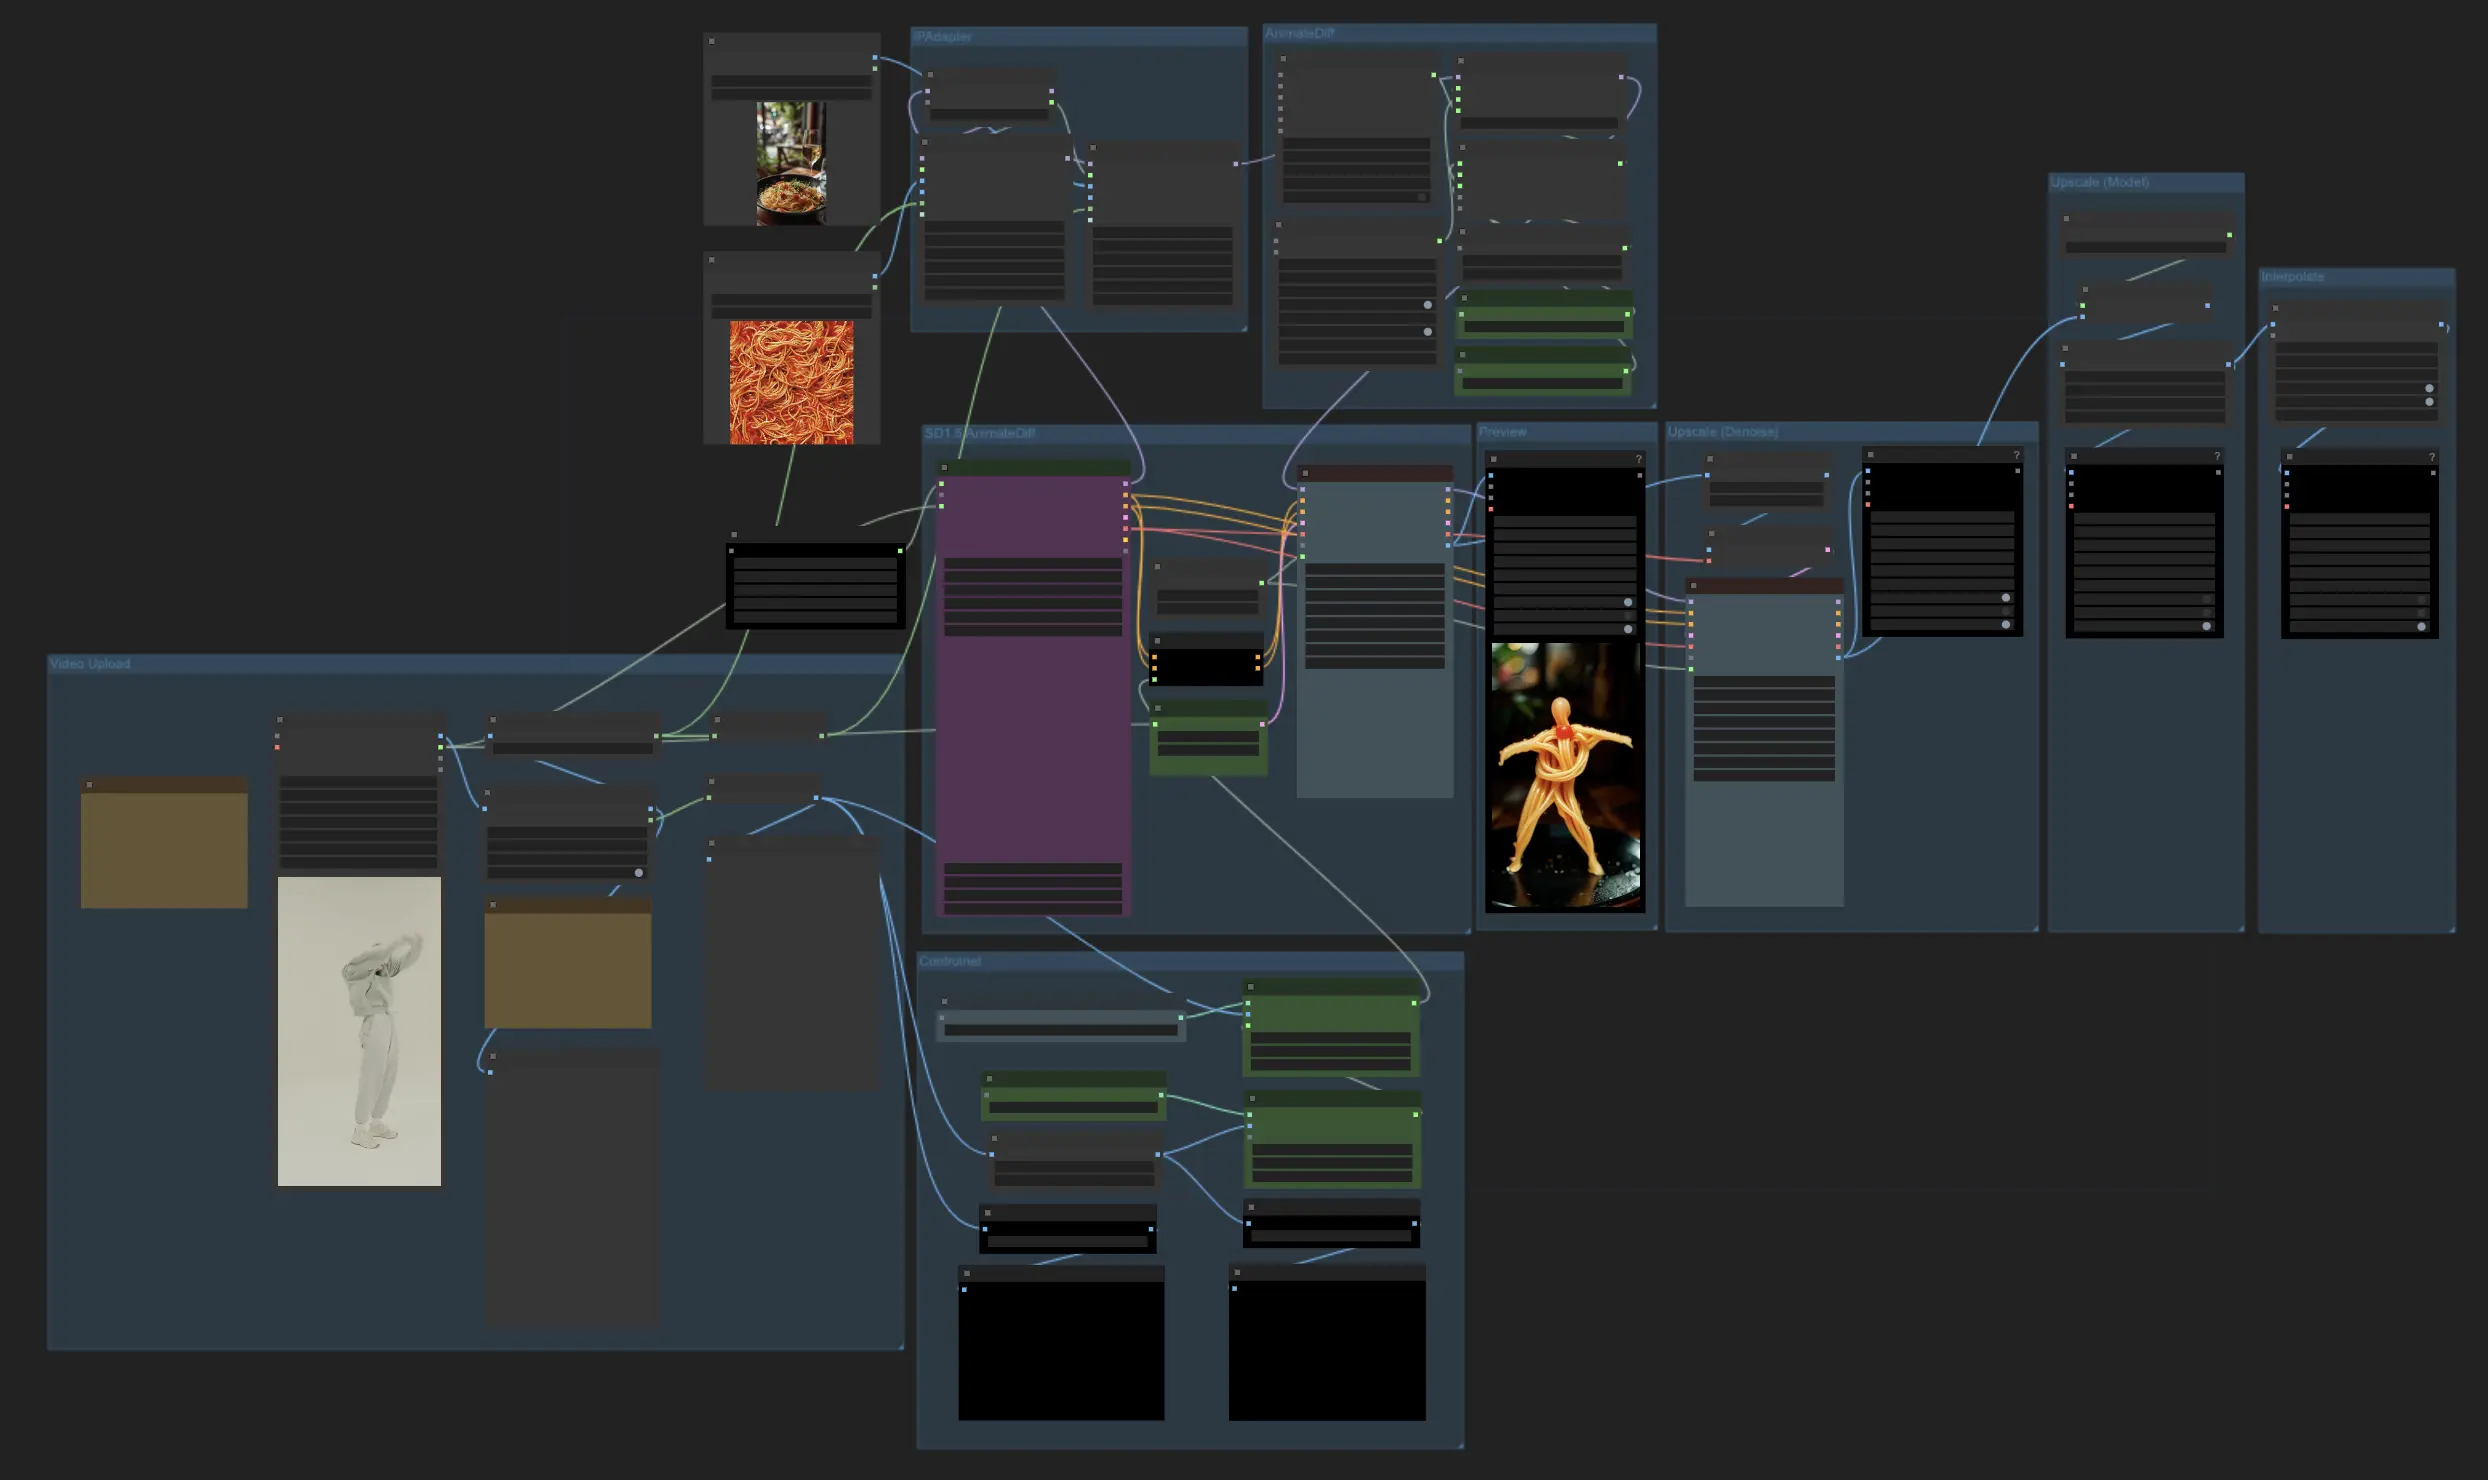
With this ComfyUI Vid2Vid Dance Transfer workflow, you can easily stylize and transform real videos into captivating animations. This workflow transfers the motion and style from a source video onto a target image or object, creating stunning results. The tutorial covers essential aspects such as video and mask preparation, target image configuration, motion transfer using AnimateDiff, ControlNet guidance, and output frame generation.ComfyUI Vid2Vid Workflow
- Fully operational workflows
- No missing nodes or models
- No manual setups required
- Features stunning visuals
ComfyUI Vid2Vid Examples
ComfyUI Vid2Vid Description
ComfyUI Vid2Vid Dance Transfer is a powerful ComfyUI Vid2Vid workflow that allows users to stylize and transform real videos into various objects or elements. With this workflow, you can create stunning video animations by transferring the motion and style of a source video onto a target image or object. This tutorial will guide you through the key components and settings required to achieve the best results.
Credit
Thanks to MDMZ and DP for their incredible contributions in creating this workflow! MDMZ shared his ComfyUI Vid2Vid Dance Transfer Workflow through his YouTube tutorial , which builds upon DP's original workflow.
1. What does ComfyUI Vid2Vid Dance Transfer Workflow do?
The ComfyUI Vid2Vid Dance Transfer workflow enables you to take a real video and transform it into a stylized animation. It transfers the motion and dance moves from the source video onto a target image or object of your choice.
2. Key Components of the ComfyUI Vid2Vid Workflow
2.1 Uploading Video and Creating Mask
- The ComfyUI Vid2Vid workflow starts with the VHS_LoadVideo component, where you upload the source video that contains the dance moves you want to transfer.
- The LayerMask: RemBgUltra component is used to remove the background from the video frames and create a black and white mask of the subject. This mask is crucial for properly identifying and transferring the motion.
- The ImageToMask and MaskToImage components convert between image and mask formats as needed in the ComfyUI Vid2Vid workflow.
- 🌟 Important Tips: RunComfy platform has preloaded the "RemBgultra model" required for the "Layer Style" node. If you have installed the "Layer Style" nodes yourself, please delete the "Layer Style" file from your private file browser to avoid conflicts. Once you delete your "Layer Style" file, the workflow will use the RunComfy preload and run smoothly.

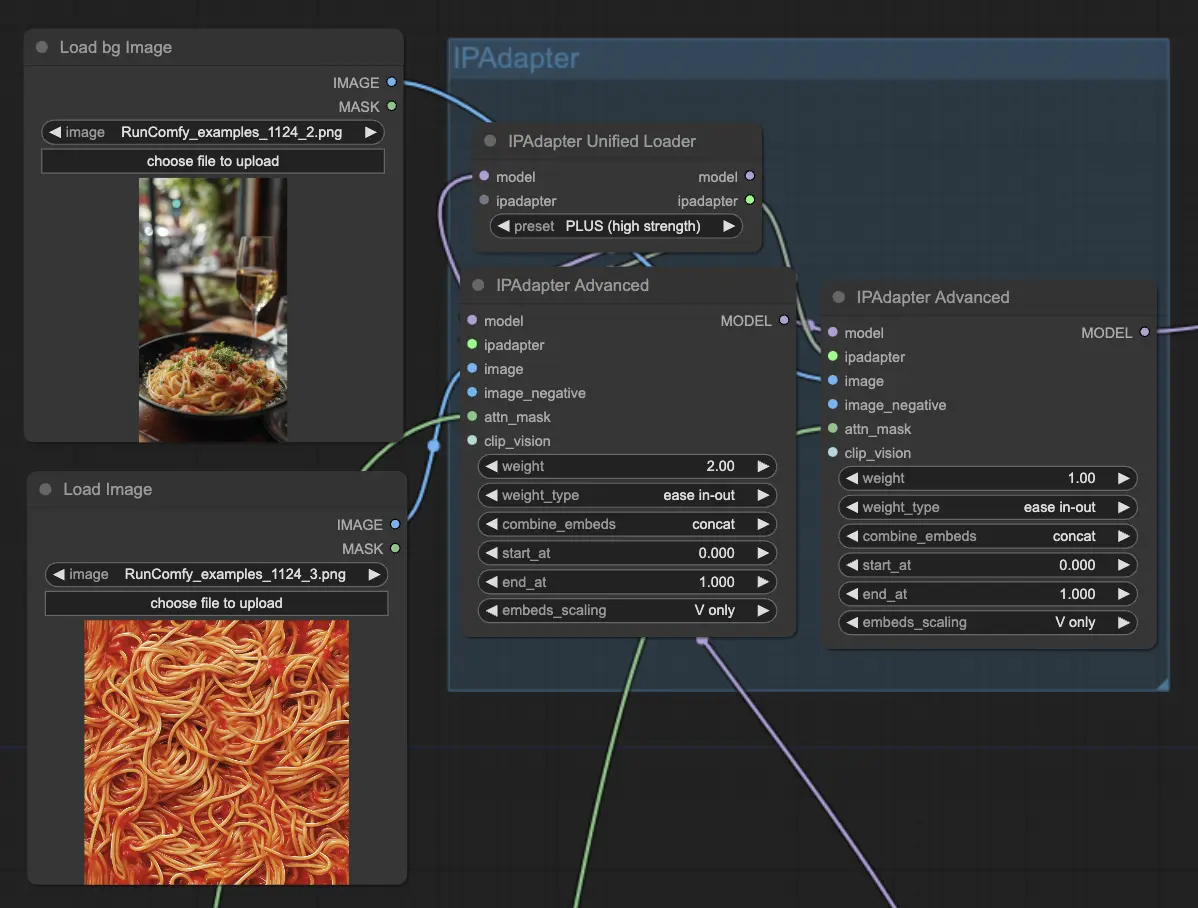
2.2 Setting Up Target Image with IPAdapter
- The IPAdapterAdvanced components are used to load and configure the target image or object that will receive the ComfyUI Vid2Vid dance transfer. You can upload the target image using the LoadImage node, and upload the target background image using the LoadBgImage node
- The IPAdapterUnifiedLoader is used to load the IPAdapter, which determines the strength of the target image's influence on the output.
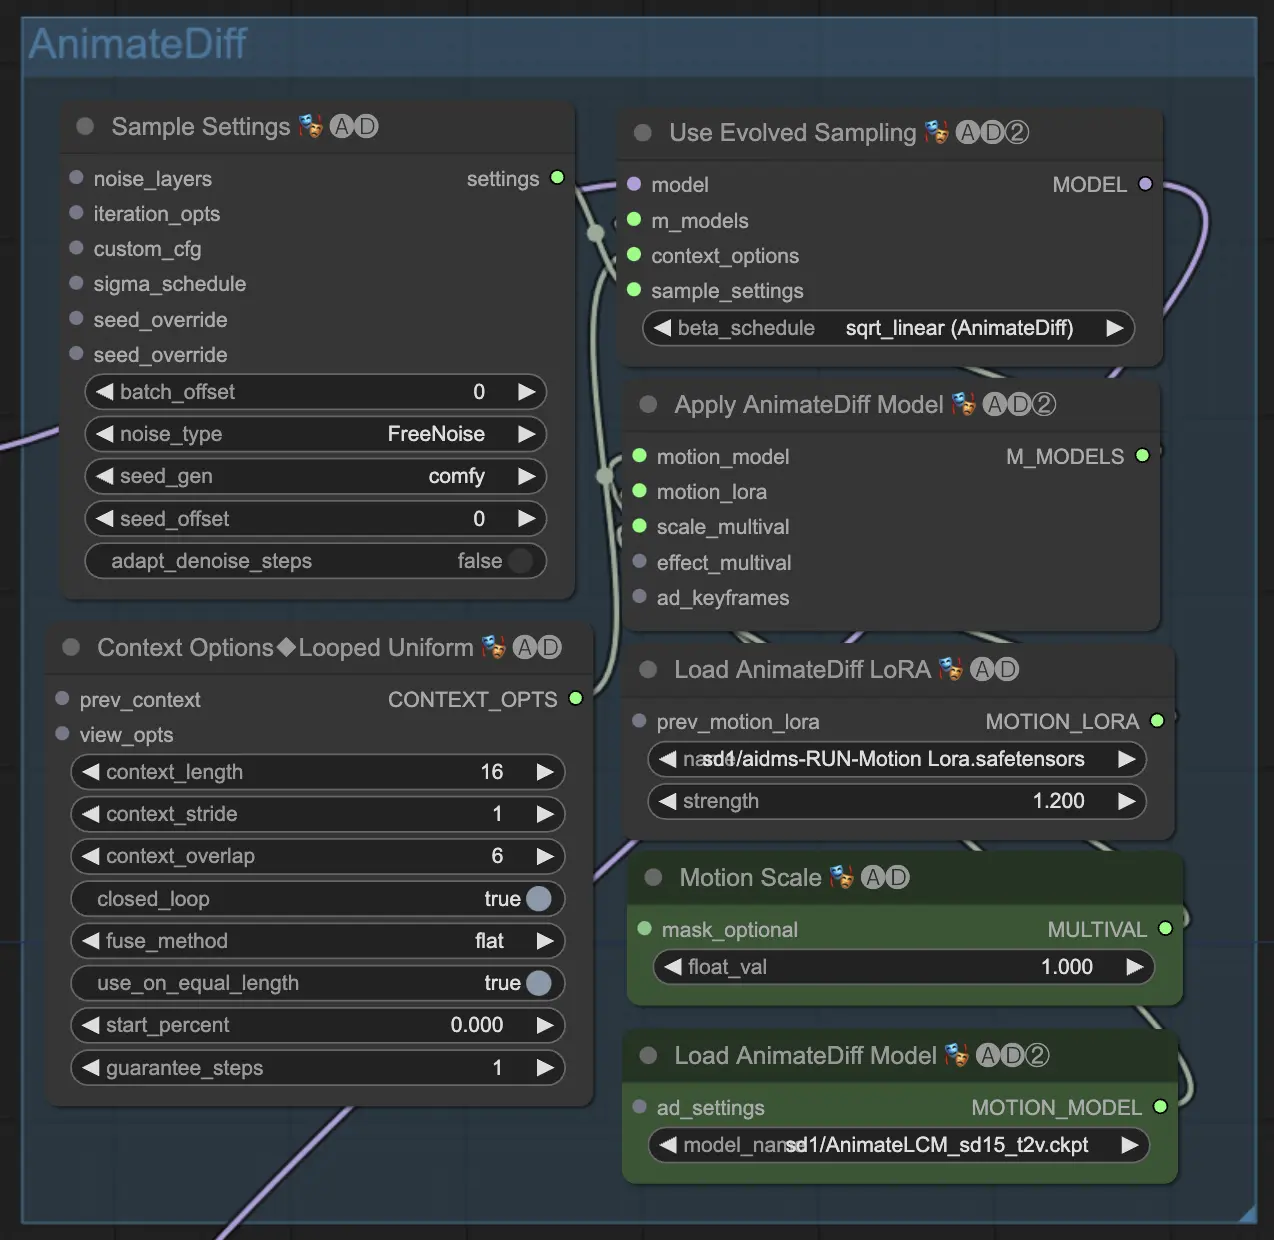
2.3 Applying AnimateDiff for Motion Transfer
- The core of the ComfyUI Vid2Vid dance transfer is powered by the AnimateDiff Latent Condition Model (LCM). This is loaded using the ADE_LoadAnimateDiffModel component in ComfyUI Vid2Vid.
- Additional components like ADE_AnimateDiffSamplingSettings, ADE_LoopedUniformContextOptions, and ADE_ApplyAnimateDiffModelSimple are used to configure the sampling settings, context options, and apply the AnimateDiff model respectively in ComfyUI Vid2Vid.
- The ADE_UseEvolvedSampling component is used to select the appropriate sampling method for the AnimateDiff model in ComfyUI Vid2Vid.
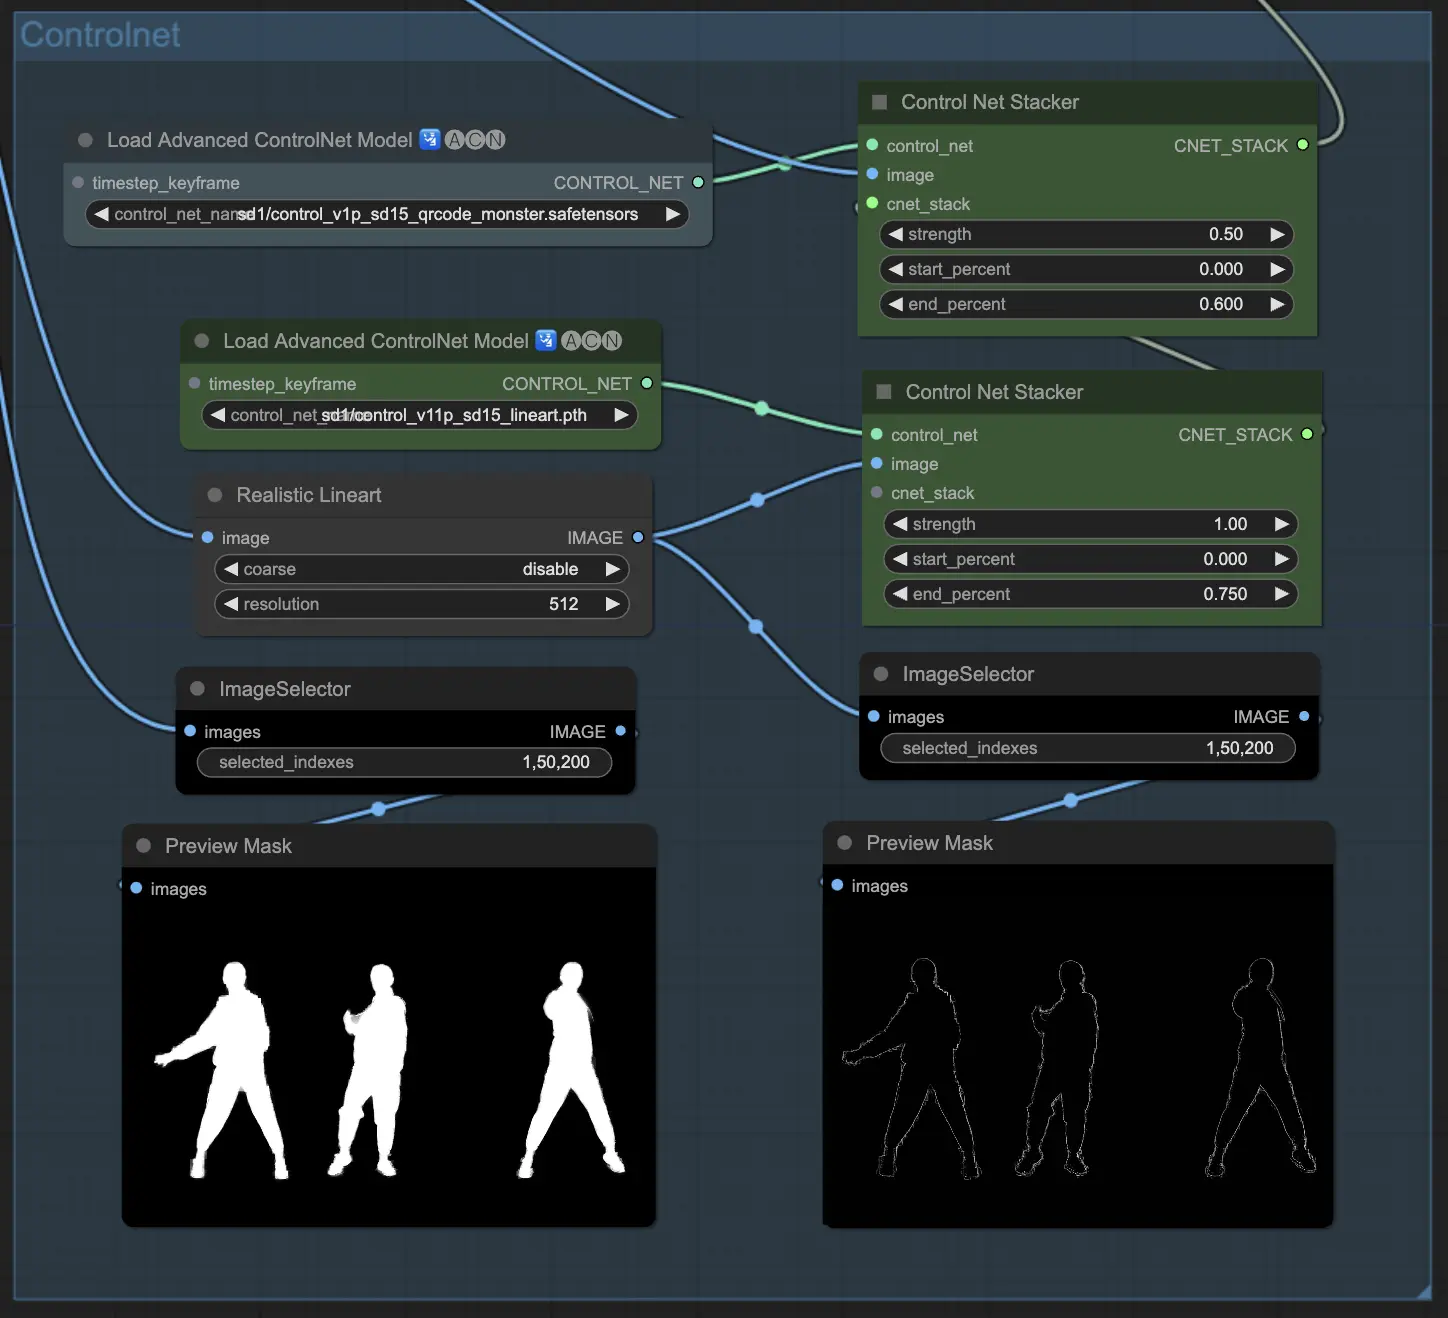
2.4 Guiding Output with ControlNet
- ControlNet is used to guide and define the subject's shape and outline in the output animation.
- The ControlNetLoaderAdvanced components are used to load the ControlNet models. This workflow uses two ControlNet models: QR Code Monster and Lineart.
- The ControlNet Stacker components are used to stack and combine the ControlNet outputs with adjustable strengths in ComfyUI Vid2Vid Transfer.
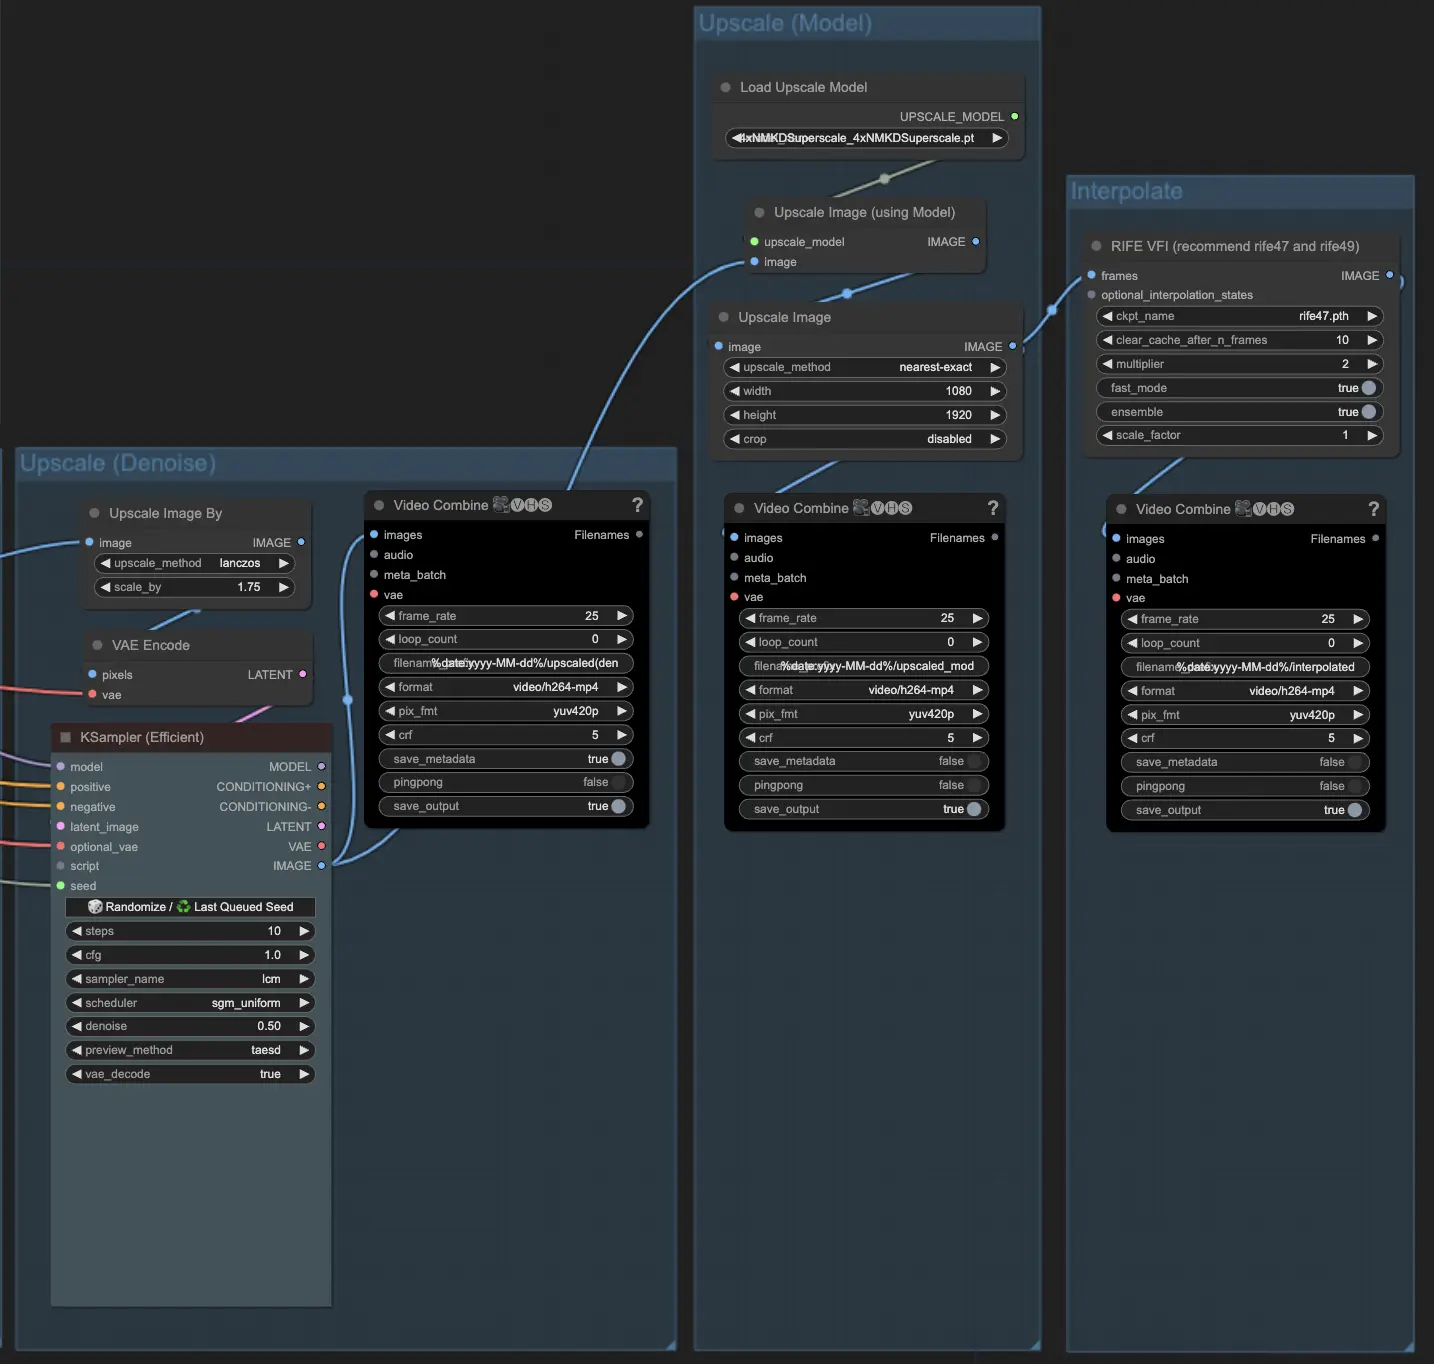
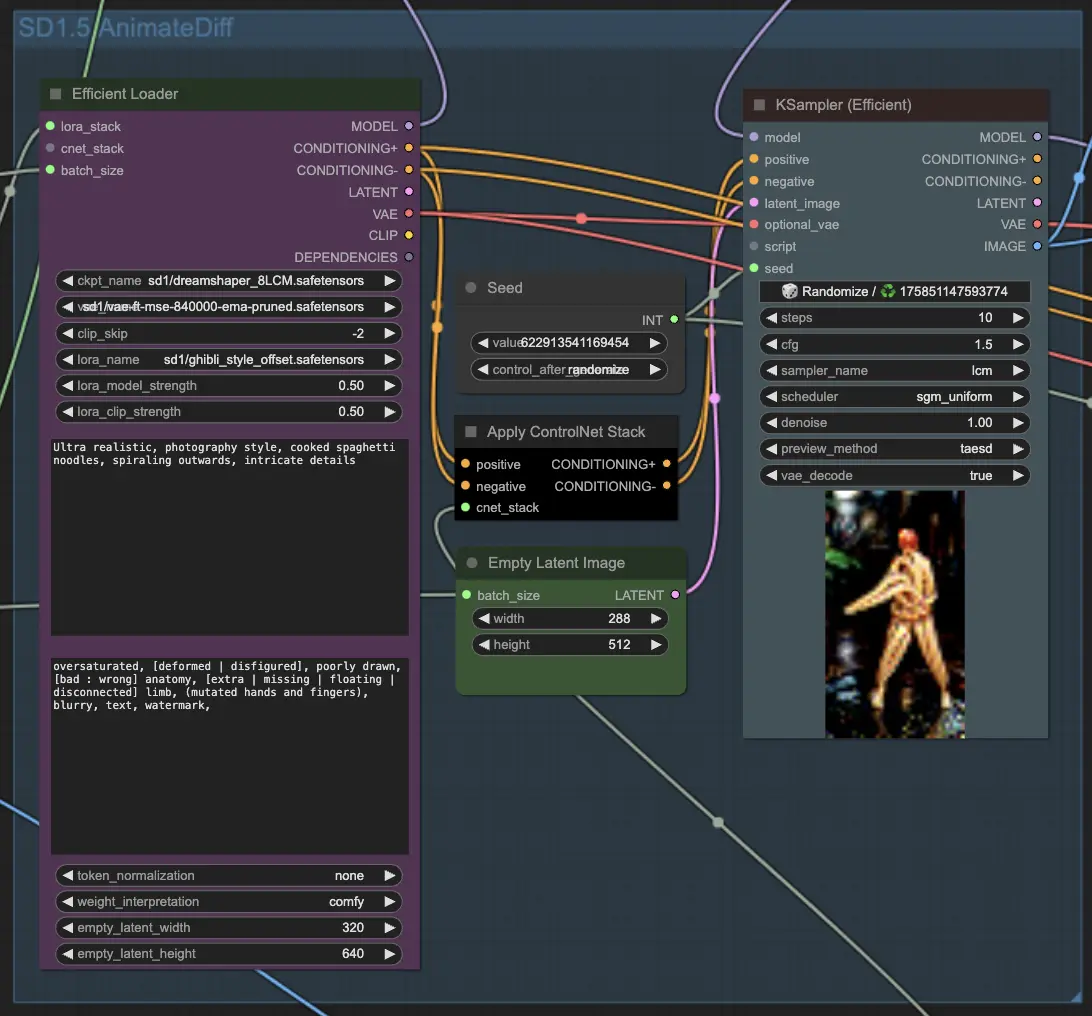
2.5 Generating Output Frames with KSampler
- The KSampler (Efficient) components in ComfyUI Vid2Vid are responsible for generating the output frames based on all the provided configurations and inputs.
- The main KSampler component processes the video frames to create the animation preview. It takes the AnimateDiff model, IPAdapter outputs, ControlNet stack, and other settings as inputs.
- The second KSampler component is used for upscaling and denoising the ComfyUI Vid2Vid output frames.
2.6 Upscaling if needed
- The ImageScaleBy component is used to scale up the resolution of the output frames. The ImageUpscaleWithModel component is used to further upscale the frames using a chosen upscale model. The workflow defaults to disabling the upscale components. If you need it, enable these components to have a better result.