The ComfyUI Vid2Vid workflow, created by **YVANN**, introduces two distinct workflows to achieve high-quality, professional animations.
- The first workflow: ComfyUI Vid2Vid Part 1 | Composition and Masking
- The second workflow: ComfyUI Vid2Vid Part 2 | SDXL Style Transfer
ComfyUI Vid2Vid Part2 | SDXL Style Transfer#
This workflow transform the original video style to your desired style.
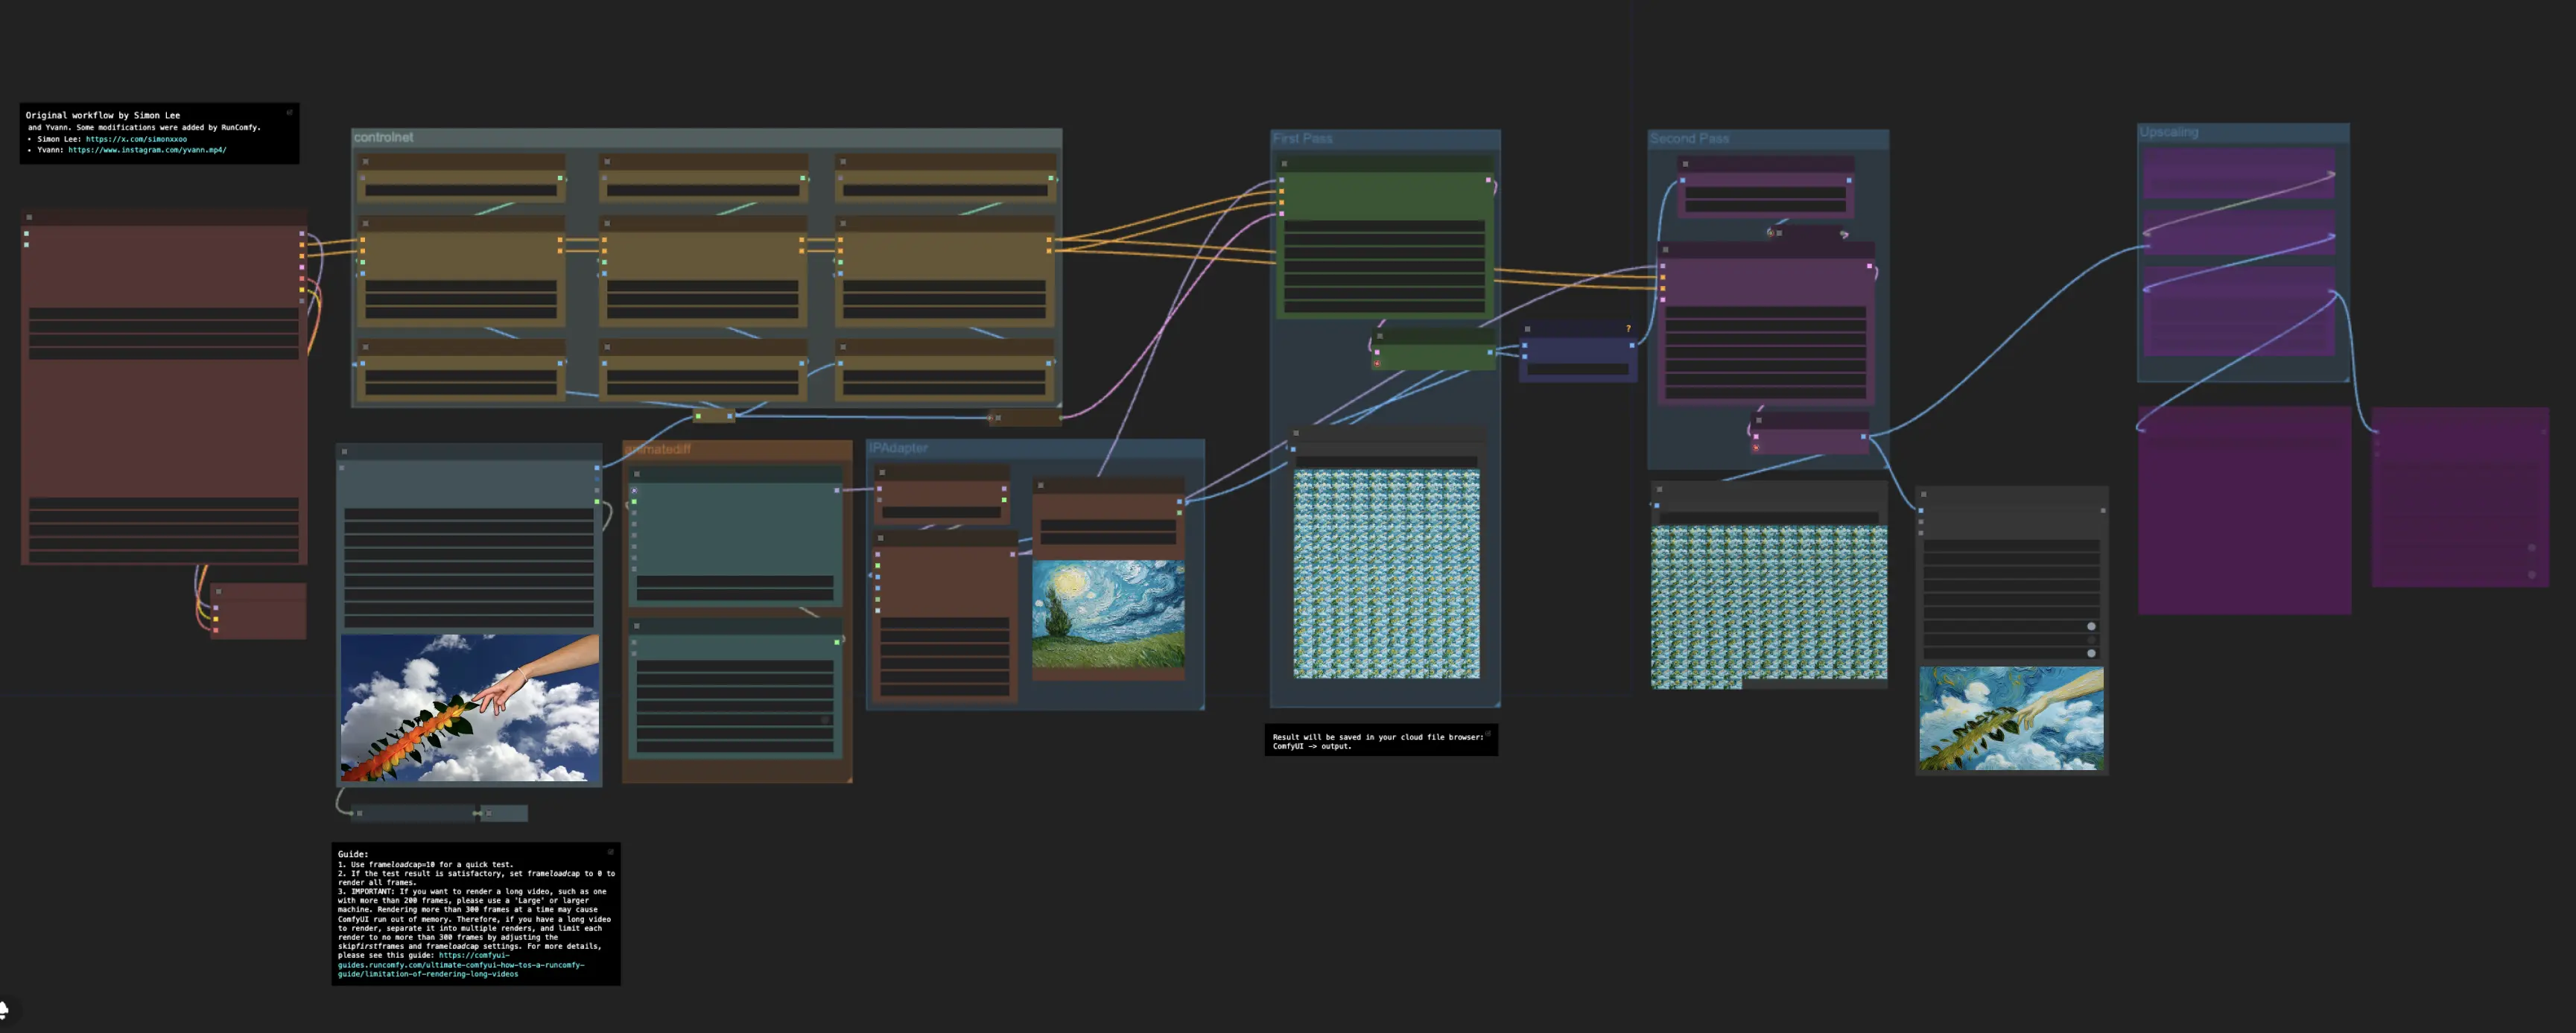
Step 1: Models Loader | ComfyUI Vid2Vid Workflow Part2#
The Efficient Loader node is the initial step where you select the appropriate models for your animation. This includes choosing the checkpoint model, VAE (Variational Autoencoder) model, and LoRA (Low-Rank Adaptation) model. These models are crucial for defining the capabilities and style of your animation.
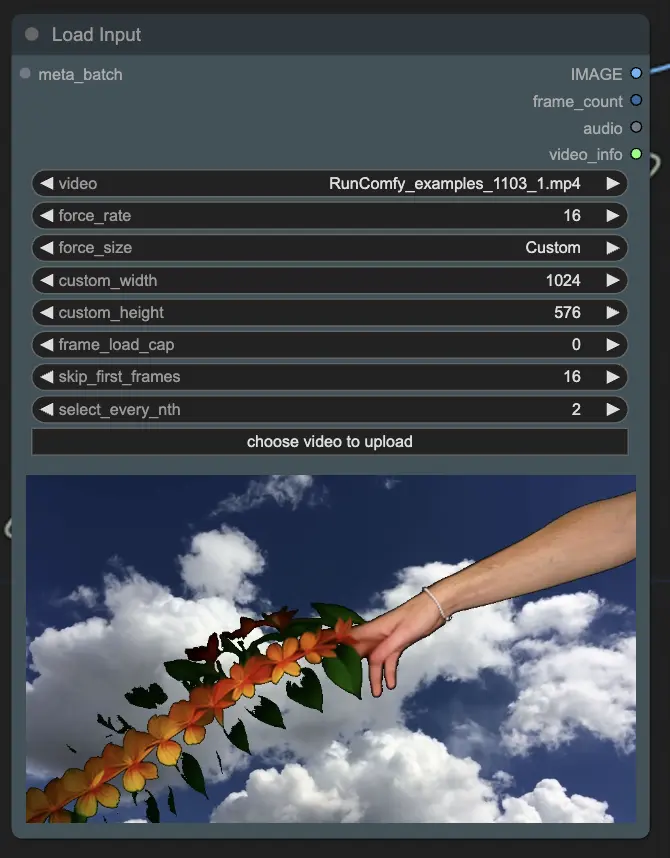
Step 2: Loading the Output from the First Workflow | ComfyUI Vid2Vid Workflow Part2#
IMPORTANT Tips:
- Use frame_load_cap=10 for a quick test.
- If the test result is satisfactory, increase frame_load_cap to a larger size.
⚠️ If you want to render a long video, such as one with more than 100 frames, it is recommended to separate the video into multiple renders, each containing NO MORE THAN 100 FRAMES. Rendering more than this at once can cause the ComfyUI system to be interrupted. You can adjust the skip_first_frames and frame_load_cap parameters to decide which frames to render.
For more detailes, please visit 📽️**⚠️ How to Render Long Videos (Over 200 Frames)**
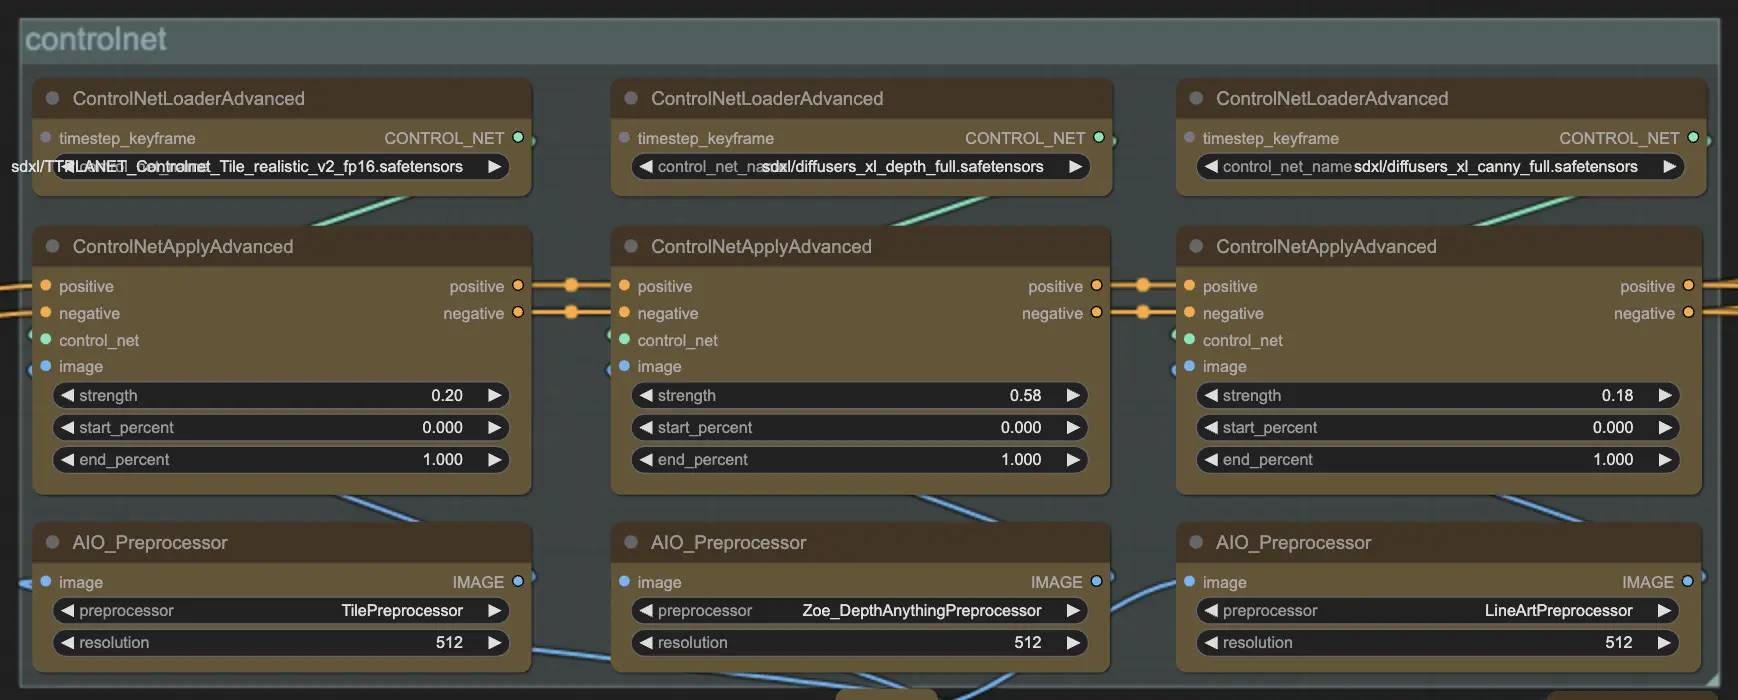
Step 3: ControlNet | ComfyUI Vid2Vid Workflow Part2#
ControlNet is used to add various conditional controls to the image generation process. It consists of different models to apply specific transformations:
- ControlNet Tile: This model helps in maintaining consistency across tiled images, ensuring that patterns and textures remain continuous without visible seams.
- ControlNet Depth: Adds depth information to the images, creating a more realistic sense of 3D space. This model uses depth maps to guide the diffusion model, enhancing the perception of depth and volume.
- ControlNet Canny: Utilizes edge detection to provide structural guidance. By detecting and preserving the edges in the input images, it helps in maintaining the integrity of shapes and outlines during style transfer.
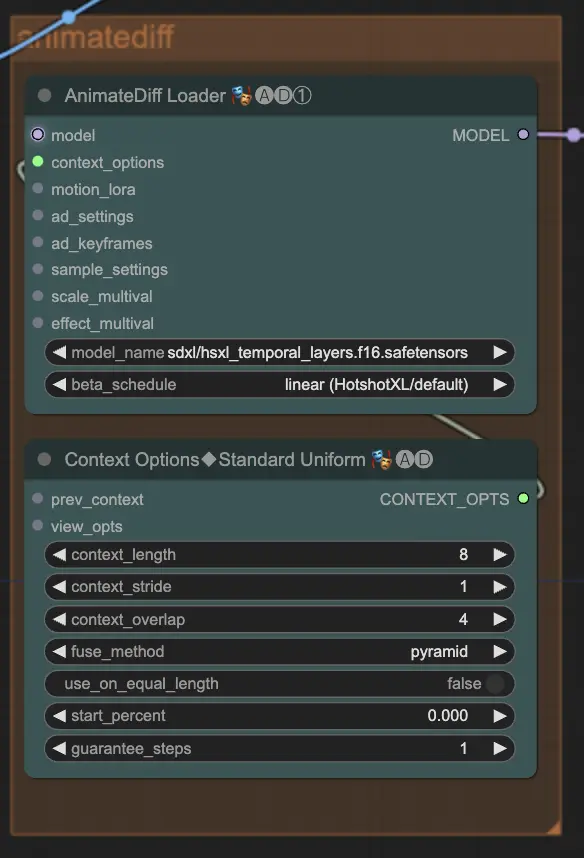
Step 4: AnimateDiff | ComfyUI Vid2Vid Workflow Part2#
The AnimateDiff node introduces temporal coherence to the animation by ensuring that stylistic changes are smoothly transitioned between frames. This is crucial for avoiding flickering and ensuring a seamless visual experience.
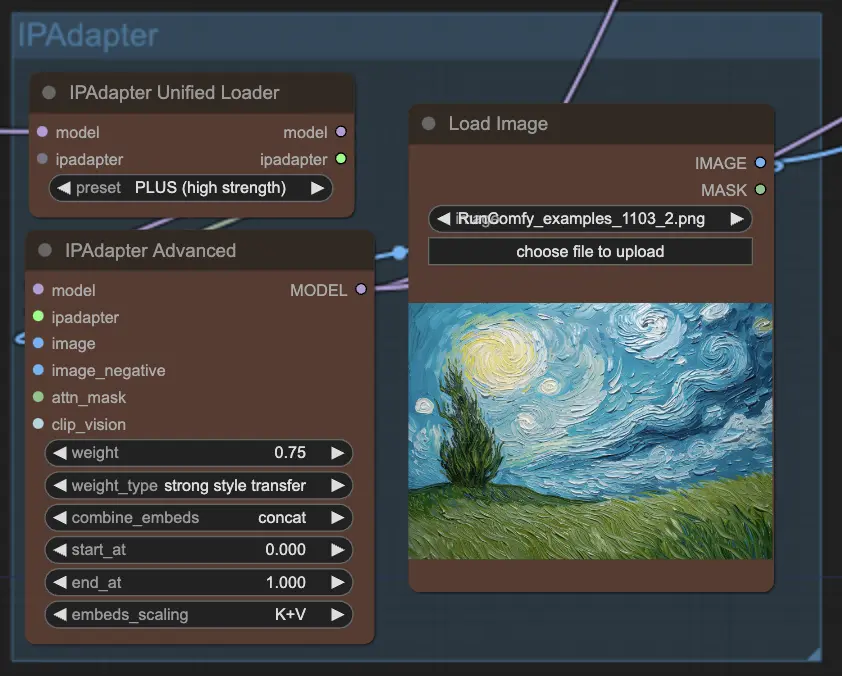
Step 5: IPAdapter | ComfyUI Vid2Vid Workflow Part2#
The IPAdapter node applies a strong style transfer to the original video, effectively transferring the desired artistic style onto the video frames. This robust application of style ensures that the final output closely matches the intended artistic vision while maintaining the integrity of the original content.
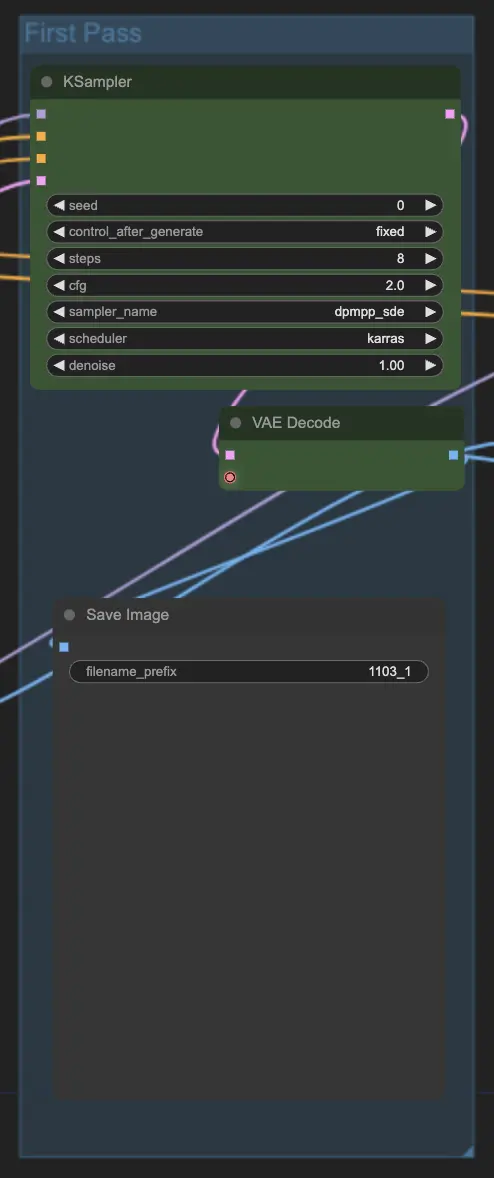
Step 6: First Render | ComfyUI Vid2Vid Workflow Part2#
The first render is produced based on the initial application of the models and conditions. This render serves as a draft.
Step 7: Color Match and Second Render | ComfyUI Vid2Vid Workflow Part2#
After the first rendering, color matching techniques are applied to ensure consistency in color tones and palettes across frames. After color matching, a second render is produced, incorporating any necessary adjustments from the first render.
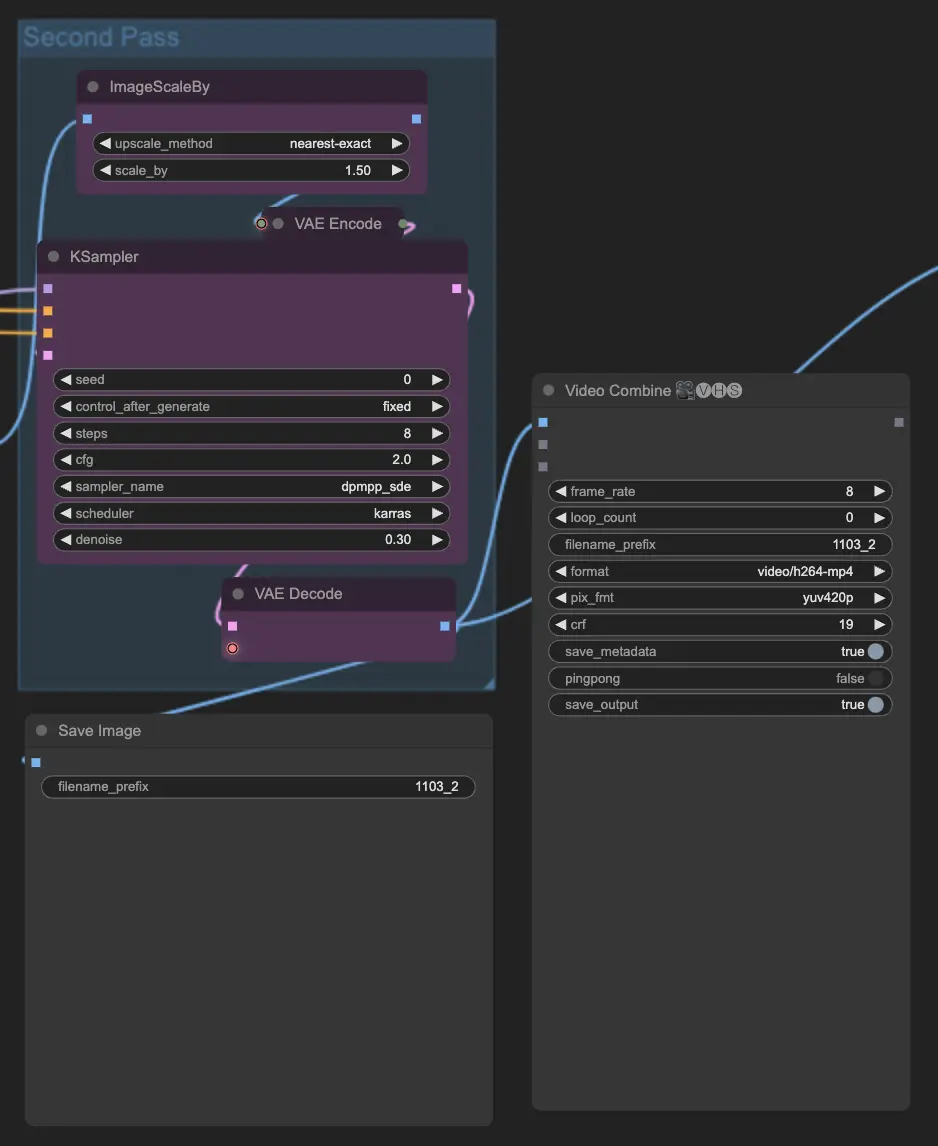
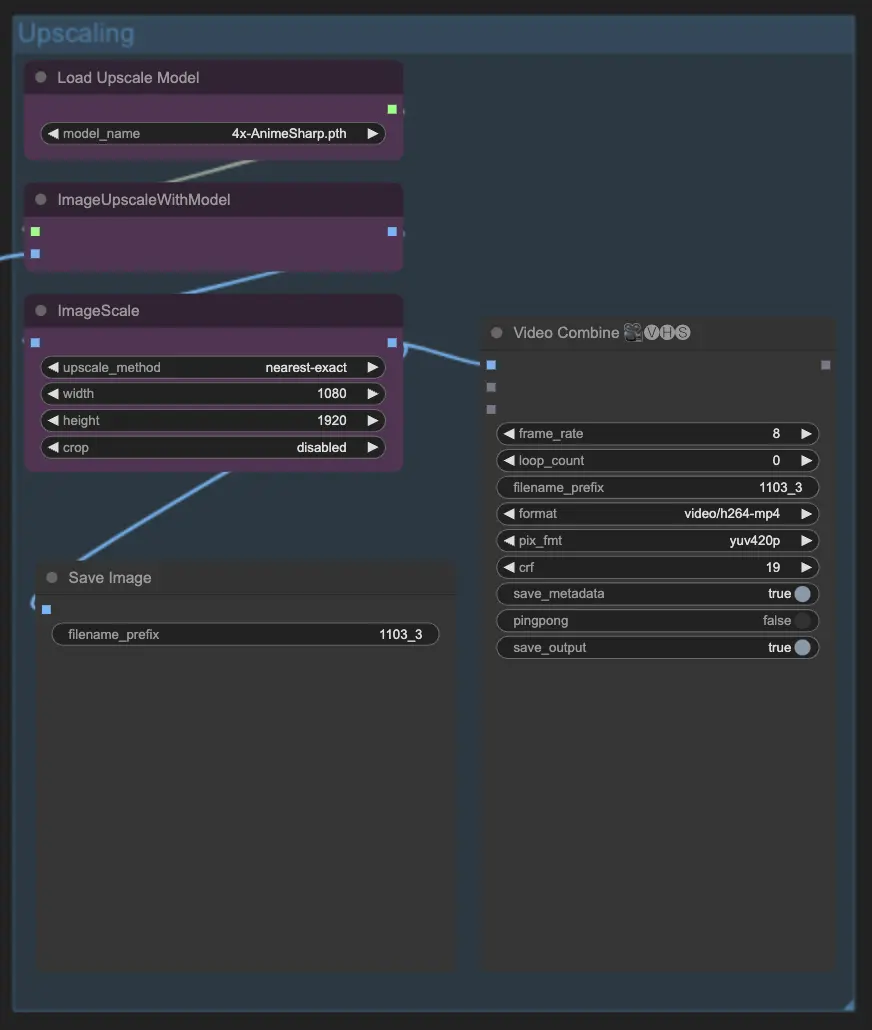
Step 8: Upscale if Needed | ComfyUI Vid2Vid Workflow Part2#
If the resolution of the animation needs to be enhanced, upscaling techniques are applied. This step ensures that the final output meets the desired quality and resolution standards.
By utilizing the ComfyUI Vid2Vid workflow Part2, you can effectively transform the original video style into your desired artistic expression, maintaining consistency and quality throughout the animation process.