
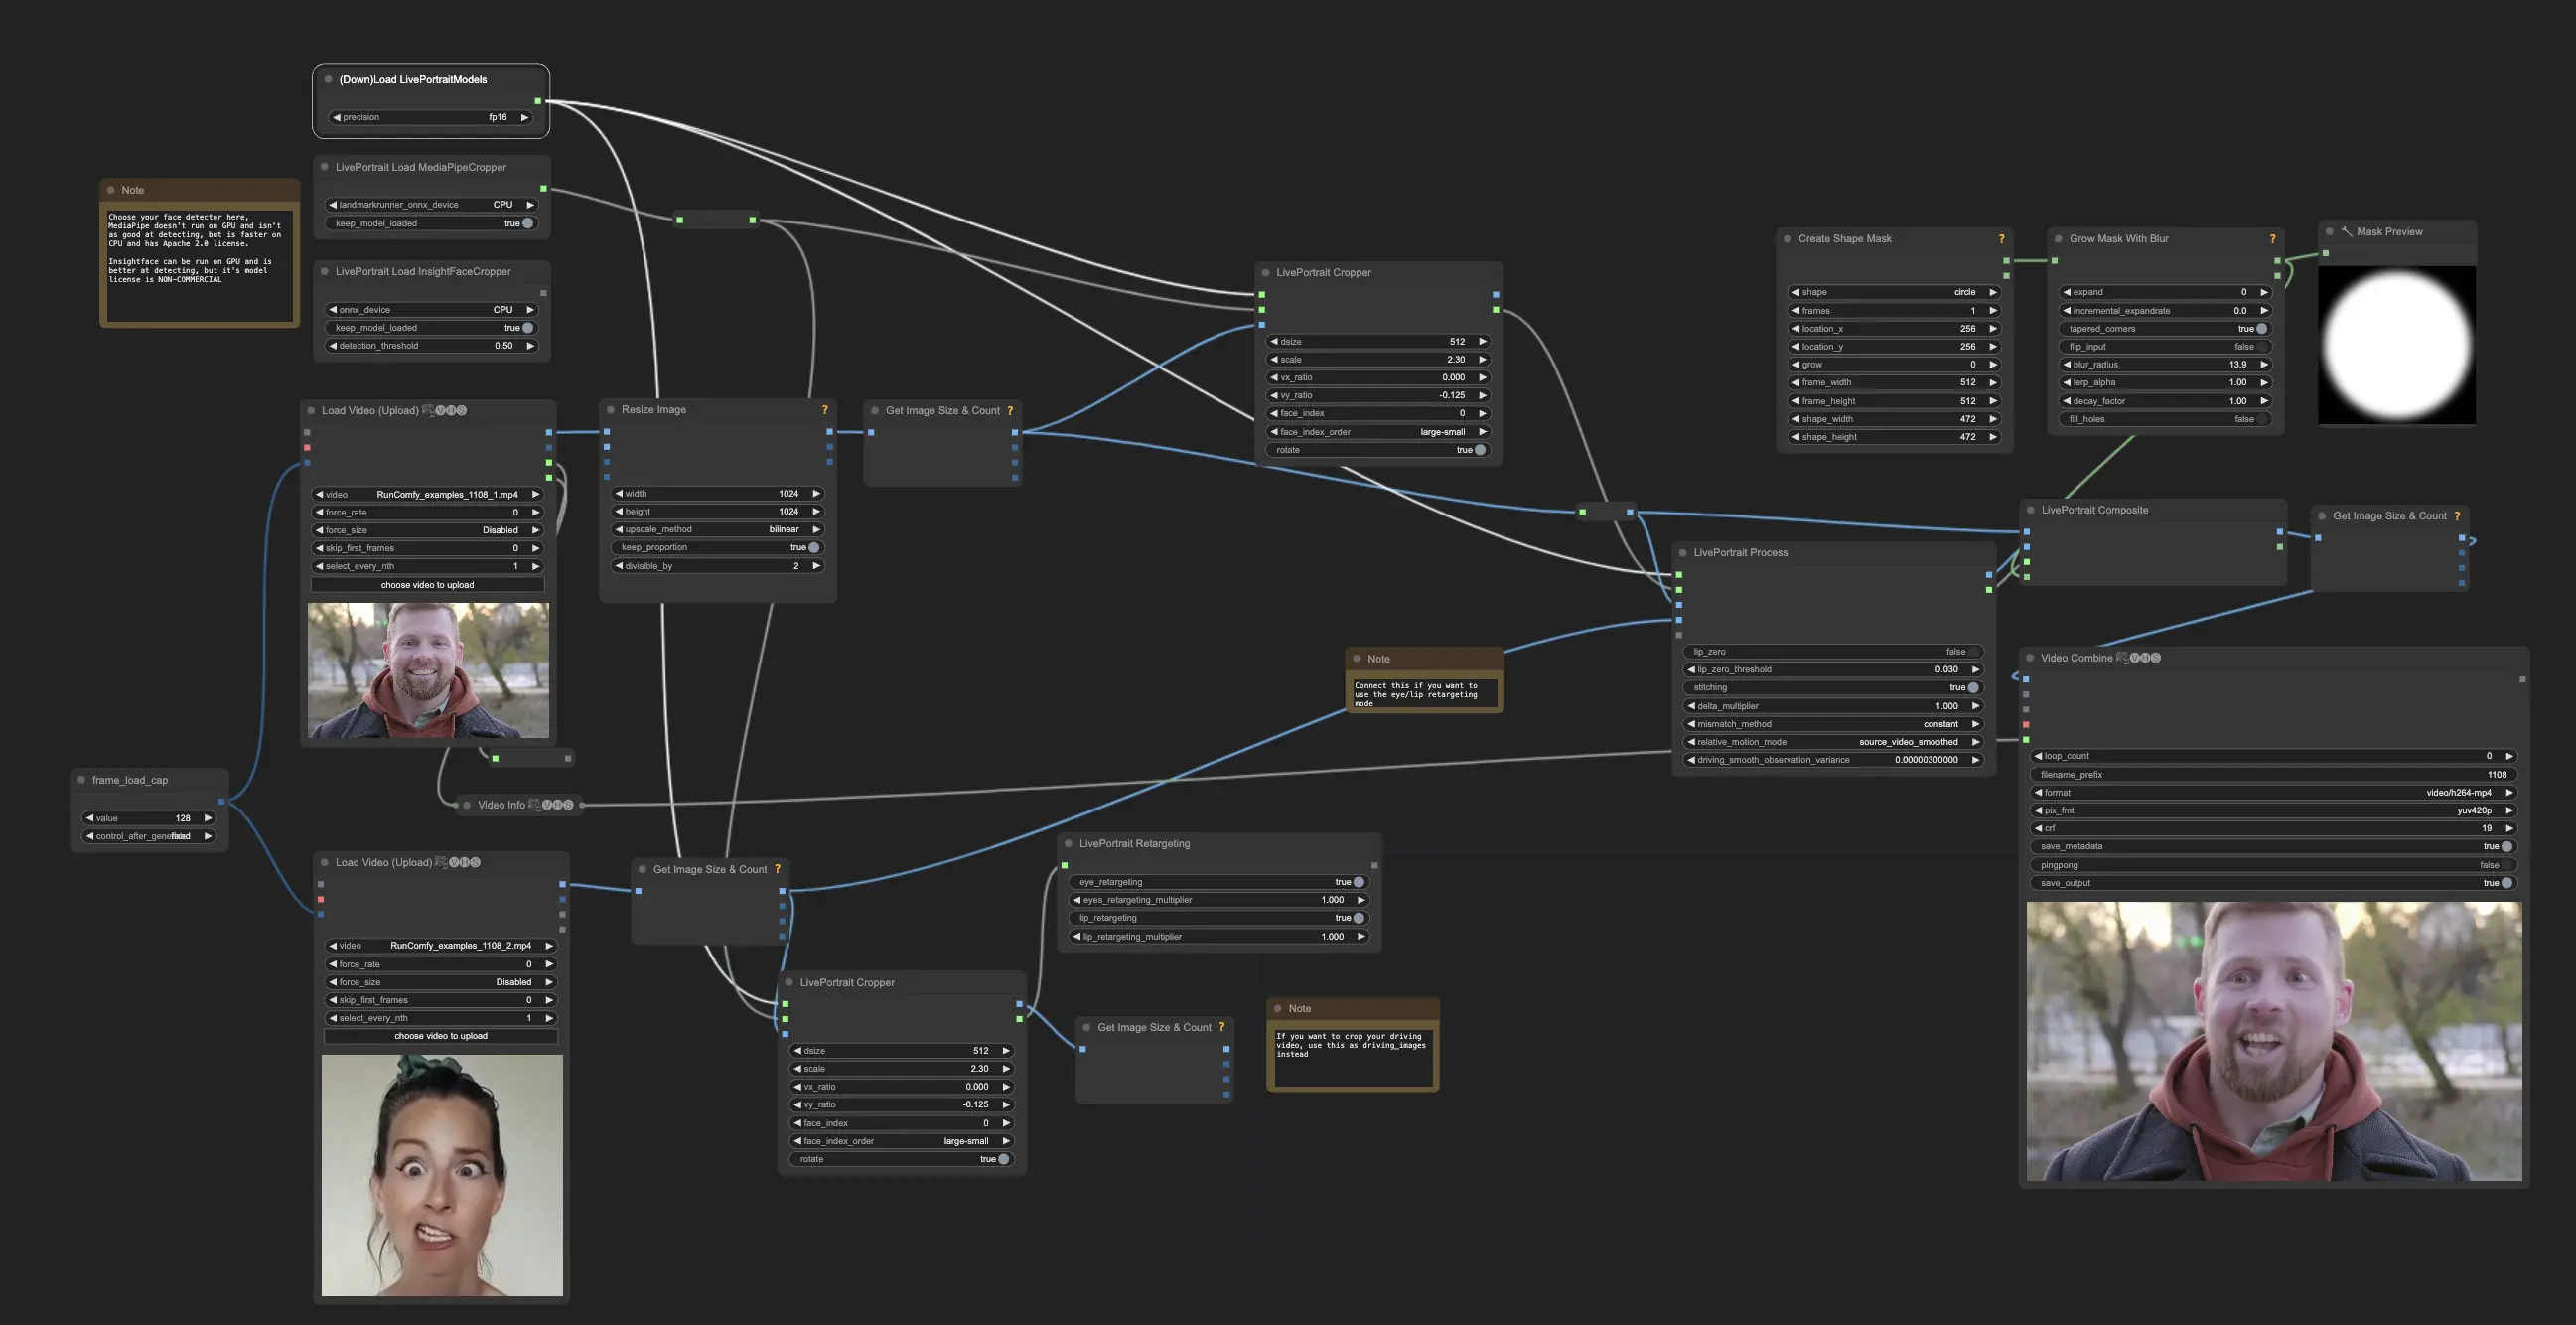
Thanks to kijai's ComfyUI-LivePortraitKJ node and workflow, creating realistic LivePortrait animations in ComfyUI is now easier. The following is a breakdown of the key components and parameters of his workflow.
Please read the LivePortrait Img2Vid description first to understand the workflow steps. After familiarizing yourself with the LivePortrait Img2Vid process, you will notice some small changes between the LivePortrait Vid2Vid and Img2Vid workflows.
The Difference Between ComfyUI LivePortrait Vid2Vid and Img2Vid#
1. Load videos using "VHS_LoadVideo" instead of images#
- In this LivePortrait Img2Vid workflow, you load a static image as the source using the "LoadImage" node. However, in the Vid2Vid workflow, you need to load a video as the source instead. Adjust the "frame_load_cap" to control how many frames are loaded.
- Resize source video to a higher resolution like 1024x1024 for better quality. After loading the source video with "VHS_LoadVideo", use the "ImageResizeKJ" node to upscale the frames to a resolution like 1024x1024. This will help maintain sharpness and detail in the final output. When working with videos, it's recommended to use a higher resolution for the source compared to the Img2Vid workflow. While 512x512 is often sufficient for static images, videos benefit from higher resolutions to preserve detail and quality.
- The driving video frames can still be resized to a lower resolution like 480x480 to save processing time, as they only provide motion information.
2. Use "source_video_smoothed" relative motion mode for smoother LivePortrait Vid2Vid results#
- The "LivePortraitProcess" node has a "relative_motion_mode" parameter that controls how motion is transferred from the driving video to the source. For Vid2Vid, it's recommended to use the "source_video_smoothed" mode.
- In this mode, the LivePortrait motion is smoothed over time based on the input video, which helps create more temporally coherent and stable results. This is especially important for videos, where sudden jumps or jitter in motion can be more noticeable than in single images.
- Other motion modes like "relative" or "single_frame" may work better for Img2Vid, but "source_video_smoothed" is typically the best choice for Vid2Vid.
3. Connect source video FPS and audio to "VHS_VideoCombine" to maintain audio sync for LivePortrait Vid2Vid#
- When creating the final output video with the "VHS_VideoCombine" node, it's important to maintain audio synchronization with the video frames. This involves two key connections:
- First, connect the source video's audio to the "audio" input of "VHS_VideoCombine" using a "Reroute" node. This will ensure the original audio is used in the output video.
- Second, connect the source video's frame rate (FPS) to the "frame_rate" input of "VHS_VideoCombine". You can get the FPS using the "VHS_VideoInfo" node, which extracts metadata from the source video. This will ensure the output video matches the timing of the source.
- By carefully handling the audio and frame rate, you can create a LivePortrait Vid2Vid output that maintains proper synchronization and timing, which is crucial for a realistic and watchable result.