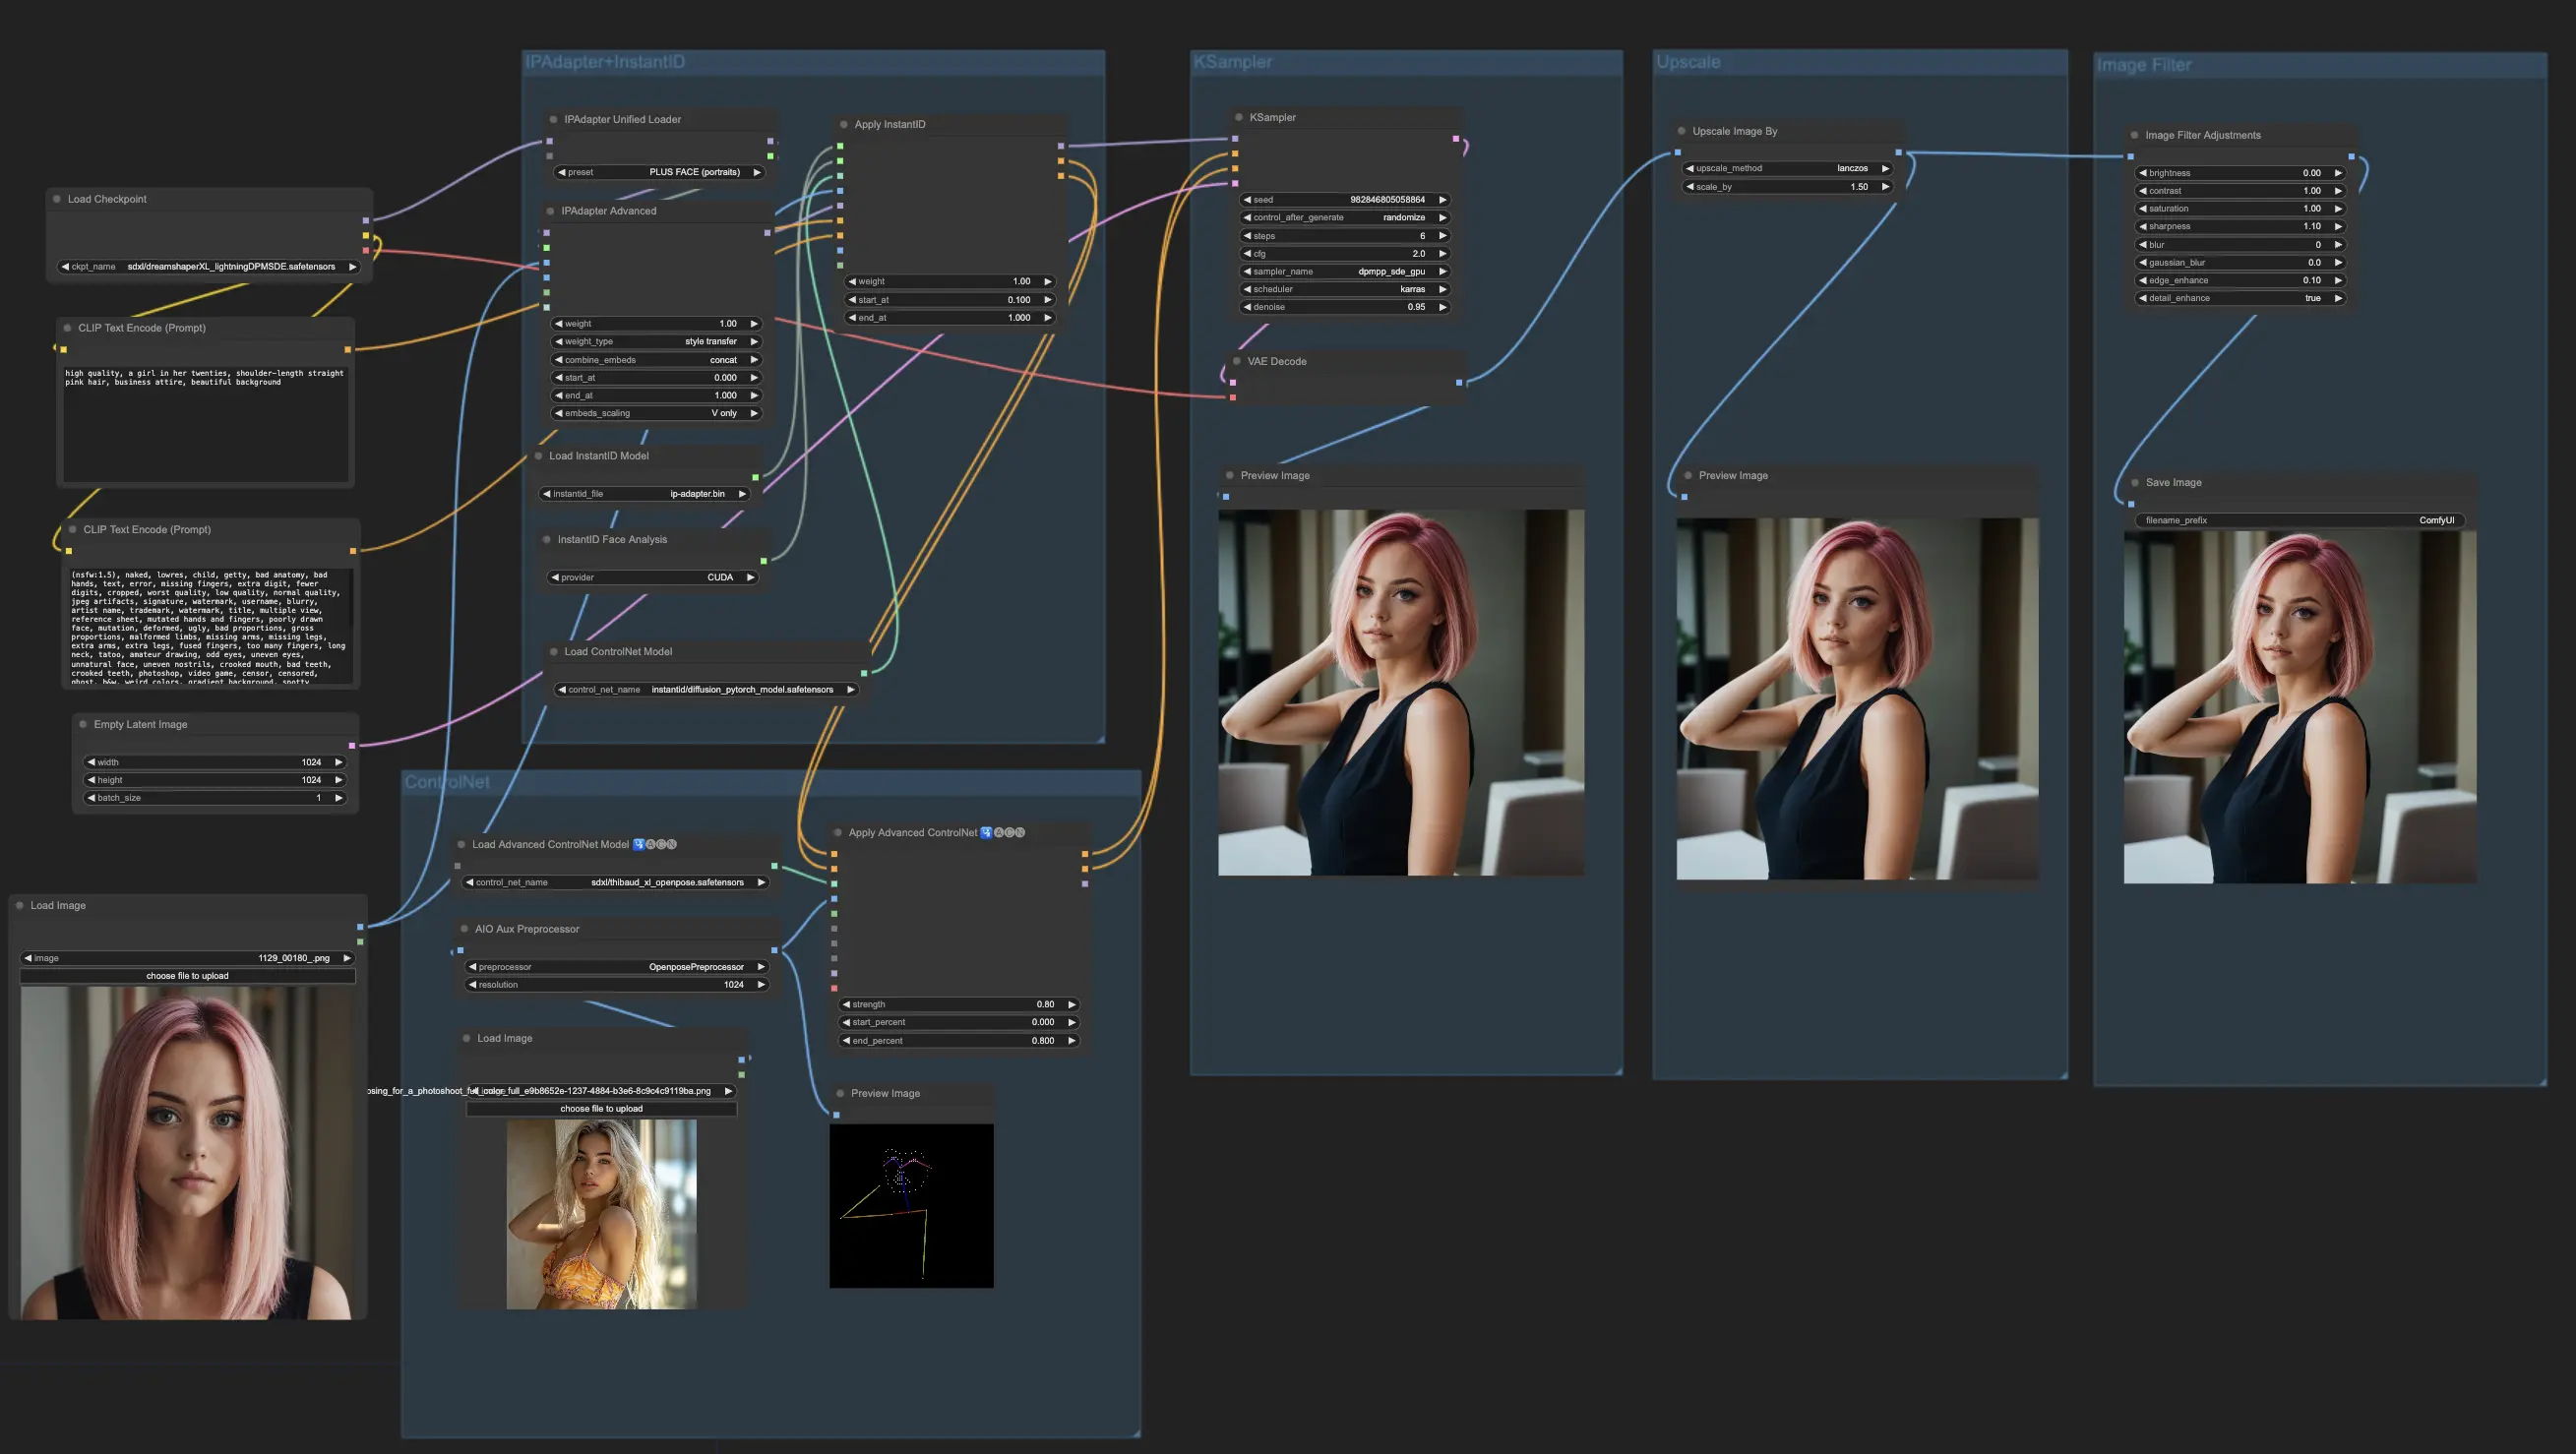
Consistent & Realistic Characters
The ComfyUI Consistent Character workflow allows you to develop remarkably consistent and realistic characters for stories, virtual influencers, or game design. With intuitive features like IPAdapter, InstantID, and ControlNet, you can precisely control facial features, poses, and composition. Achieve unparalleled character consistency while maintaining artistic freedom.ComfyUI Consistent Character Workflow

- Fully operational workflows
- No missing nodes or models
- No manual setups required
- Features stunning visuals
ComfyUI Consistent Character Examples

ComfyUI Consistent Character Description
The ComfyUI Consistent Character workflow is a powerful tool that allows you to create characters with remarkable consistency and realism. Whether you're developing a story, designing a virtual influencer, or creating a game character, this workflow can help you achieve your goals. In this tutorial, we will guide you through the steps of using the ComfyUI Consistent Character workflow effectively.
1. Upload Input Image
The first step in using the ComfyUI Consistent Character workflow is to select the perfect input image. This image should embody the essence of your character and serve as the foundation for the entire process. Take your time to choose an image that aligns with your artistic vision, considering factors such as facial features and overall aesthetic.
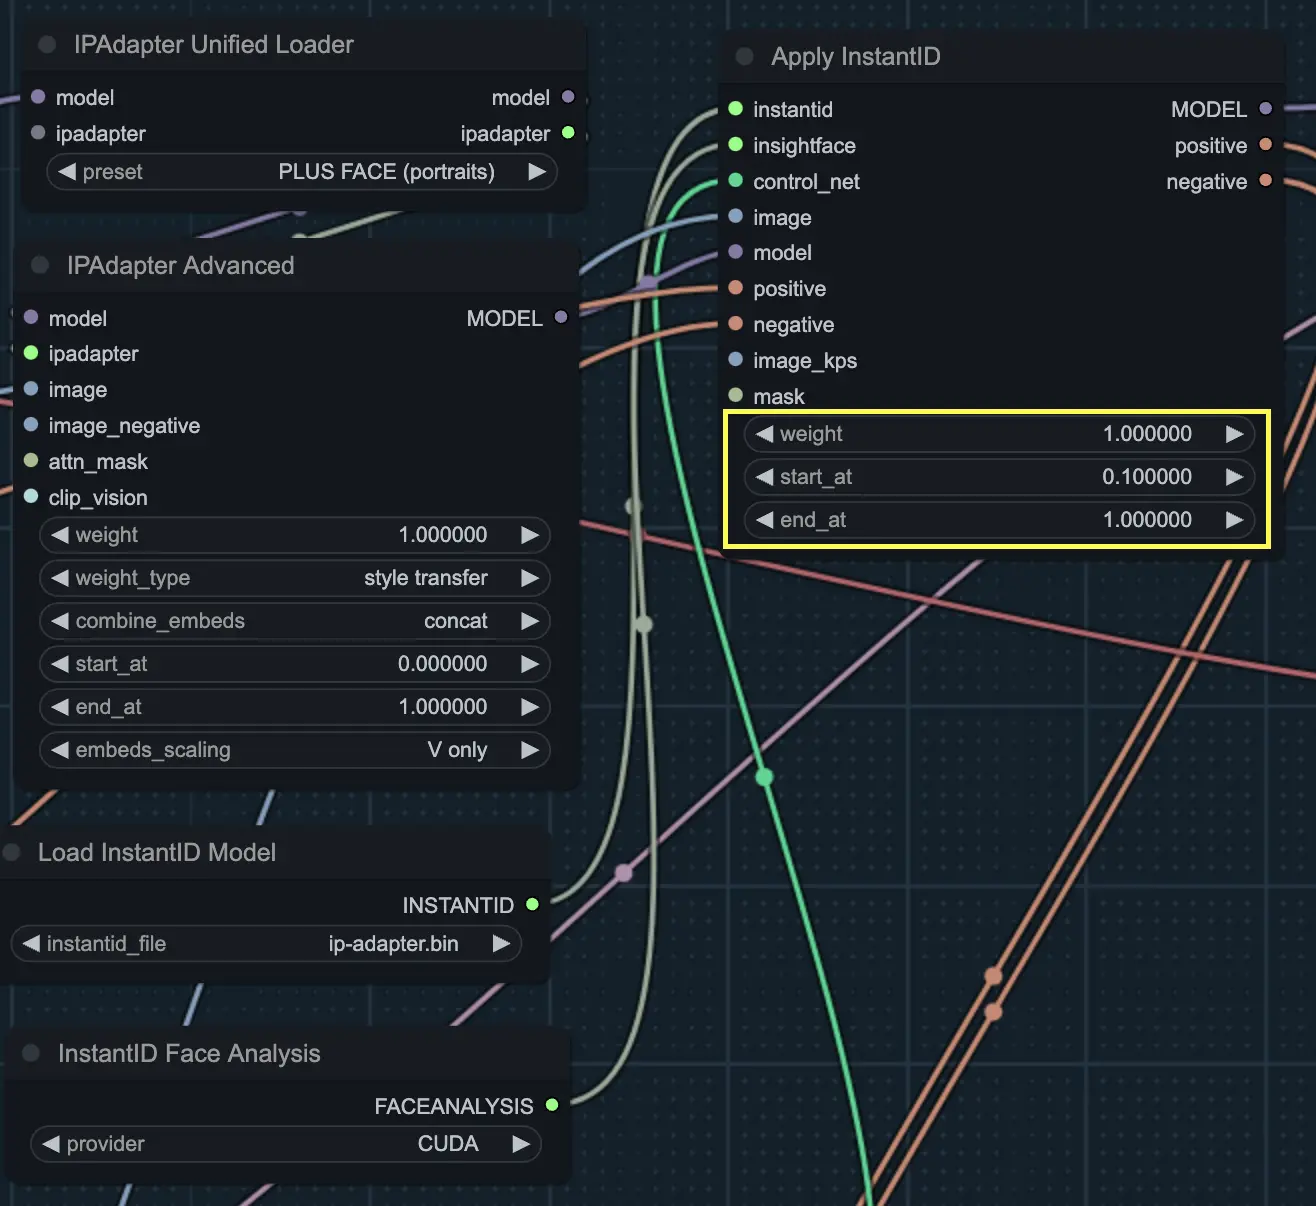
2. Configure IPAdapter+InstantID Settings
The IPAdapter+InstantID component plays a vital role in maintaining character consistency. It works by first extracting the facial features and other important details from the input image. It then intelligently applies these features to the generated character, taking into account factors such as facial structure, eye shape, nose shape, mouth shape, and overall proportions. The result is a consistent character that retains the essence of the original input.
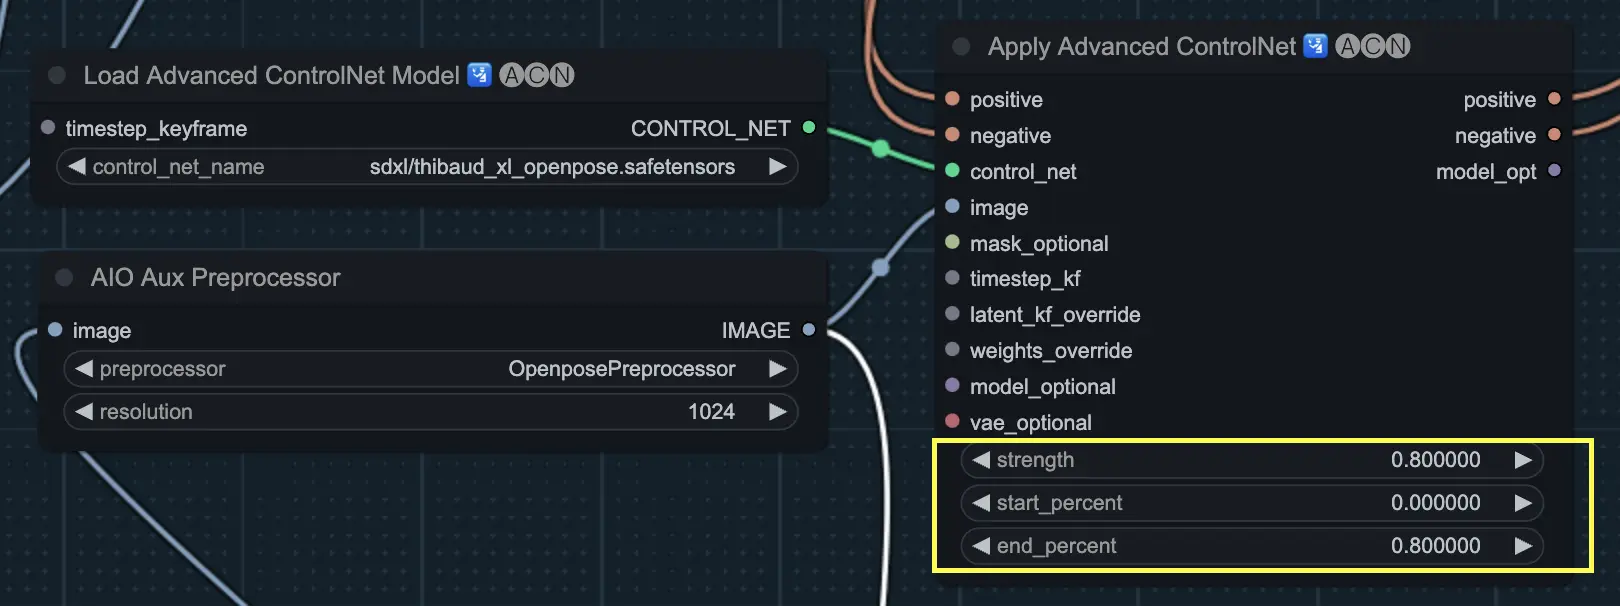
3. Set Up ControlNet
ControlNet is another essential component in the Consistent Character workflow. It enables you to control the pose, composition, and structure of your generated characters, allowing for more precise and intentional character creation.
ControlNet works by incorporating additional input data, such as depth maps, segmentation masks, or keypoint annotations, to guide the character generation process. By providing this extra information, ControlNet helps to ensure that the generated consistent character follows the desired pose, maintains the correct proportions, and preserves the overall composition of the scene.
Tip: Balancing InstantID and ControlNet
To achieve the best results, it's important to find a balance between the InstantID and ControlNet components. Experiment with different weights/strengths, start percentage, and end percentage for each component until you find the optimal combination that generates a consistent character while still allowing for pose control.


4. Generate the Consistent Character
Once you have configured the IPAdapter+InstantID and ControlNet settings, it's time to generate your consistent character. The KSampler component takes the adapted model, positive and negative conditioning, and the latent representation as input to create the final consistent character output. This process brings your character to life based on the specified parameters.
5. Upscale and Filter the Consistent Character
To enhance the visual quality of your generated consistent character, you can use the Upscale and Adjustments components.
The ImageScaleBy node allows you to increase the resolution and sharpen the details of your character, resulting in a clearer and more refined output.
The Filter Adjustments node provides various options to fine-tune the appearance of your character. Adjust settings such as brightness, contrast, saturation, gamma, hue, and sharpness to achieve the desired aesthetic and ambiance for your consistent character.
By following these steps and leveraging the power of the ComfyUI ComfyUI Consistent Character workflow, you can create consistent characters that are realistic and aligned with your creative vision. Whether you're a storyteller, influencer, or game developer, this ComfyUI workflow offers a gateway to bringing your consistent character ideas to life
