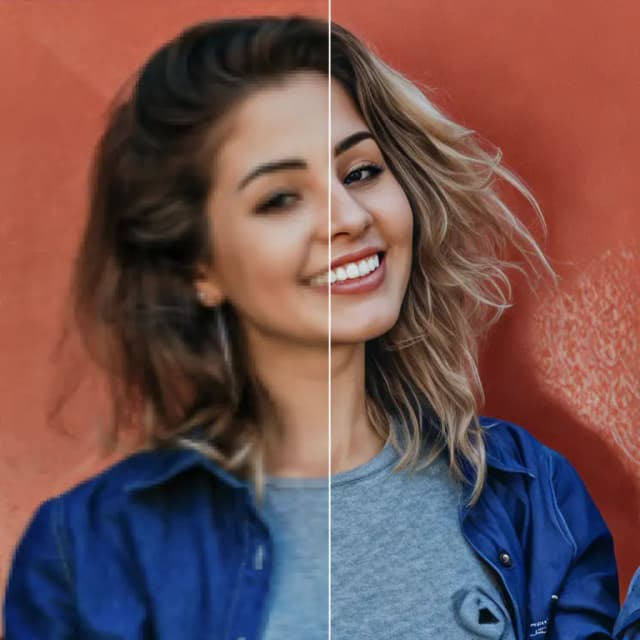
Flux Upscaler - Ultimate 32k | Image Upscaler
The Flux Upscaler workflow delivers outstanding performance, enhancing images to a remarkable 4k, 8k, 16k, and 32k resolution with the Ultimate SD Upscaler node. It preserves sharpness and fine detail, making it ideal for professional-grade enlargements. Perfect for those requiring ultra-high-definition imagery, Flux Upscaler produces pristine results with exceptional clarity and precision, even at large scales.ComfyUI Flux Upscaler Workflow
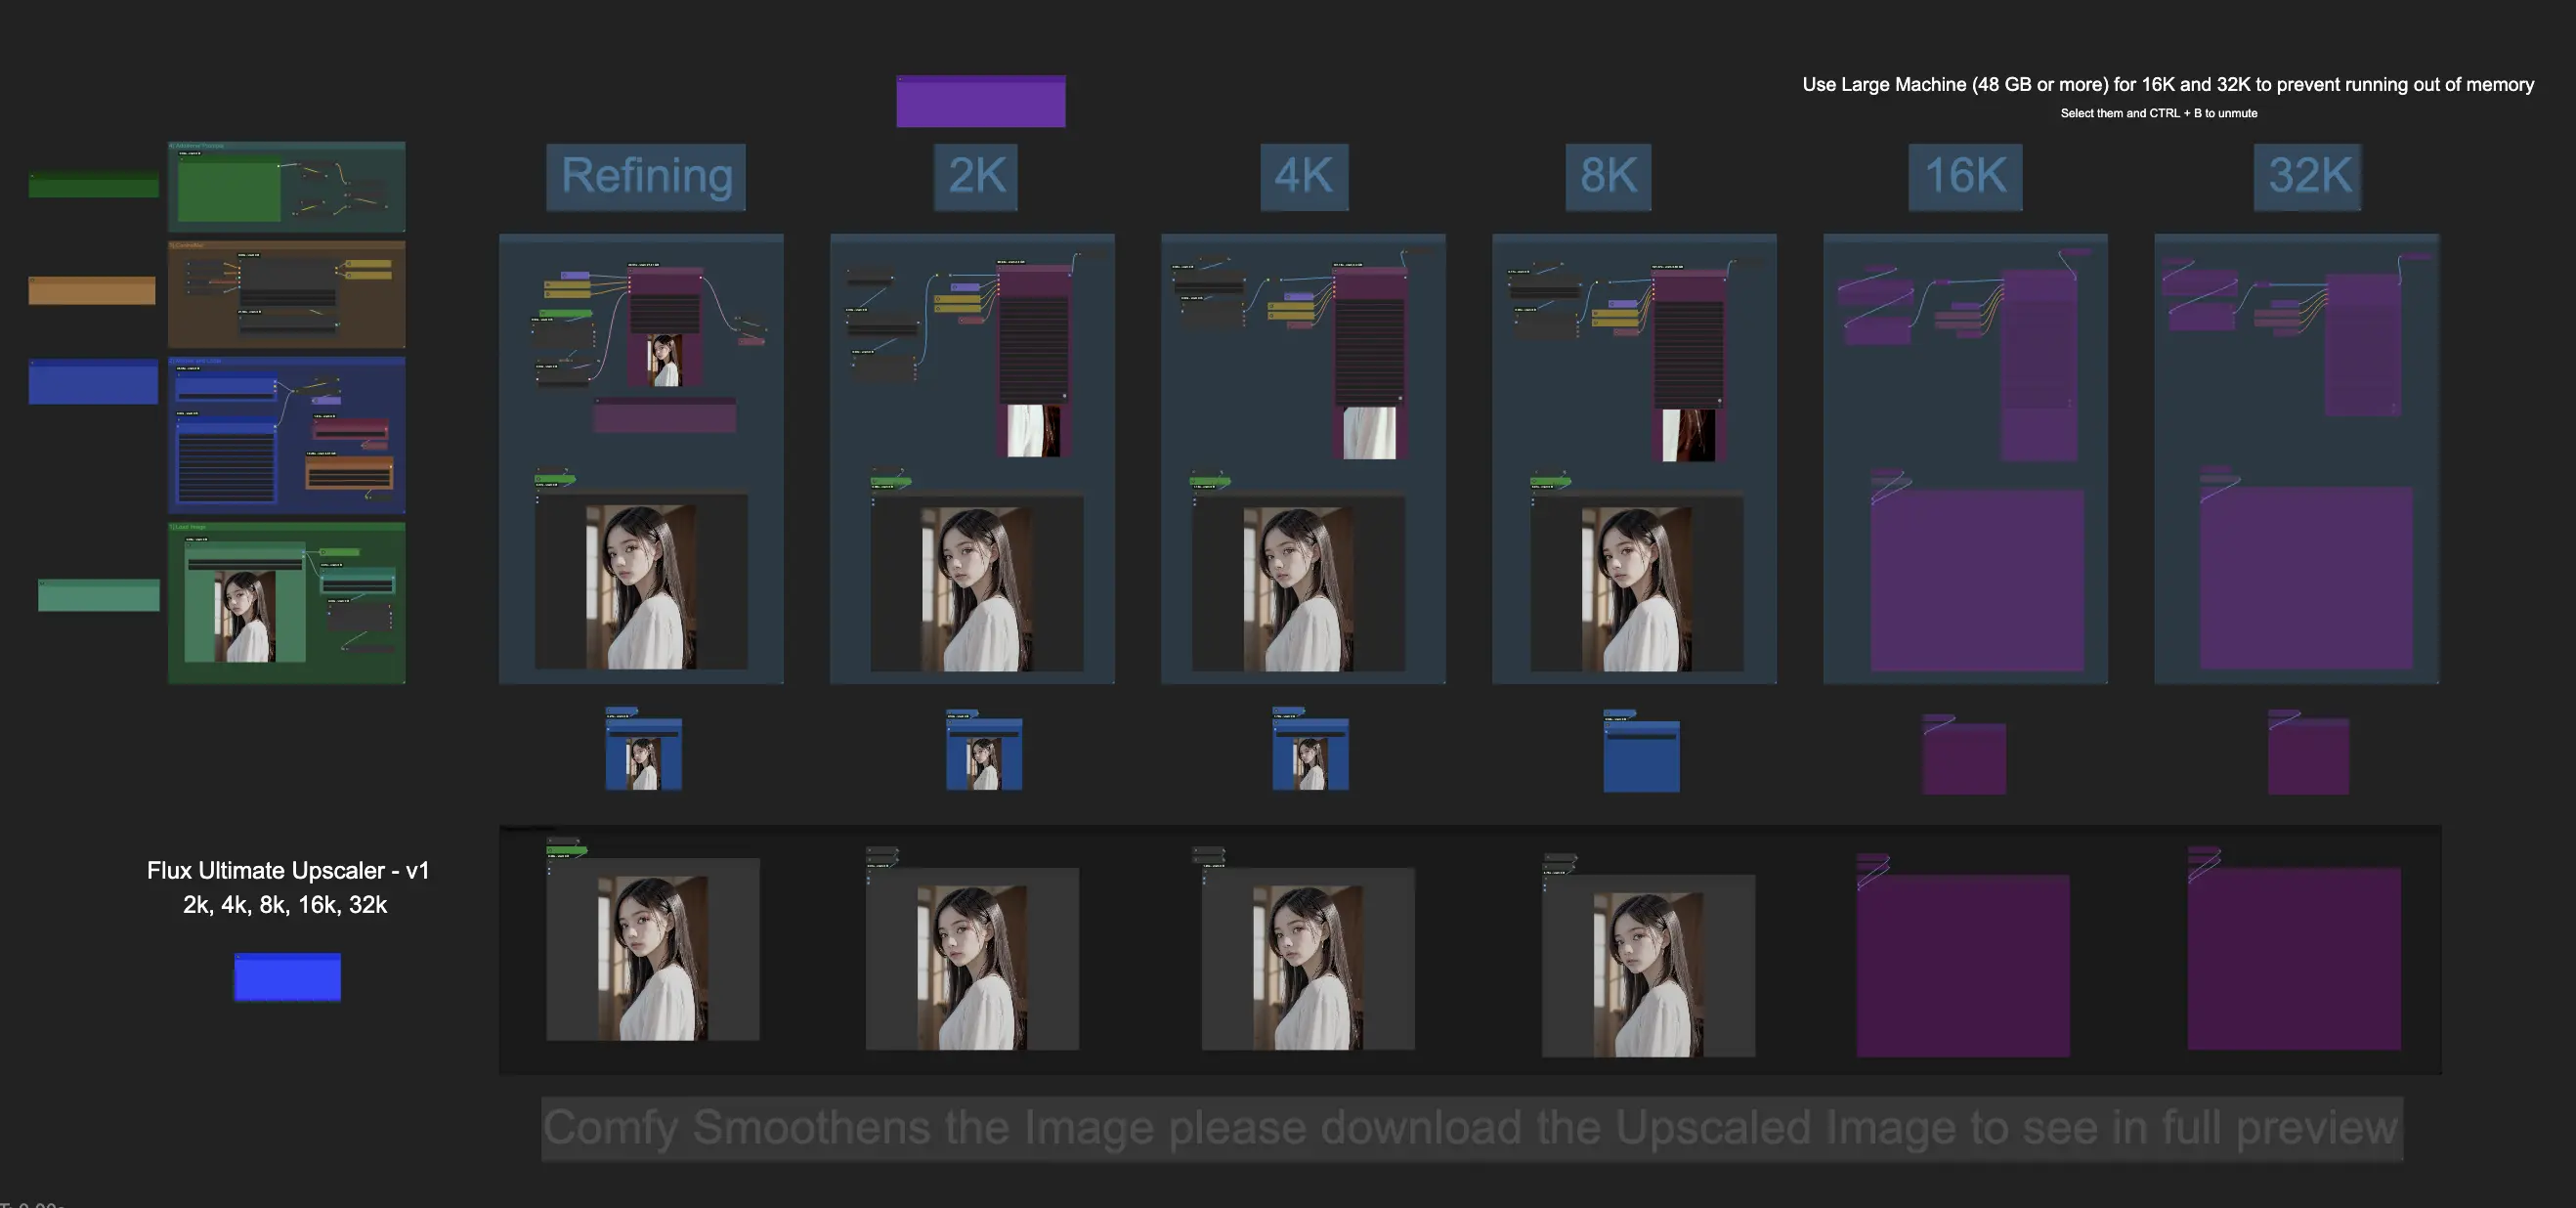
- Fully operational workflows
- No missing nodes or models
- No manual setups required
- Features stunning visuals
ComfyUI Flux Upscaler Examples


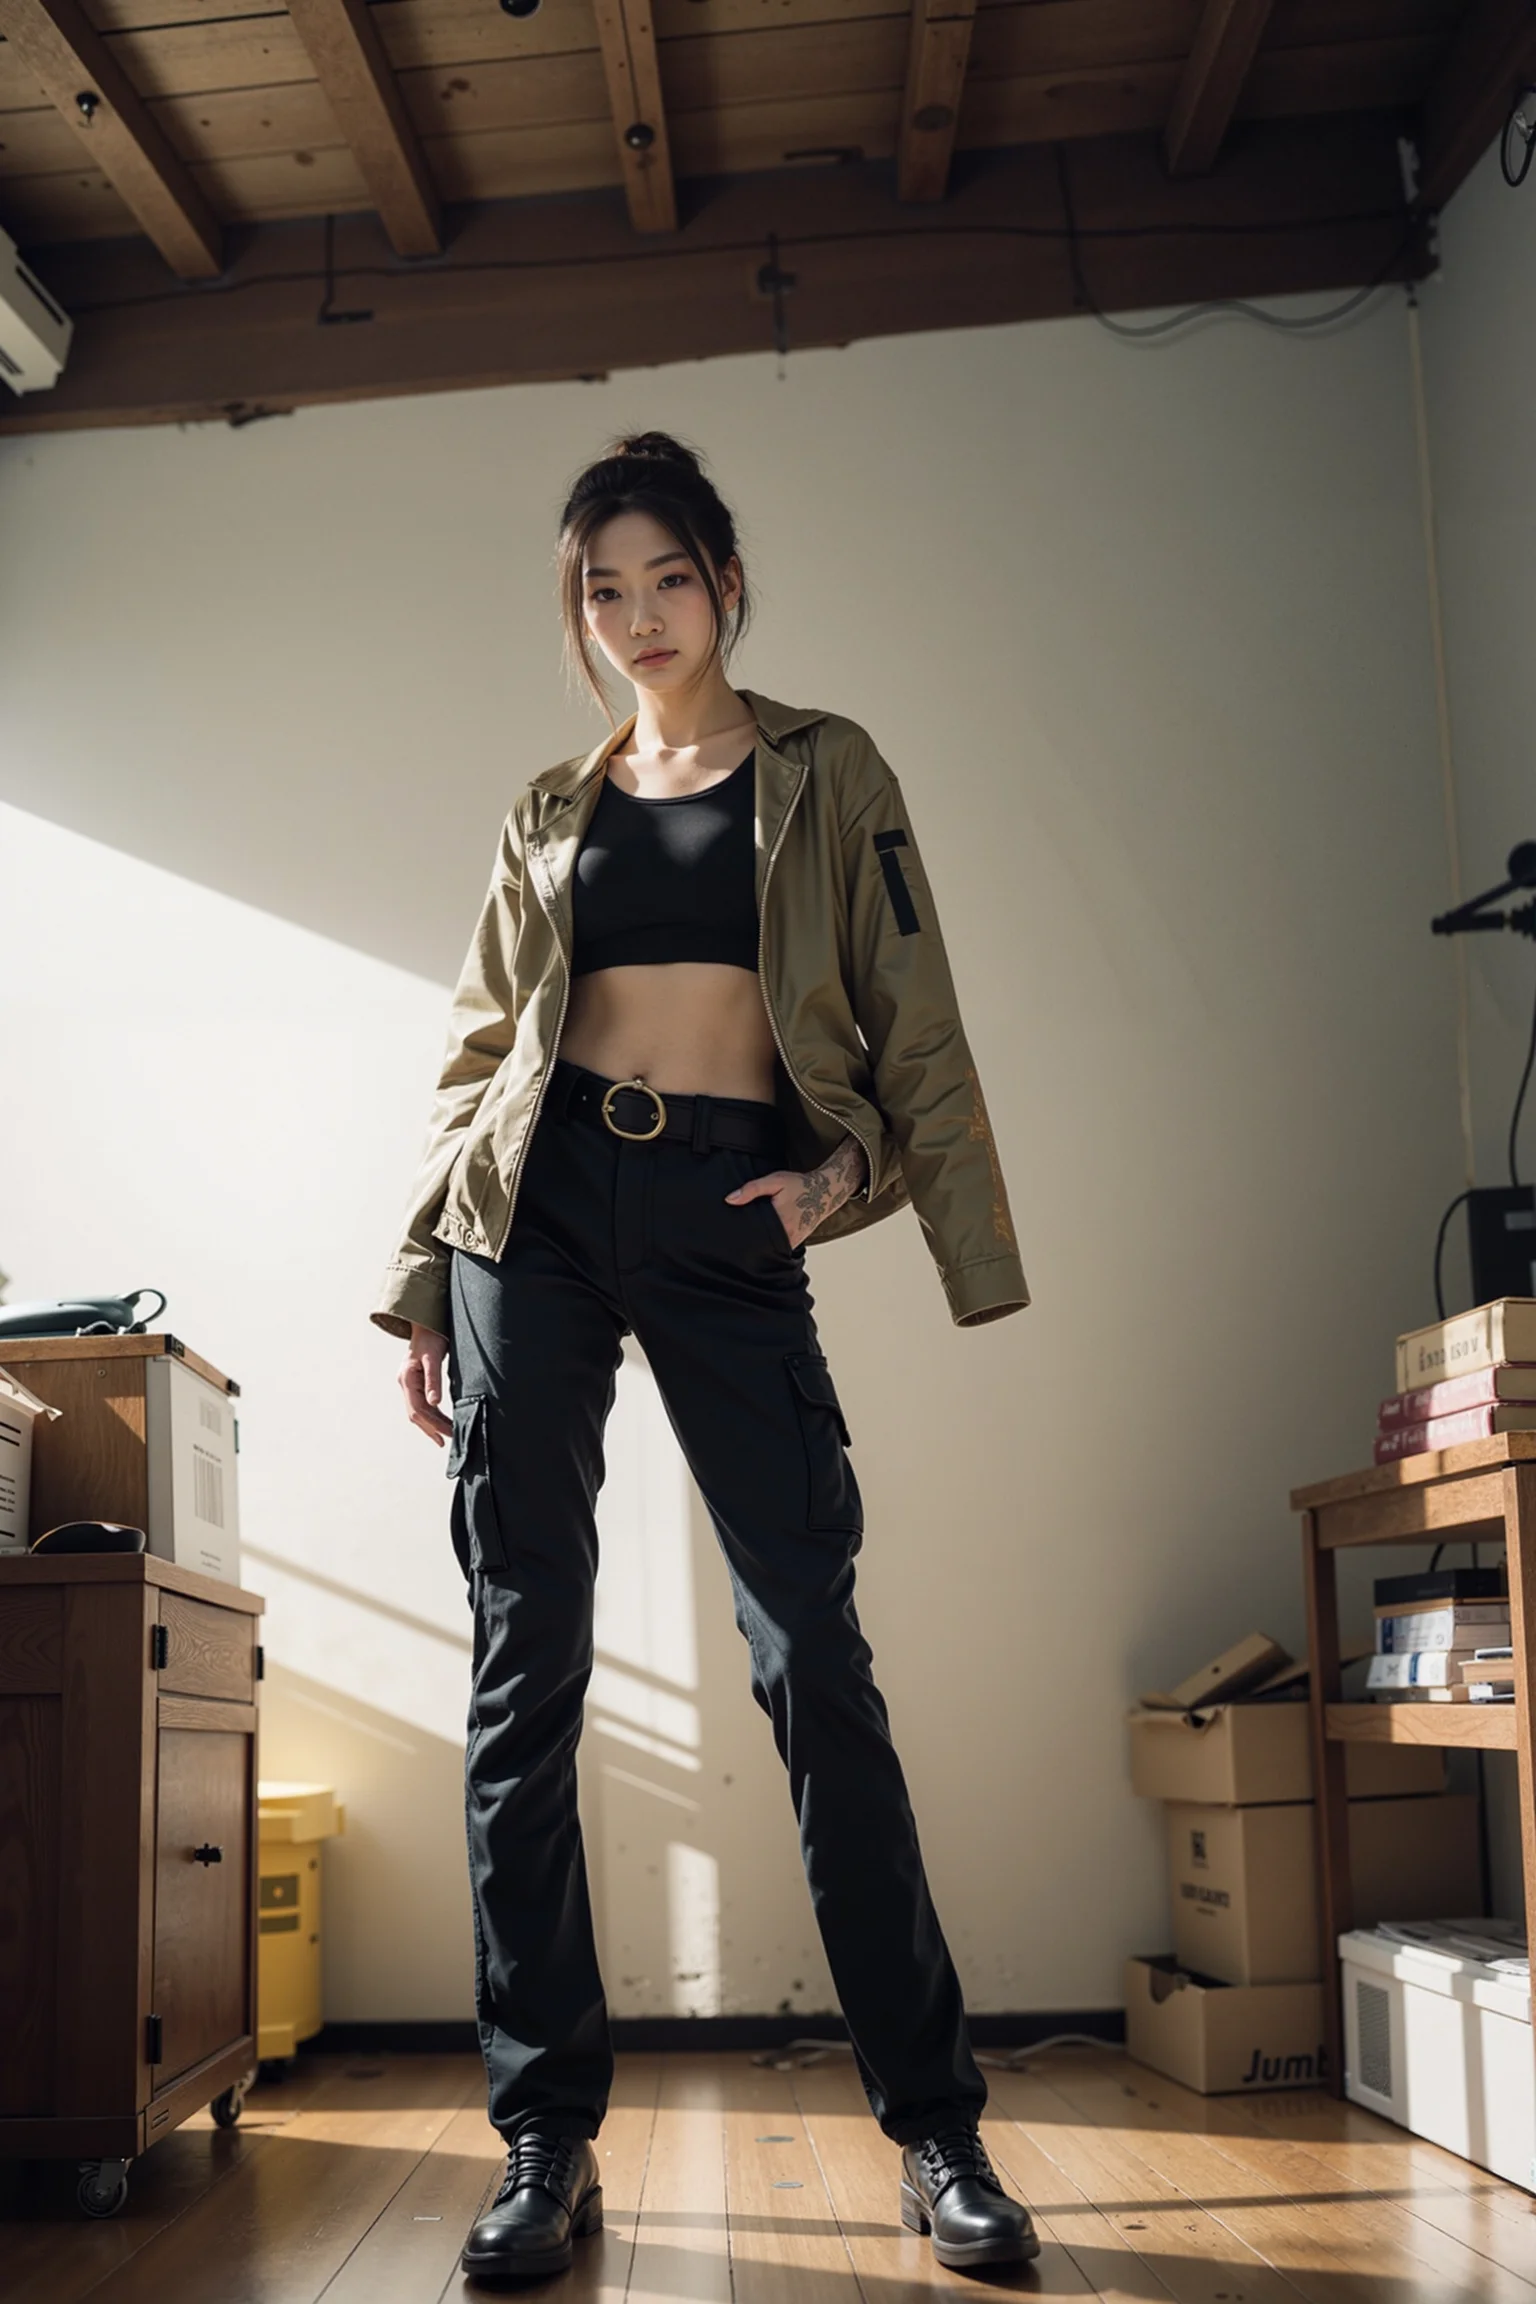

ComfyUI Flux Upscaler Description
The is developed fully developed by ssitu. And the Workflow is made by using the RunComfy platform who is also our part time workflow developer. We are simply presenting their work to the community. It is important to note that there is currently no formal connection or partnership between RunComfy and ssitu. We deeply appreciate ssitu’s work!
Flux Ultimate 32k Upscaler
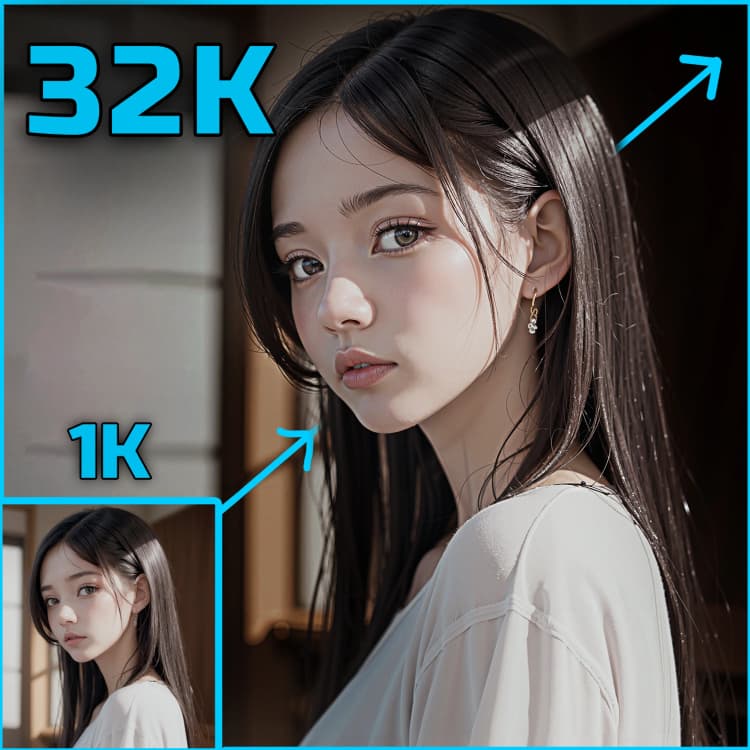
The Flux Ultimate 32k Upscaler Workflow is a powerful upscaler solution that enhances visuals to stunning resolutions of 4k, 8k, 16k, and up to an impressive 32k. Powered by the Ultimate SD Upscaler node, this Flux upscaler ensures that intricate details and sharpness are preserved across all output sizes. Perfect for professionals requiring flexibility, the Flux Upscaler adapts to various needs—whether for detailed 4k displays or ultra-high-definition 32k applications. With its seamless scaling capabilities, Flux Upscaler offers pristine, artifact-free results, making it ideal for any project demanding exceptional clarity and precision at any scale.
How to Use Flux Ultimate 32k Upscaler Workflow?
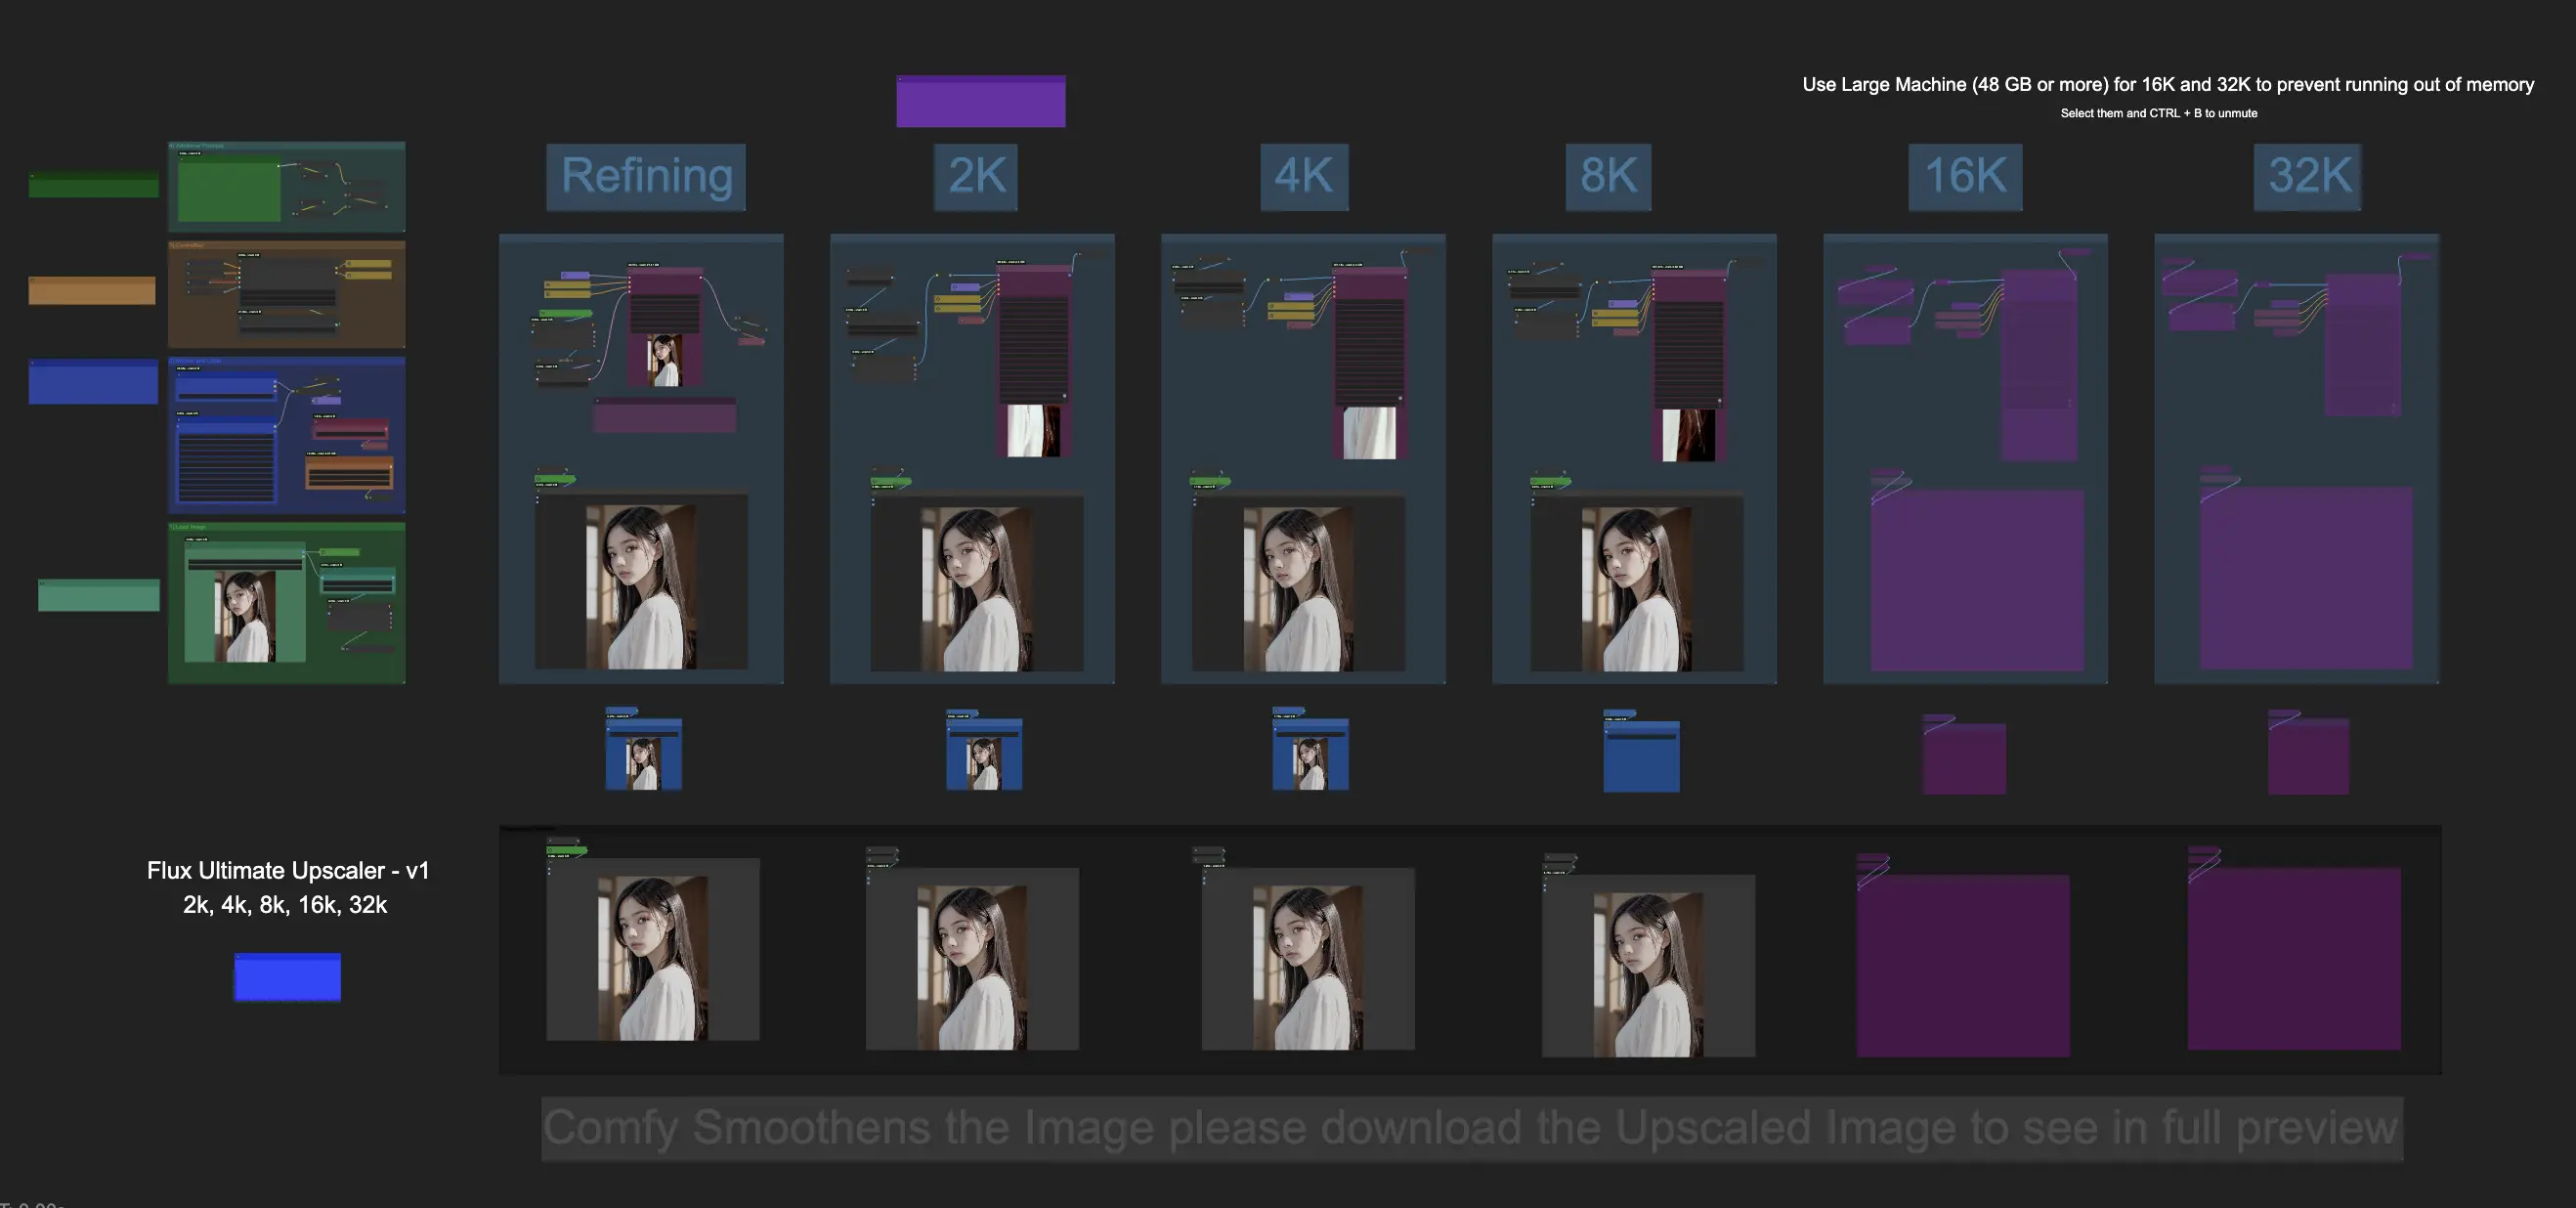
1.1 Load the Visual Group
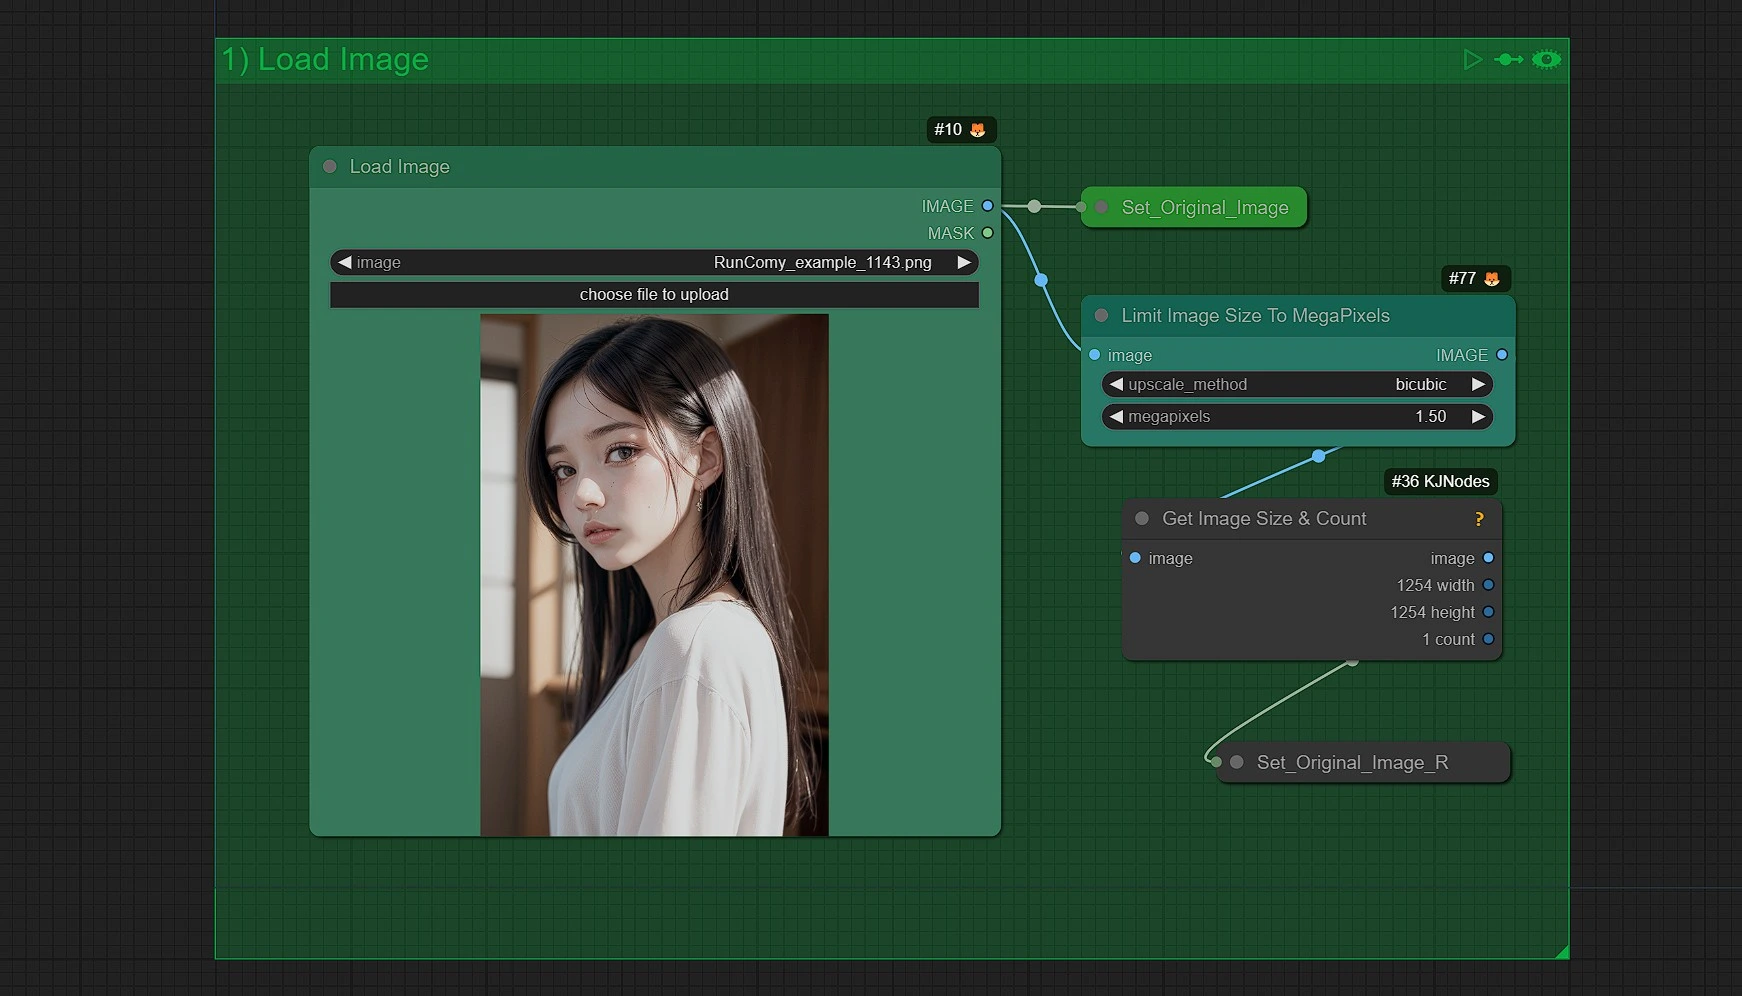
- Upload, Drag and drop or Copy and Paste (Ctrl+V) your image in the load image node
Limit Image Size to MegaPixels:is default to 1.5 MP, This servers as the starting point for upscaling resolution. which will be upscaled 2x,4x,8x,16x,32x times.
1.2 Models and Loras Group
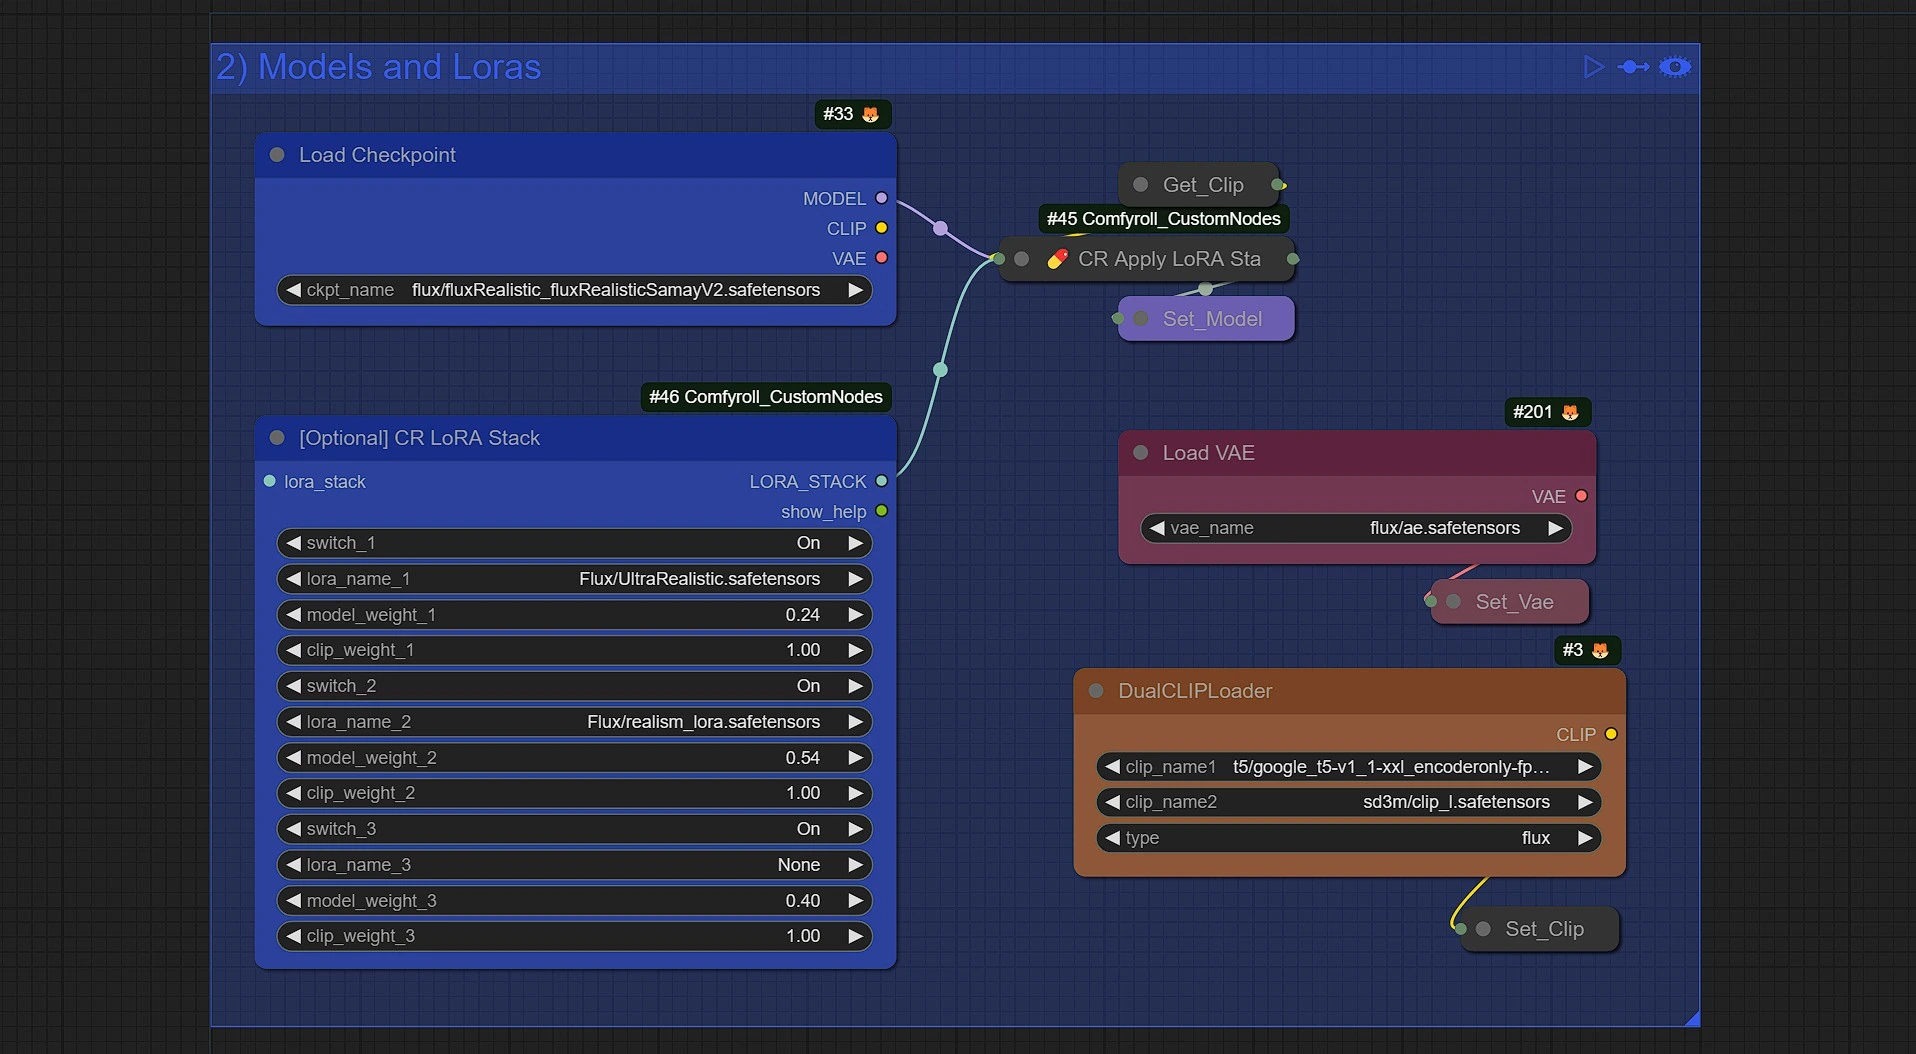
Load Checkpoint:In this node you select the checkpoint which best suits your upload image's rendering style i.e. realistic, anime, toon...etc which will increase the accuracy of detailsOptional Lora Stack:Using style loras like cloths, figures, style, character, artstyle or abstract loras of your image's element will further increase the accuracy of the rendered image.Load VAE:The default flux vae is fine to use.Dual Clip Loader:The default clip models are loaded and need not to be changed.- Make a copy of lora stack and connect it in chain if need more than 3 loras.
1.3 ControlNet Group
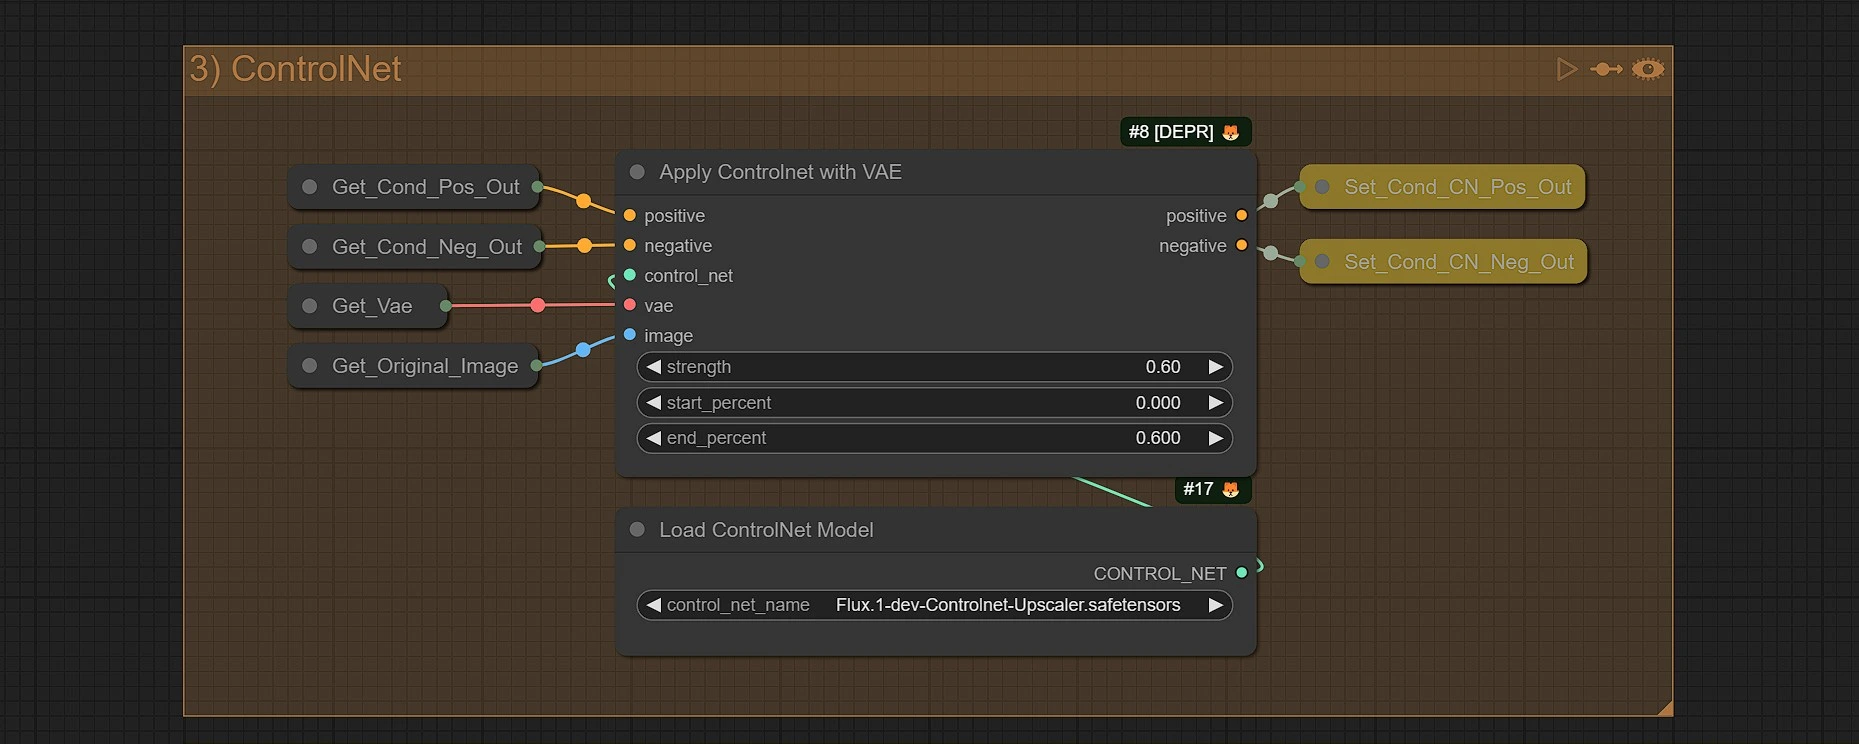
In this controlnet model is used which act as a traditional tile controlnet.
Strength:The Strength for the Controlnet. Use value below 0.7 as higher value will give rough artifacts on the edges.Start Percent:This value decides from which percent the controlnet will take affect. Let it be 0.End Percent:This value decides till when percent the controlnet apply it's affect. Use Value under 0.7 .
1.4 Additional Prompt
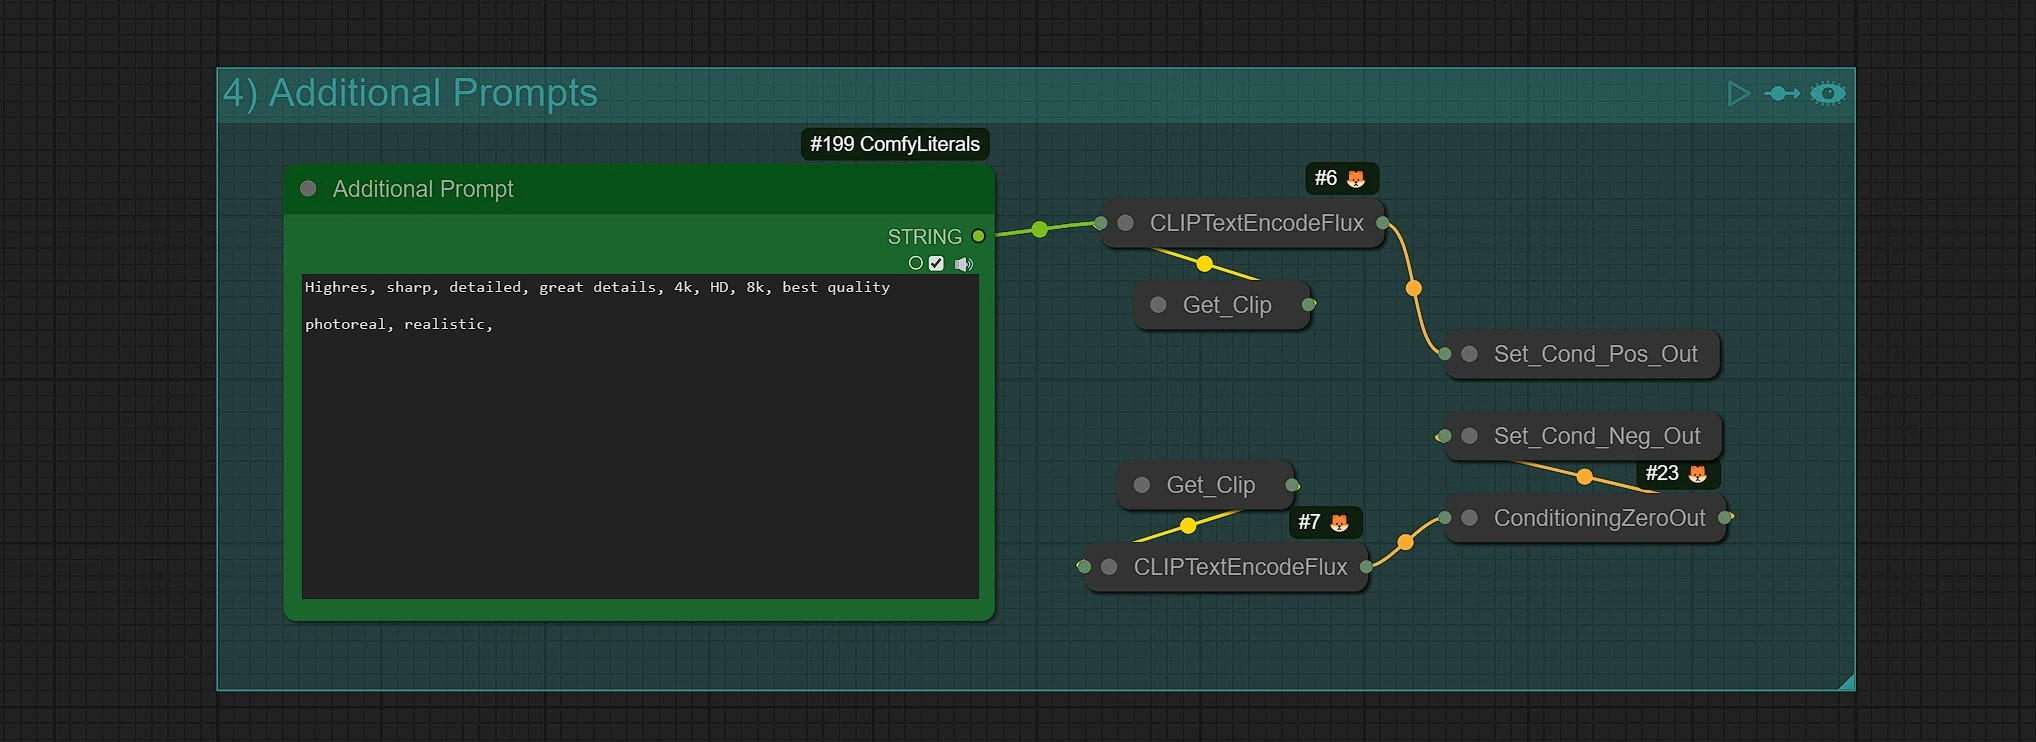
In this text box, it can remain empty, or you can add your lora trigger prompts, style prompts which will improve your renders.
1.5 Refiner Sampler
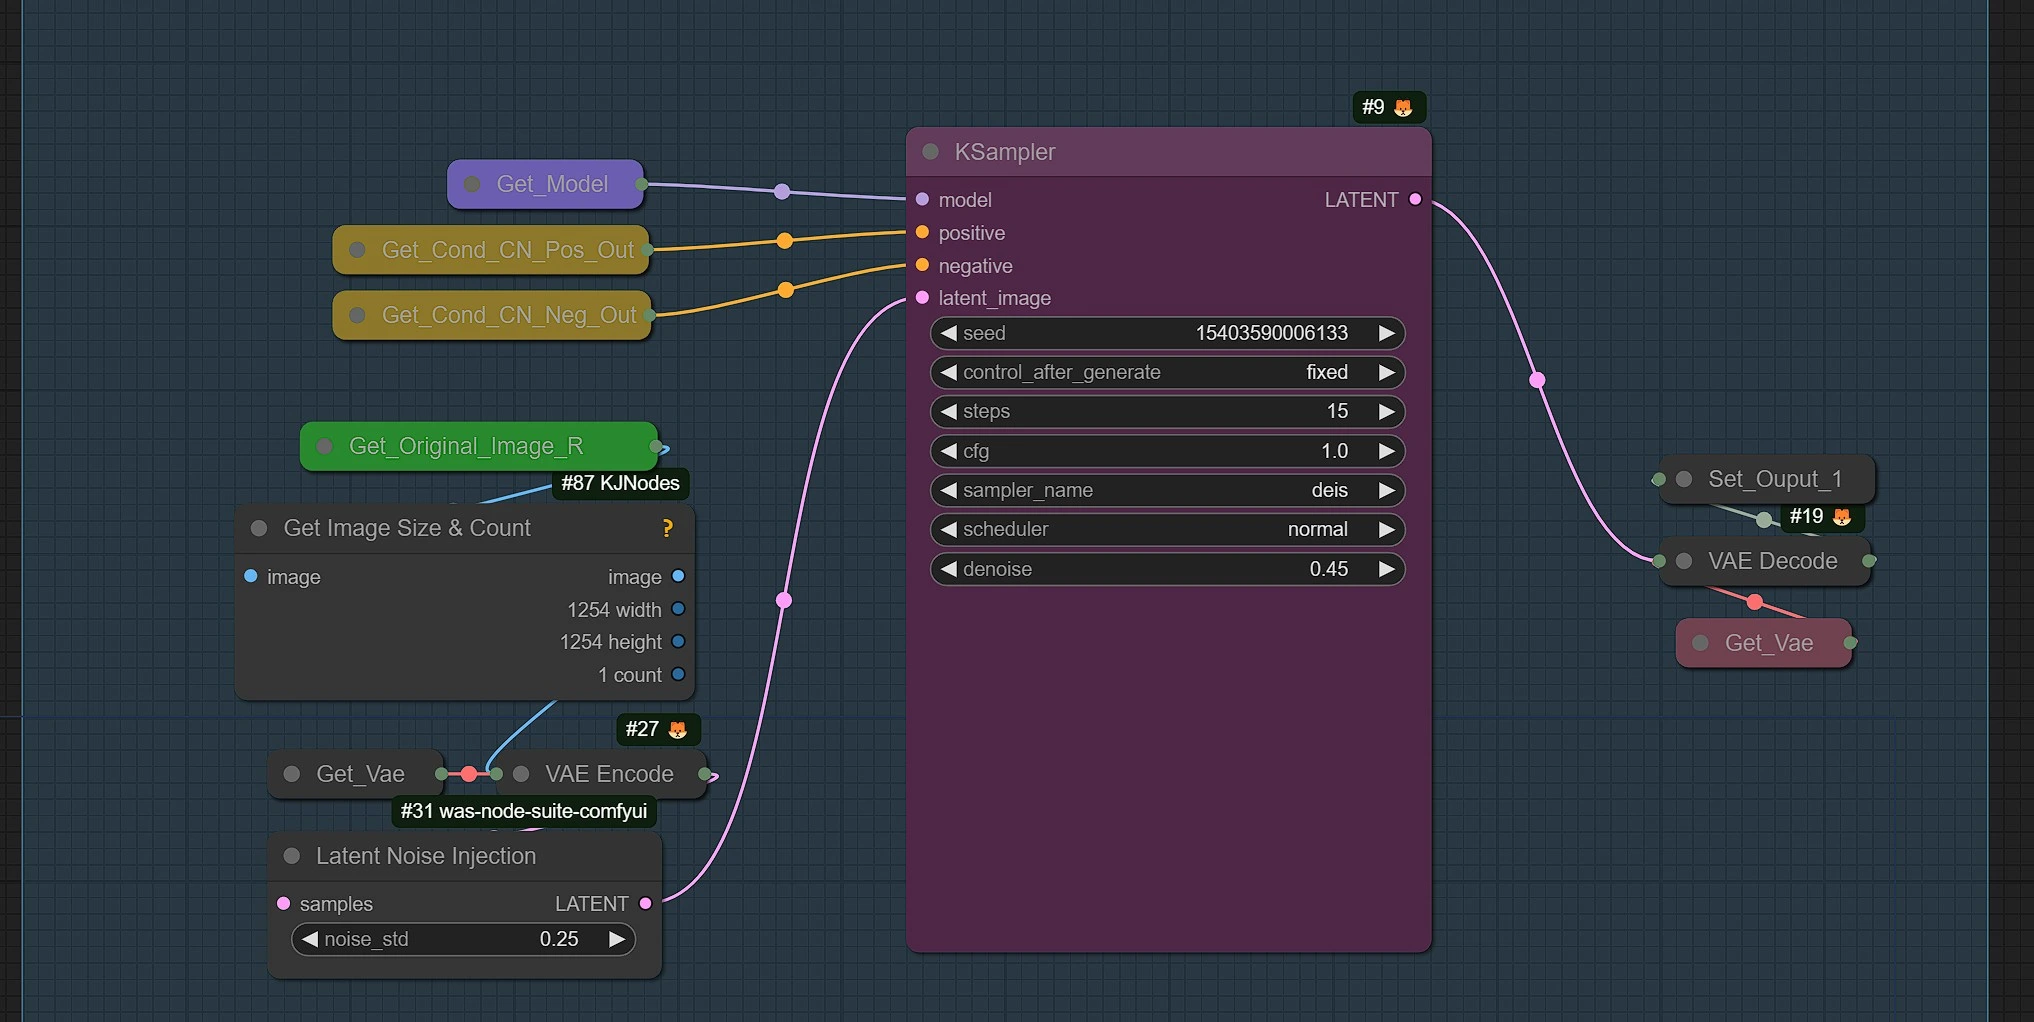
This Ksampler will give you a preview of how the upscaling is going to progress.
- Use Deis, Euler and Dpm_2 is seen to give best output. Feel free to try other sampers and schedulers.
- Use Low Denoising (0.2 - 0.4) if major details are getting lost.
- According to your selected Model, Loras and Prompts used, the image may slightly change from Original.
1.6 Ultimate SD Sampler
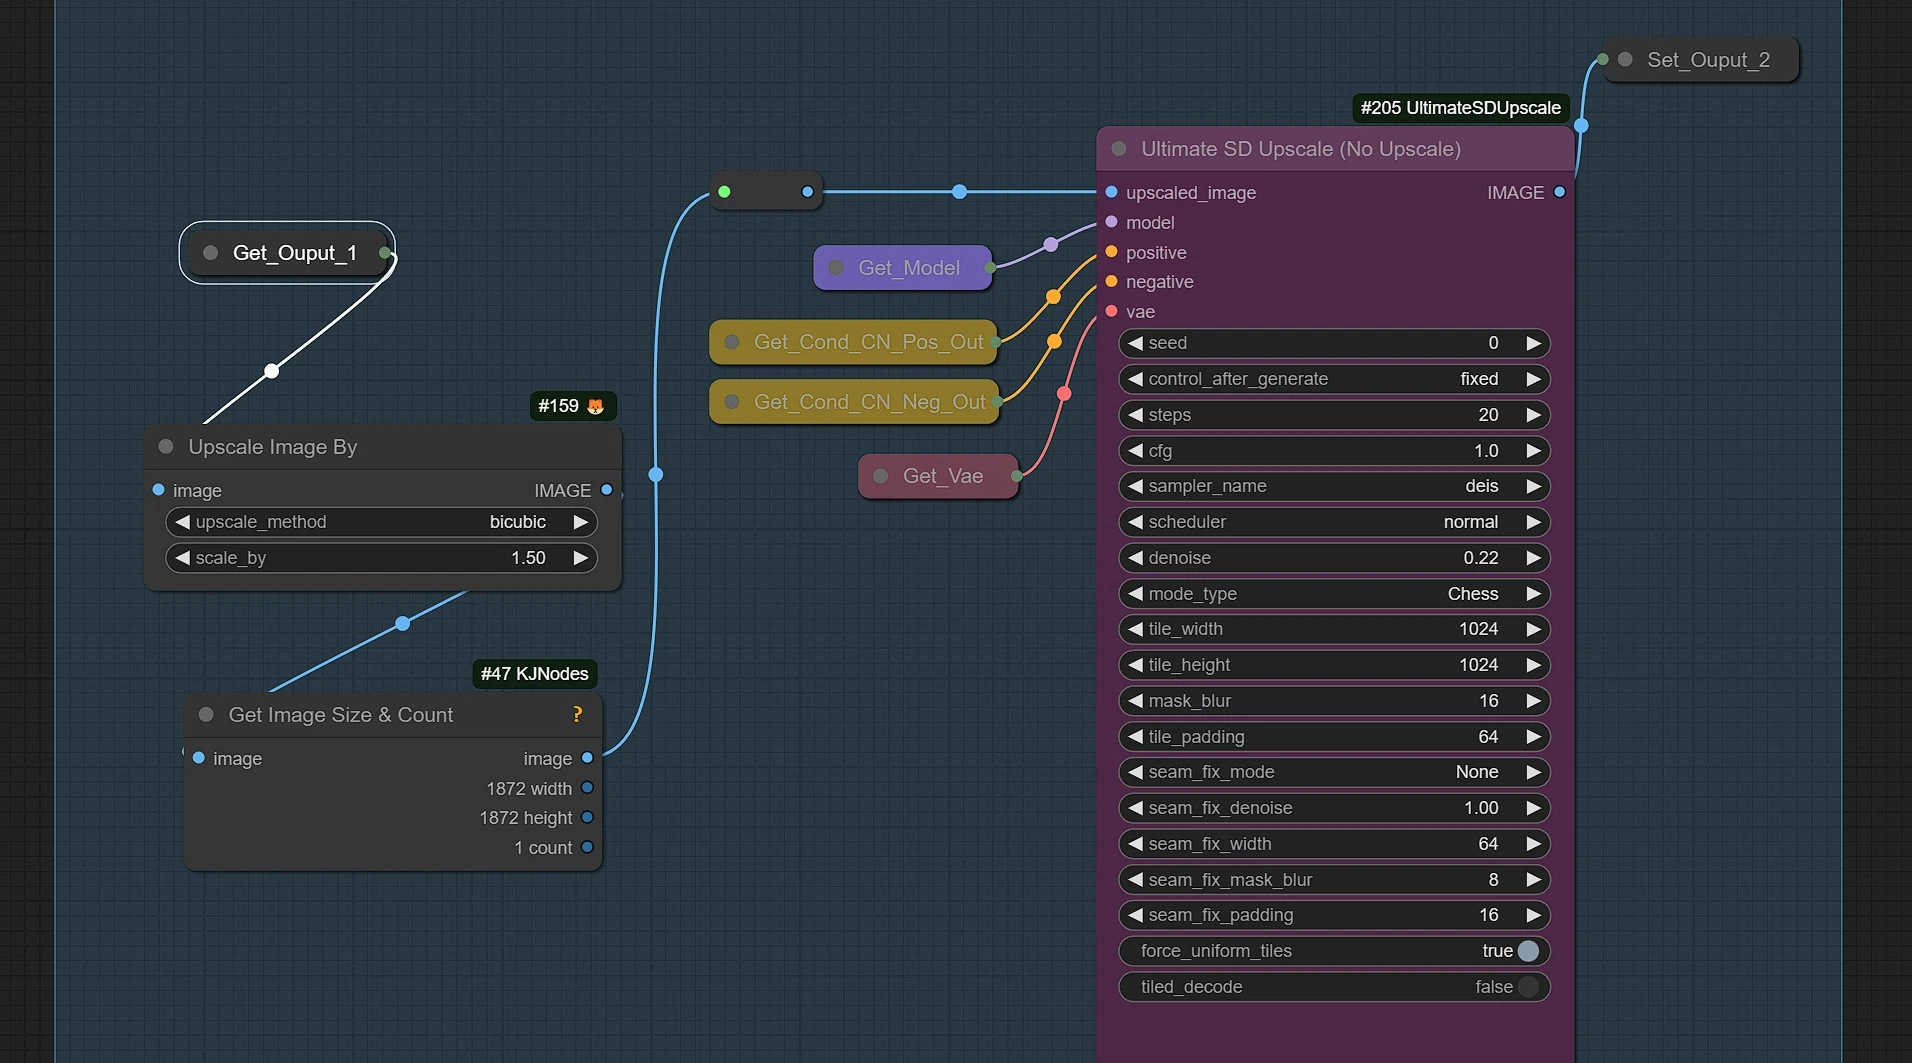
The SD sampler is set to best settings, just only with Denoise value and sampler name only.
Following are the Detailed parameters:
denoise:Uses from default img2img field. We recommend 0.35 value for image enhancements, but if you don't want changes, use 0.15-0.20.target size type:Where to get the size of the final image.from img2img settings:Default img2img width and height sliders.custom size:Built-in width and height sliders. Max values - 8192.scale from image size:Init image size multiplied by scale factor.
redraw:upscaler:Upscale image before redrawing. Use what you like. Our recommendation - ESRGAN for photorealistic images, R-ESRGAN 4x+ for others (less requirements).type:linear:All tiles processed one by one, column by column, row by row.chess:All tiles are processed in a checkerboard pattern, reducing the chance of seam artifacts.none:Disabled redraw. Use it when running generation without seam fix, seeing visible overlays or artifacts on seams, and wanting to run just seam pass. Don't forget to put upscaled image as the source before.
tile width:The width to be processed. The larger the tile, the fewer artifacts in the final image. For 2k, 512px is usually enough.tile height:The height to be processed. The default is 0, in which case it is equal to the width. Larger tiles reduce artifacts. For 2k, 512px is usually enough.padding:How many pixels of neighboring tiles will be taken into account during processing.mask blur:It is blur of masks used in tile masking. Set it to 12-16 on 512-768px size. Increase if you see seams.
seams fix:Do not use if the result image has no visible grid; it's just another redraw pass.type:bands pass:Adds passes on seams (rows and columns) and covers a small area around them (width in UI). It requires less time than offset pass.half tile offset pass:Adds two passes like redraw pass, but with a half-tile offset. One pass for rows with vertical gradient mask and one for columns with horizontal gradient mask. This pass covers a bigger area than bands and mostly produces better results, but requires more time.half tile offset + intersections pass:Runs Half tile offset pass, then runs extra pass on intersections with radial gradient mask.none:Disabled seams fix. Default value.
denoise: Denoise strength for seams fix.width:Redraw line width. Used only by "Band pass."padding:Pixels near the seam will be taken into account when processing a tile.mask blur:It is the blur of masks used in tile masking. Set to 8-16 on 32px padding. Increase if padding is increased.
save options:upscaled:Enabled by default. Saves image from Redraw.seams fix:Disabled by default. Saves image after Seams fix.
upscale_by:Number to multiply the width and height of the image by. For exact width and height, use the "No Upscale" version of the node and perform upscaling separately (e.g., ImageUpscaleWithModel -> ImageScale -> UltimateSDUpscaleNoUpscale).force_uniform_tiles:If enabled, tiles cut off by the image edges will expand using the rest of the image to keep consistent tile size as determined by tile_width and tile_height (similar to A1111 Web UI). If disabled, minimal tile size will be used, which may speed up sampling but can cause artifacts due to irregular tile sizes.
1.7 Upscaled Preview
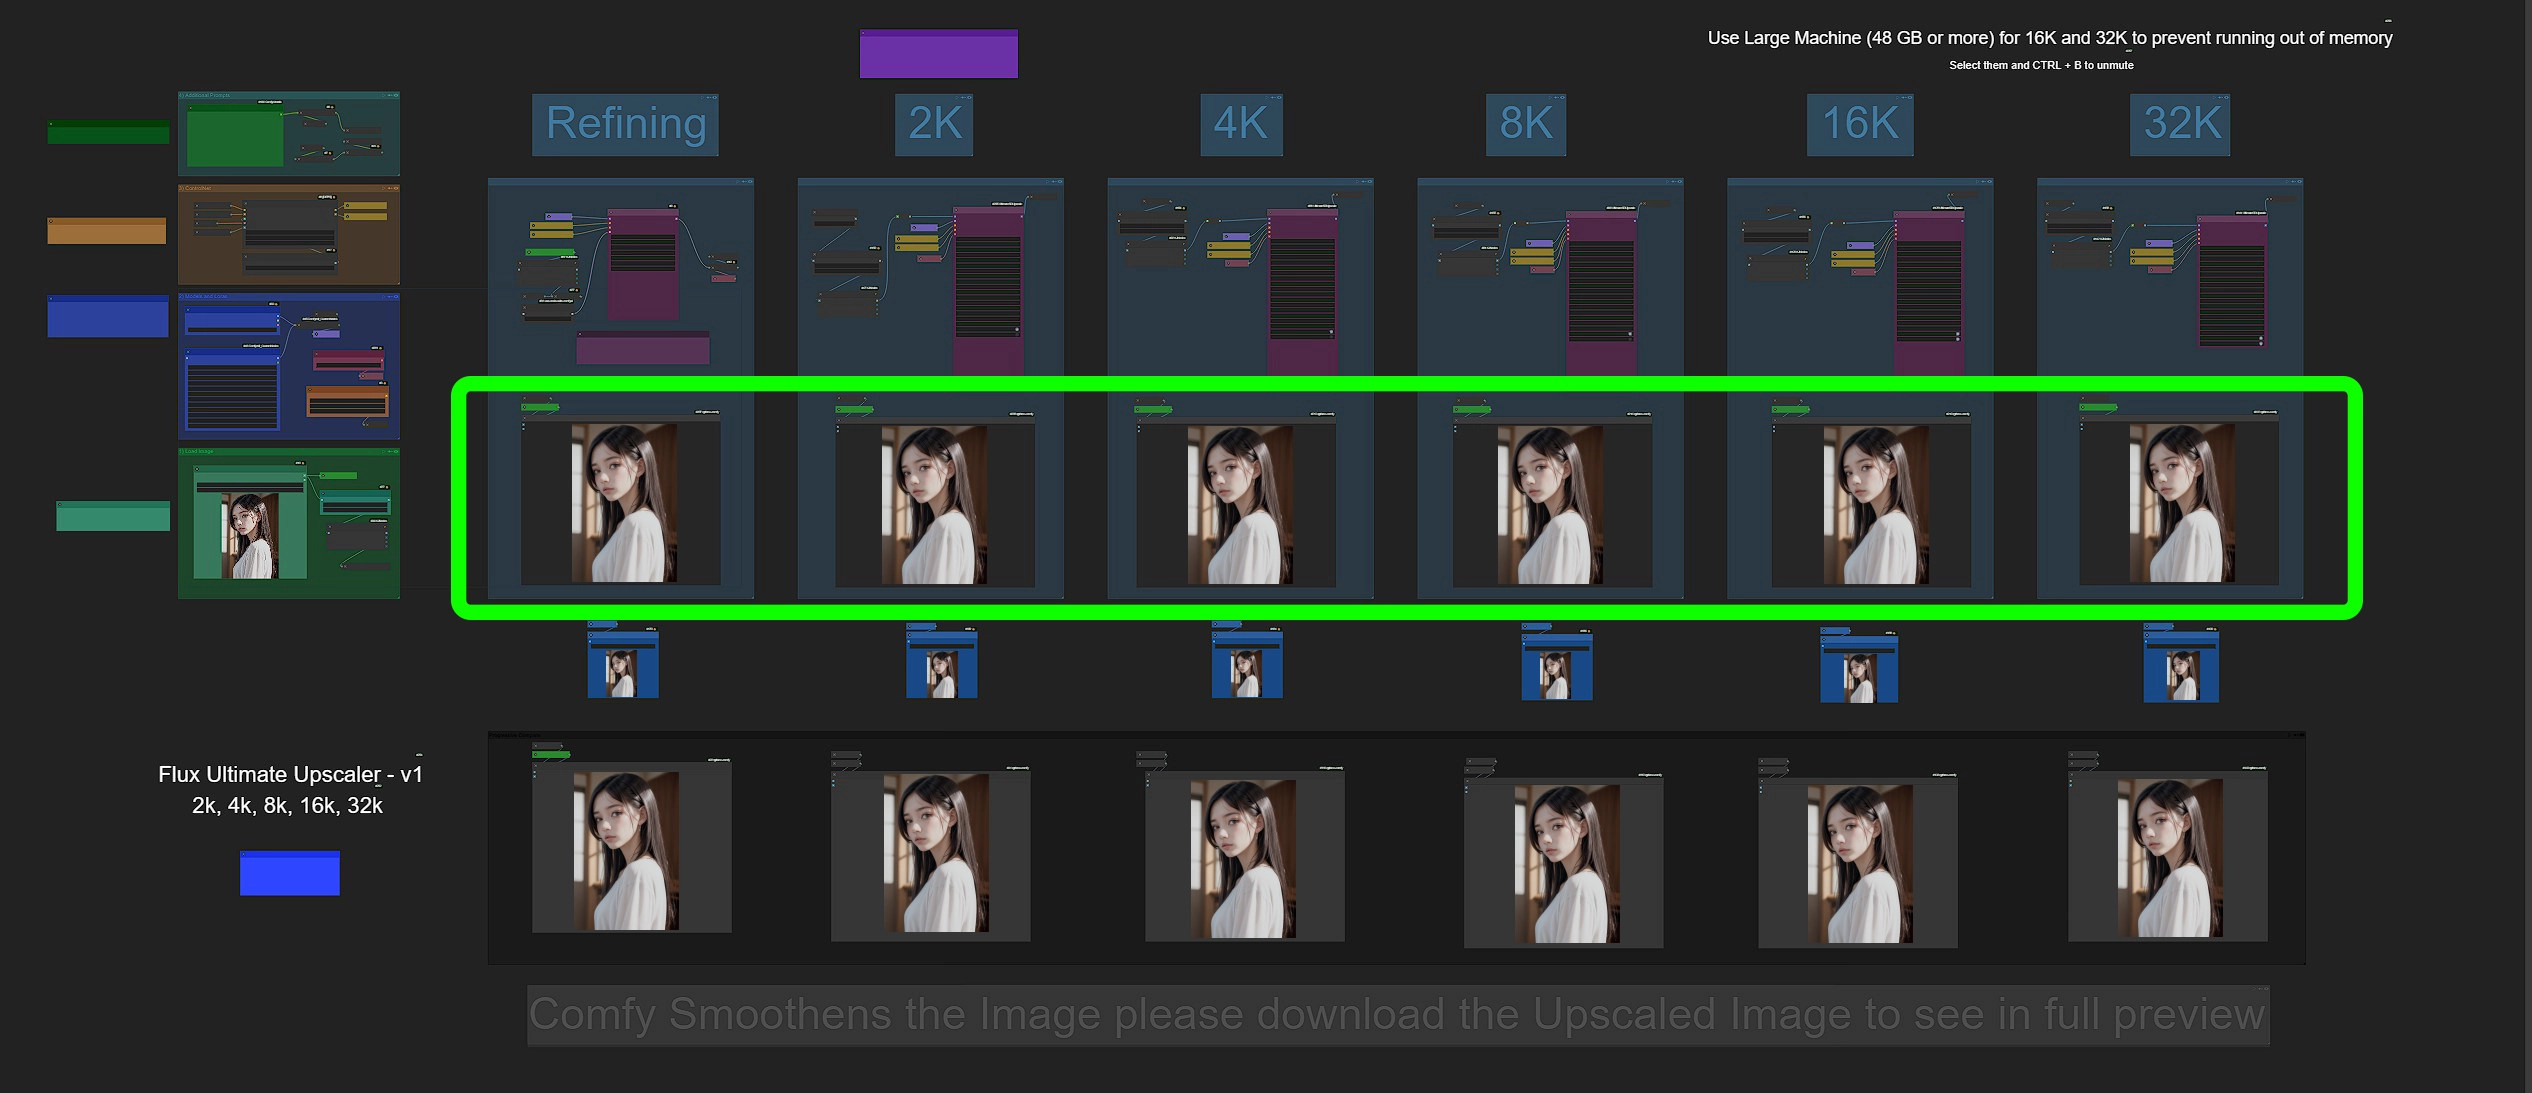
You can see your upscaled preview here. These nodes will give the comparison of original image vs the upscaled image
Flux Upscaler’s sophisticated processing pipeline incorporates customizable settings that allow users to fine-tune each stage of the Flux upscaling process. With features like adjustable denoise strength, seam-fixing algorithms, and tile padding, Flux Upscaler ensures smooth transitions across image sections, even at extreme resolutions. Users can optimize performance with tiling options, such as “Linear” or “Checkerboard,” and utilize upscale presets for photorealistic (ESRGAN) and general-purpose (R-ESRGAN 4x+) outputs to suit various stylistic needs. These capabilities make Flux Upscaler an adaptable choice for artists and designers aiming for flawless upscaling in both realistic and artistic renderings.
Beyond its technical prowess, Flux Upscaler is crafted for workflow flexibility. Users can save intermediate and final upscaled images, apply multiple redraw passes, and set custom tile sizes to balance quality and processing speed. Advanced scaling options in Flux Upscaler allow users to either multiply image dimensions based on the original size or define exact output sizes as needed. By preserving high-definition imagery’s integrity and aesthetics, Flux Upscaler becomes an invaluable asset for projects demanding impressive visual detail, from large-scale digital art to cinematic-quality visuals.

