Blender + ComfyUI | AI Rendering 3D Animations
Transform your 3D animation projects with AI rendering. First, use Blender to set up 3D scenes and generate image sequences, including mask, depth, and outline sequences. Then, use ComfyUI for rendering. In ComfyUI, you can render each object separately, ultimately producing stunning animations with full creative control.ComfyUI 3D Animation Rendering Workflow
- Fully operational workflows
- No missing nodes or models
- No manual setups required
- Features stunning visuals
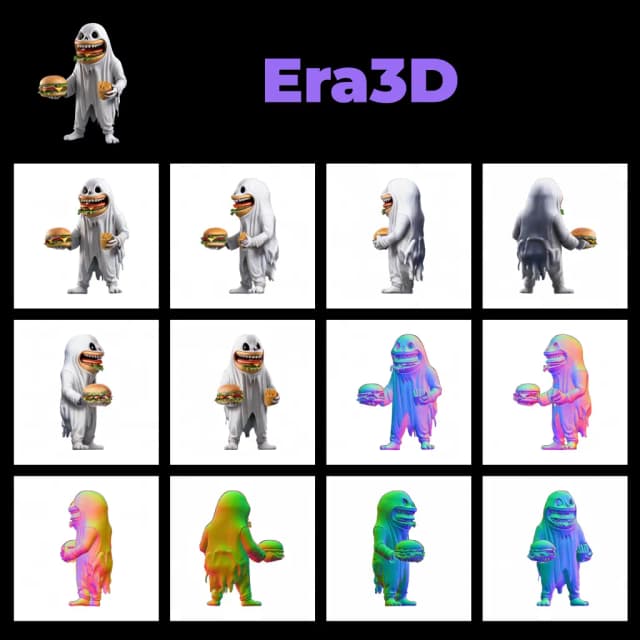
ComfyUI 3D Animation Rendering Examples
ComfyUI 3D Animation Rendering Description
AI Renderings of 3D Animations: Blender + ComfyUI
This innovative workflow, developed by the talented , combines Blender and ComfyUI to produce stunning 3D animations rendered with AI. We highly recommend checking out his YouTube channel for more inspiration.
In the following, we used different materials to reproduce his approach. Here are the steps:
🌟
Part 1: Using Blender to Create 3D Animations and Render Passes
1. Set Up a 3D Scene in Blender
- Start by importing or modeling the necessary 3D assets, such as characters, environments, and props. Arrange these assets within the scene, position the cameras, and set up any required animations. Remove existing materials, textures, and lights, as ComfyUI will generate these during the rendering process.
2. Render Depth Pass
- The depth pass provides essential distance information to enhance depth perception, which will be utilized in ComfyUI.
- In Blender, go to
View Layer Properties, activate theZpass, and render the image. In theCompositingtab, connect a viewer node to the depth output. Normalize the depth values using aMap Rangenode to create a black-and-white gradient representing the scene's depth.
3. Render Outline Pass
- The outline pass produces line art edges that define the shapes and silhouettes of objects for use in ComfyUI.
- In Blender, use the Freestyle tool to create outlines based on the 3D geometry. Set the color to white and adjust the line thickness. Render the image and process it in the
Compositingtab.
4. Render Mask Pass
- The mask pass assigns unique colors to different objects. Make sure to note the Hex Codes for these colors, as they will be used for specific AI prompts in ComfyUI.
- In Blender, assign simple emission shaders with distinct colors to each object. Render the image and save it.
For detailed instructions on these steps, refer to 's YouTube tutorial if you are unfamiliar with Blender.
After completing Part 1, you will have created three types of image sequences: mask images, depth images, and outline images. These will be used in the next step with ComfyUI.
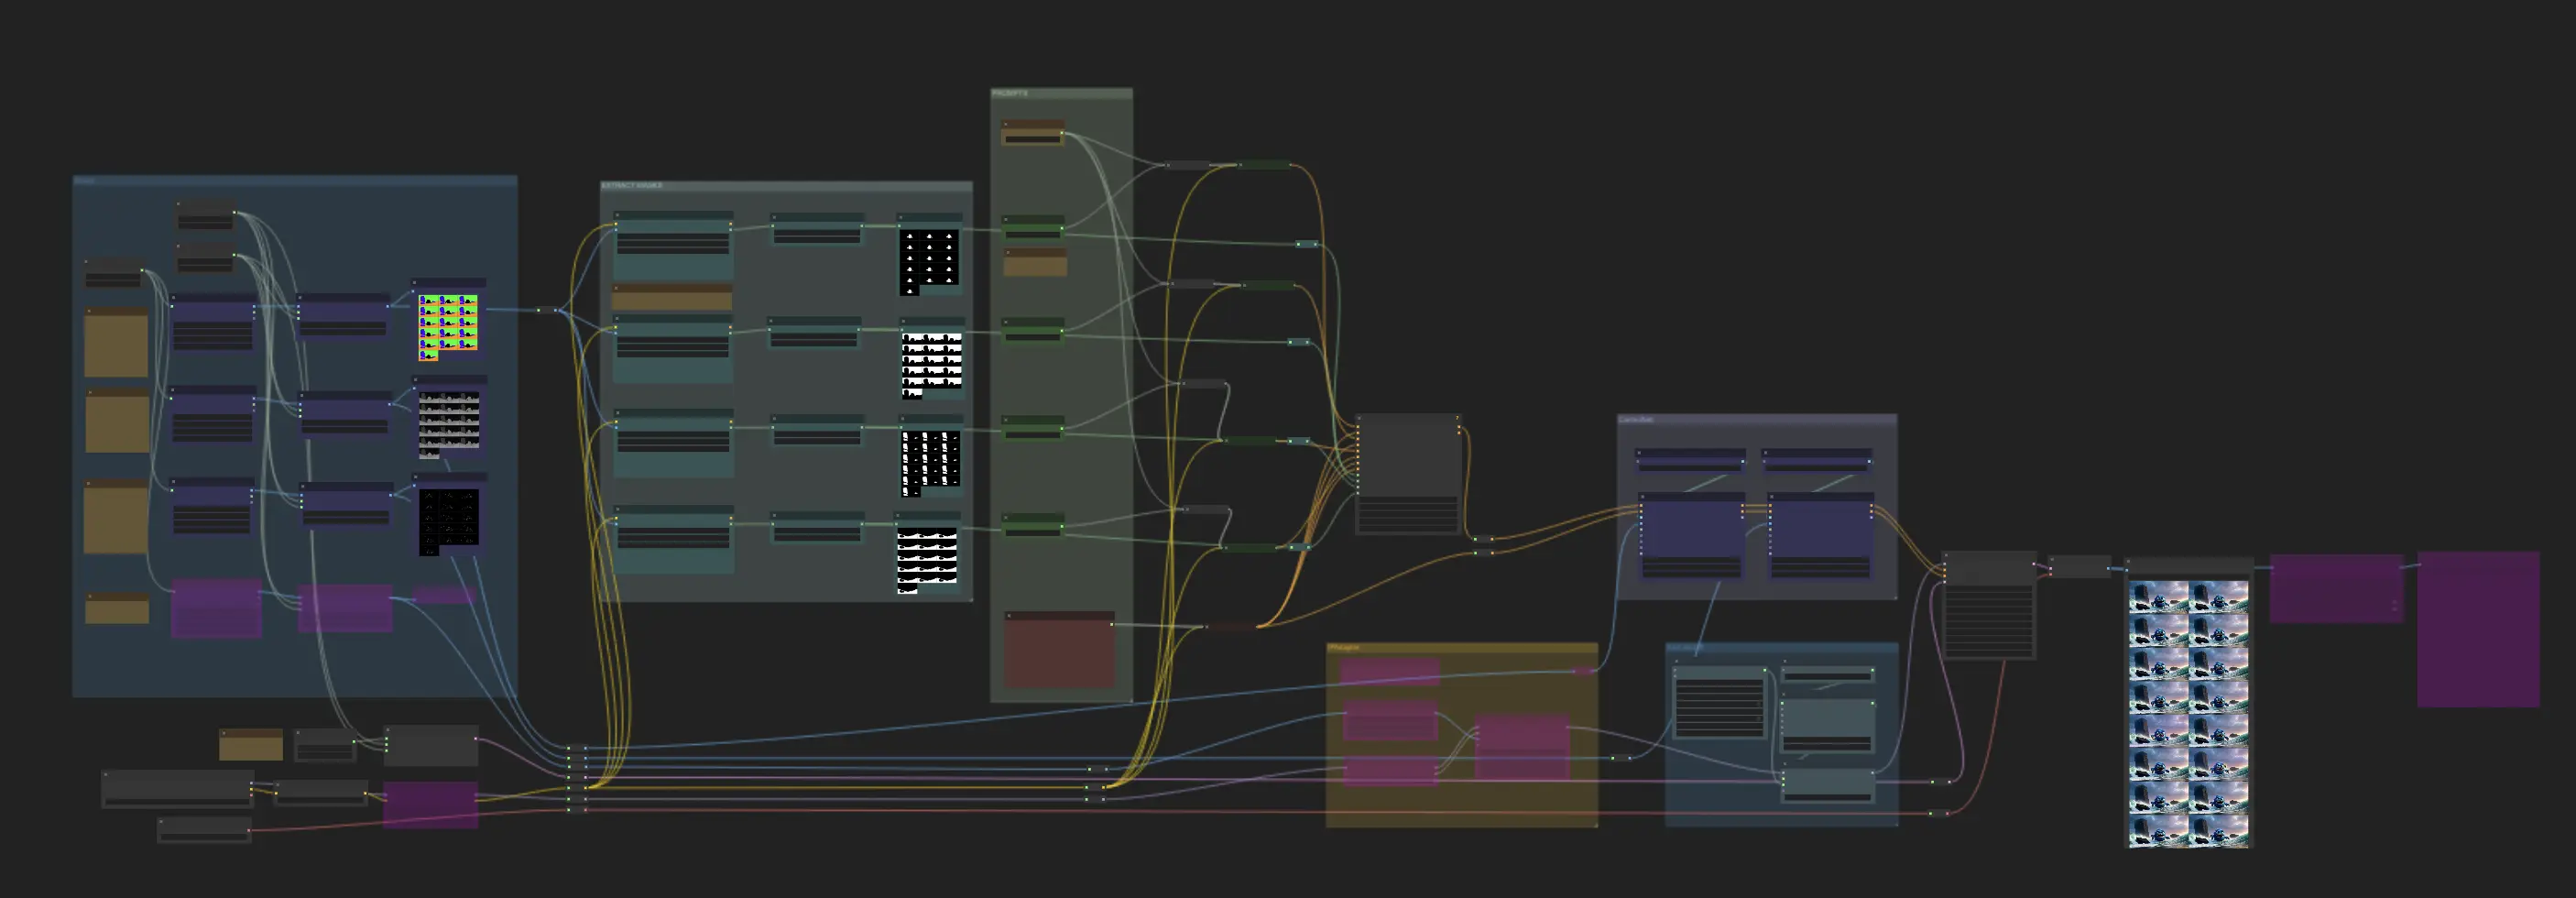
Part 2: Using ComfyUI to Render AI Animations
Mickmumpitz's ComfyUI workflow consists of several key components:
1. Load Image Sequences
- Load Mask Sequences: Load the mask sequence and then use the "regional conditioning by color mask" node to separate the objects in the mask image. Enter the Hex Code obtained from Step 1 into the "mask_color" field. This node will then automatically segment objects based on the assigned colors. 🌟 Note: We use specific Hex Codes for our materials in this workflow. If you use a different mask image, make sure to enter the corresponding Hex Code in the "mask_color" field. This ensures the "regional conditioning by color mask" node correctly segments the objects.
- Load Depth Sequences: Load the depth sequences to provide information about the distance of objects in the scene.
- Load Outline Sequences: Load the outline sequences to define the shapes and edges of objects in the scene.
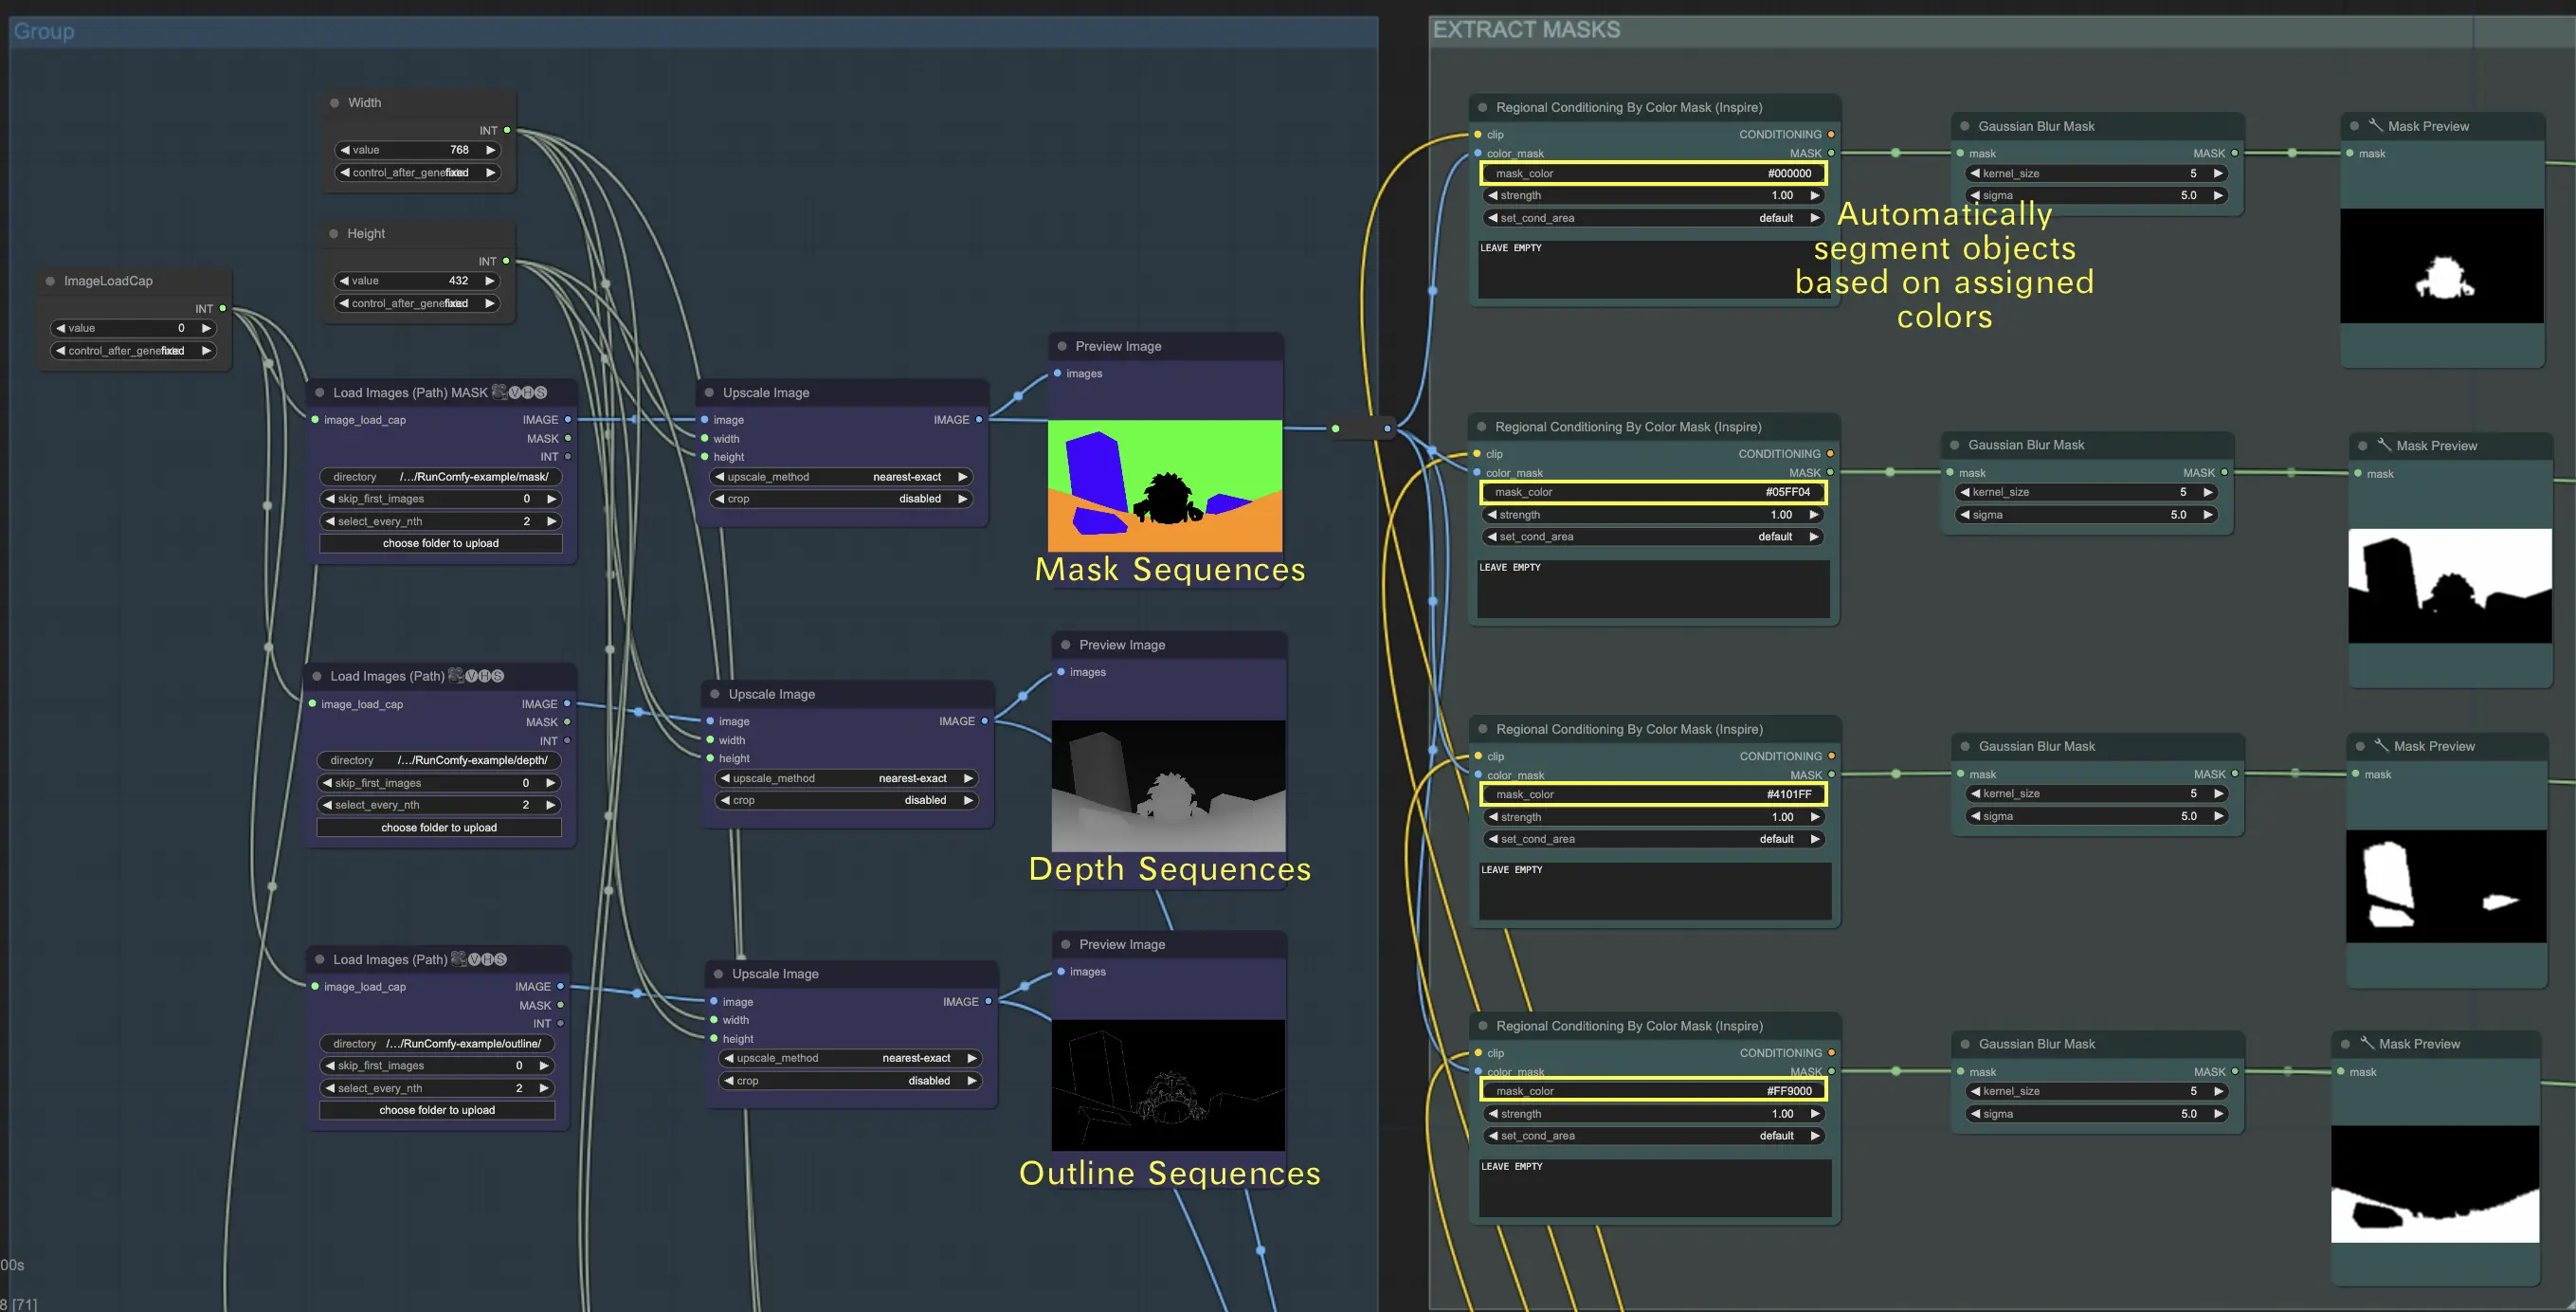
🌟 How to Load Image Sequences by Path
Organize Your Sequences
- Place your mask sequences in a folder, for example,
{mask}. - Place your depth sequences in a separate folder, for example,
{depth}. - Place your outline sequences in another folder, for example,
{outline}.
Upload Folders
- Use our file browser to upload these folders to the
ComfyUI/inputdirectory.
Directory Path
- The full directory path should be:
/home/user/ComfyUI/input/{folder_name}. - For example:
/home/user/ComfyUI/input/{mask}.
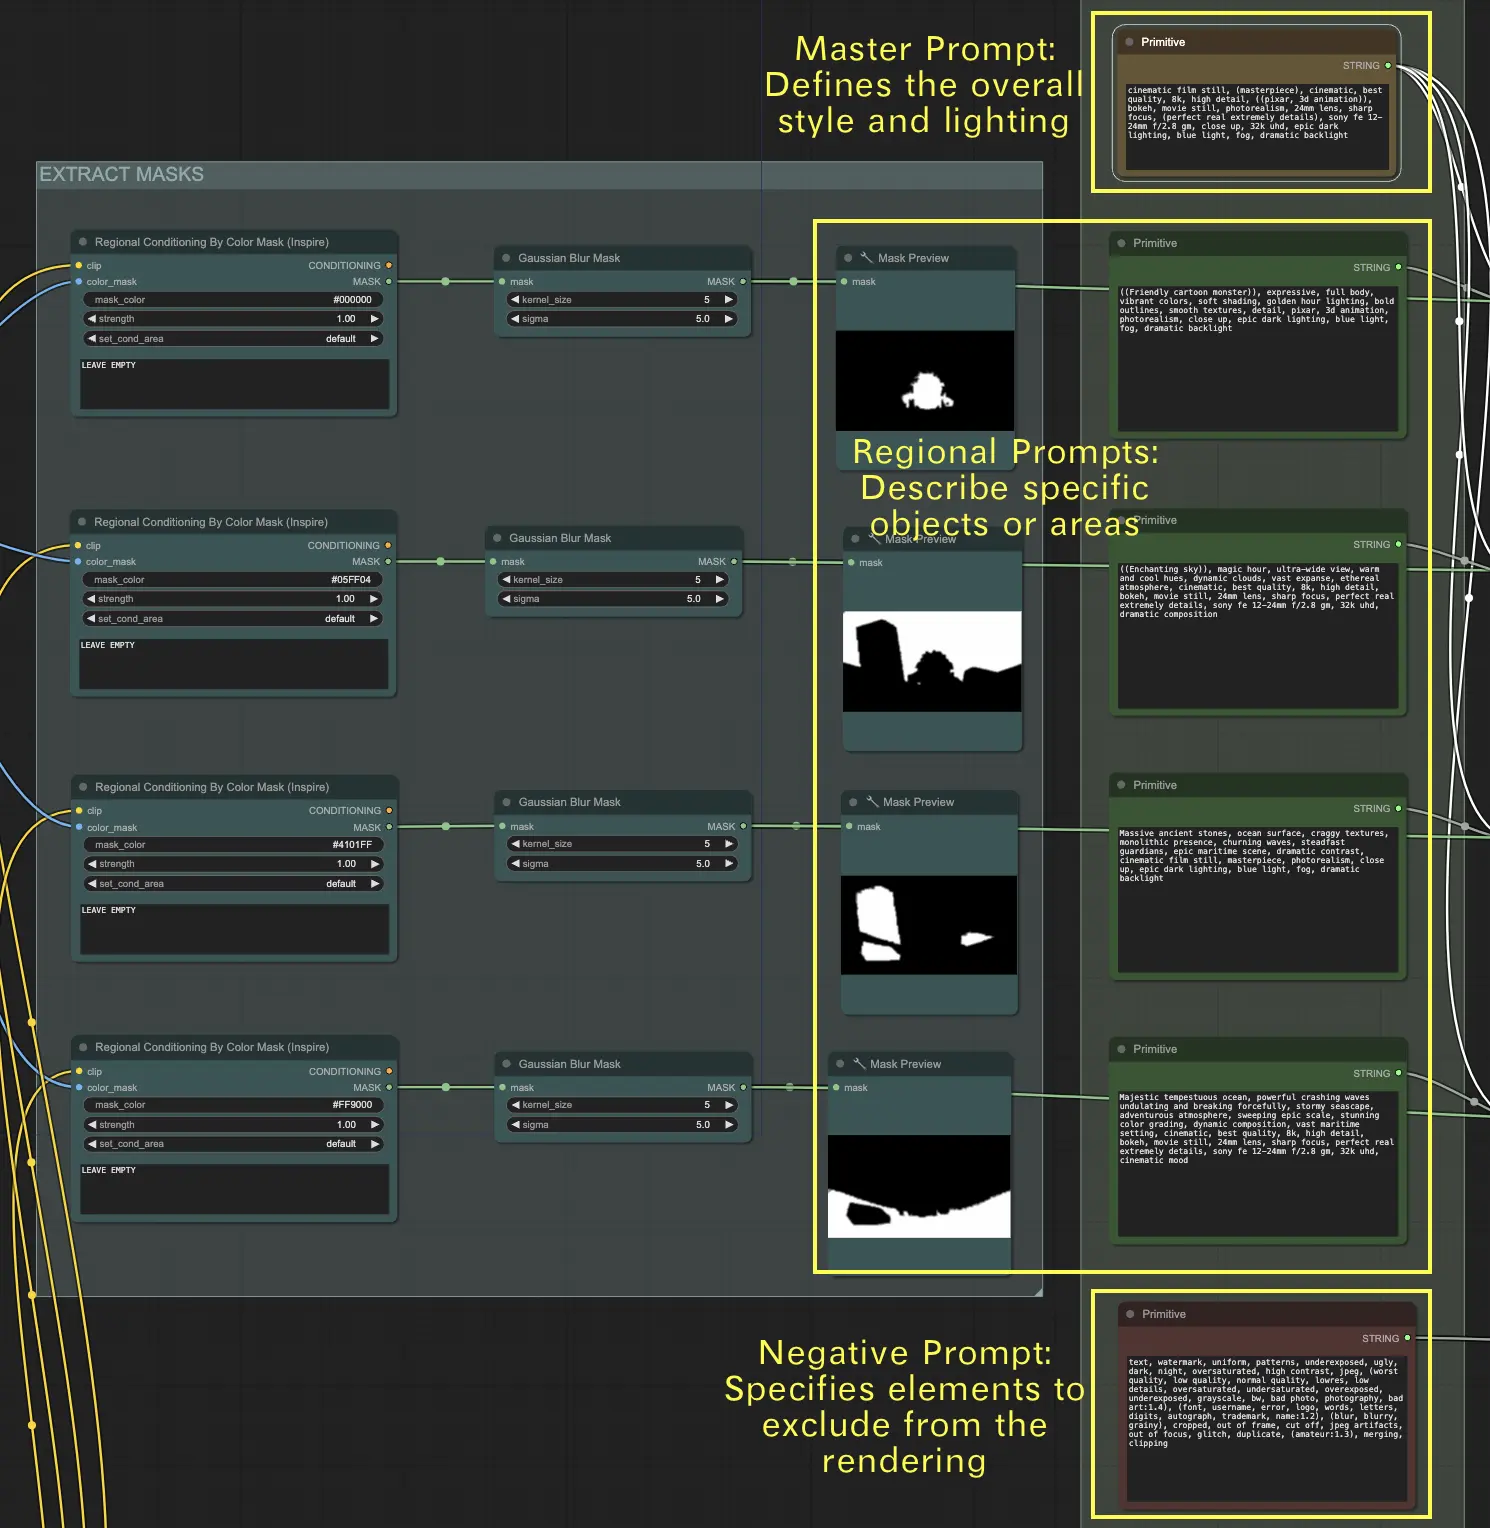
2. Use Text Prompts to Define Visual Effects
For Mask Sequences, use text prompts to specify the desired visual effects for each object in the scene.
- Master Prompt: This prompt sets the overall style and lighting for the entire scene. It dictates the general mood, atmosphere, and visual tone that the final rendering should achieve.
- Regional Prompts: These prompts provide detailed descriptions for specific objects or areas within the scene. Each prompt should correspond to a distinct object or region, ensuring that every element is accurately represented as intended.
- Negative Prompt: This prompt lists the elements that should be excluded from the rendering. It helps to prevent certain features or objects from appearing in the final output, ensuring the scene remains focused and free from unwanted details.
3. ControlNet Module
- Input the depth sequences into the ControlNet Depth model.
- Input the outline sequences into the ControlNet Canny model.
4. AnimateDiff Module
- Use this module to render smooth animations from the processed sequences.
5. Optional IPAdapter Usage
- Use the IPAdapter for additional conditioning guidance to improve the consistency and quality of the generated images.
By leveraging Blender's precise 3D data alongside the powerful image synthesis capabilities of Stable Diffusion via ComfyUI, you can generate incredibly photorealistic or stylized 3D animations with full creative control.