
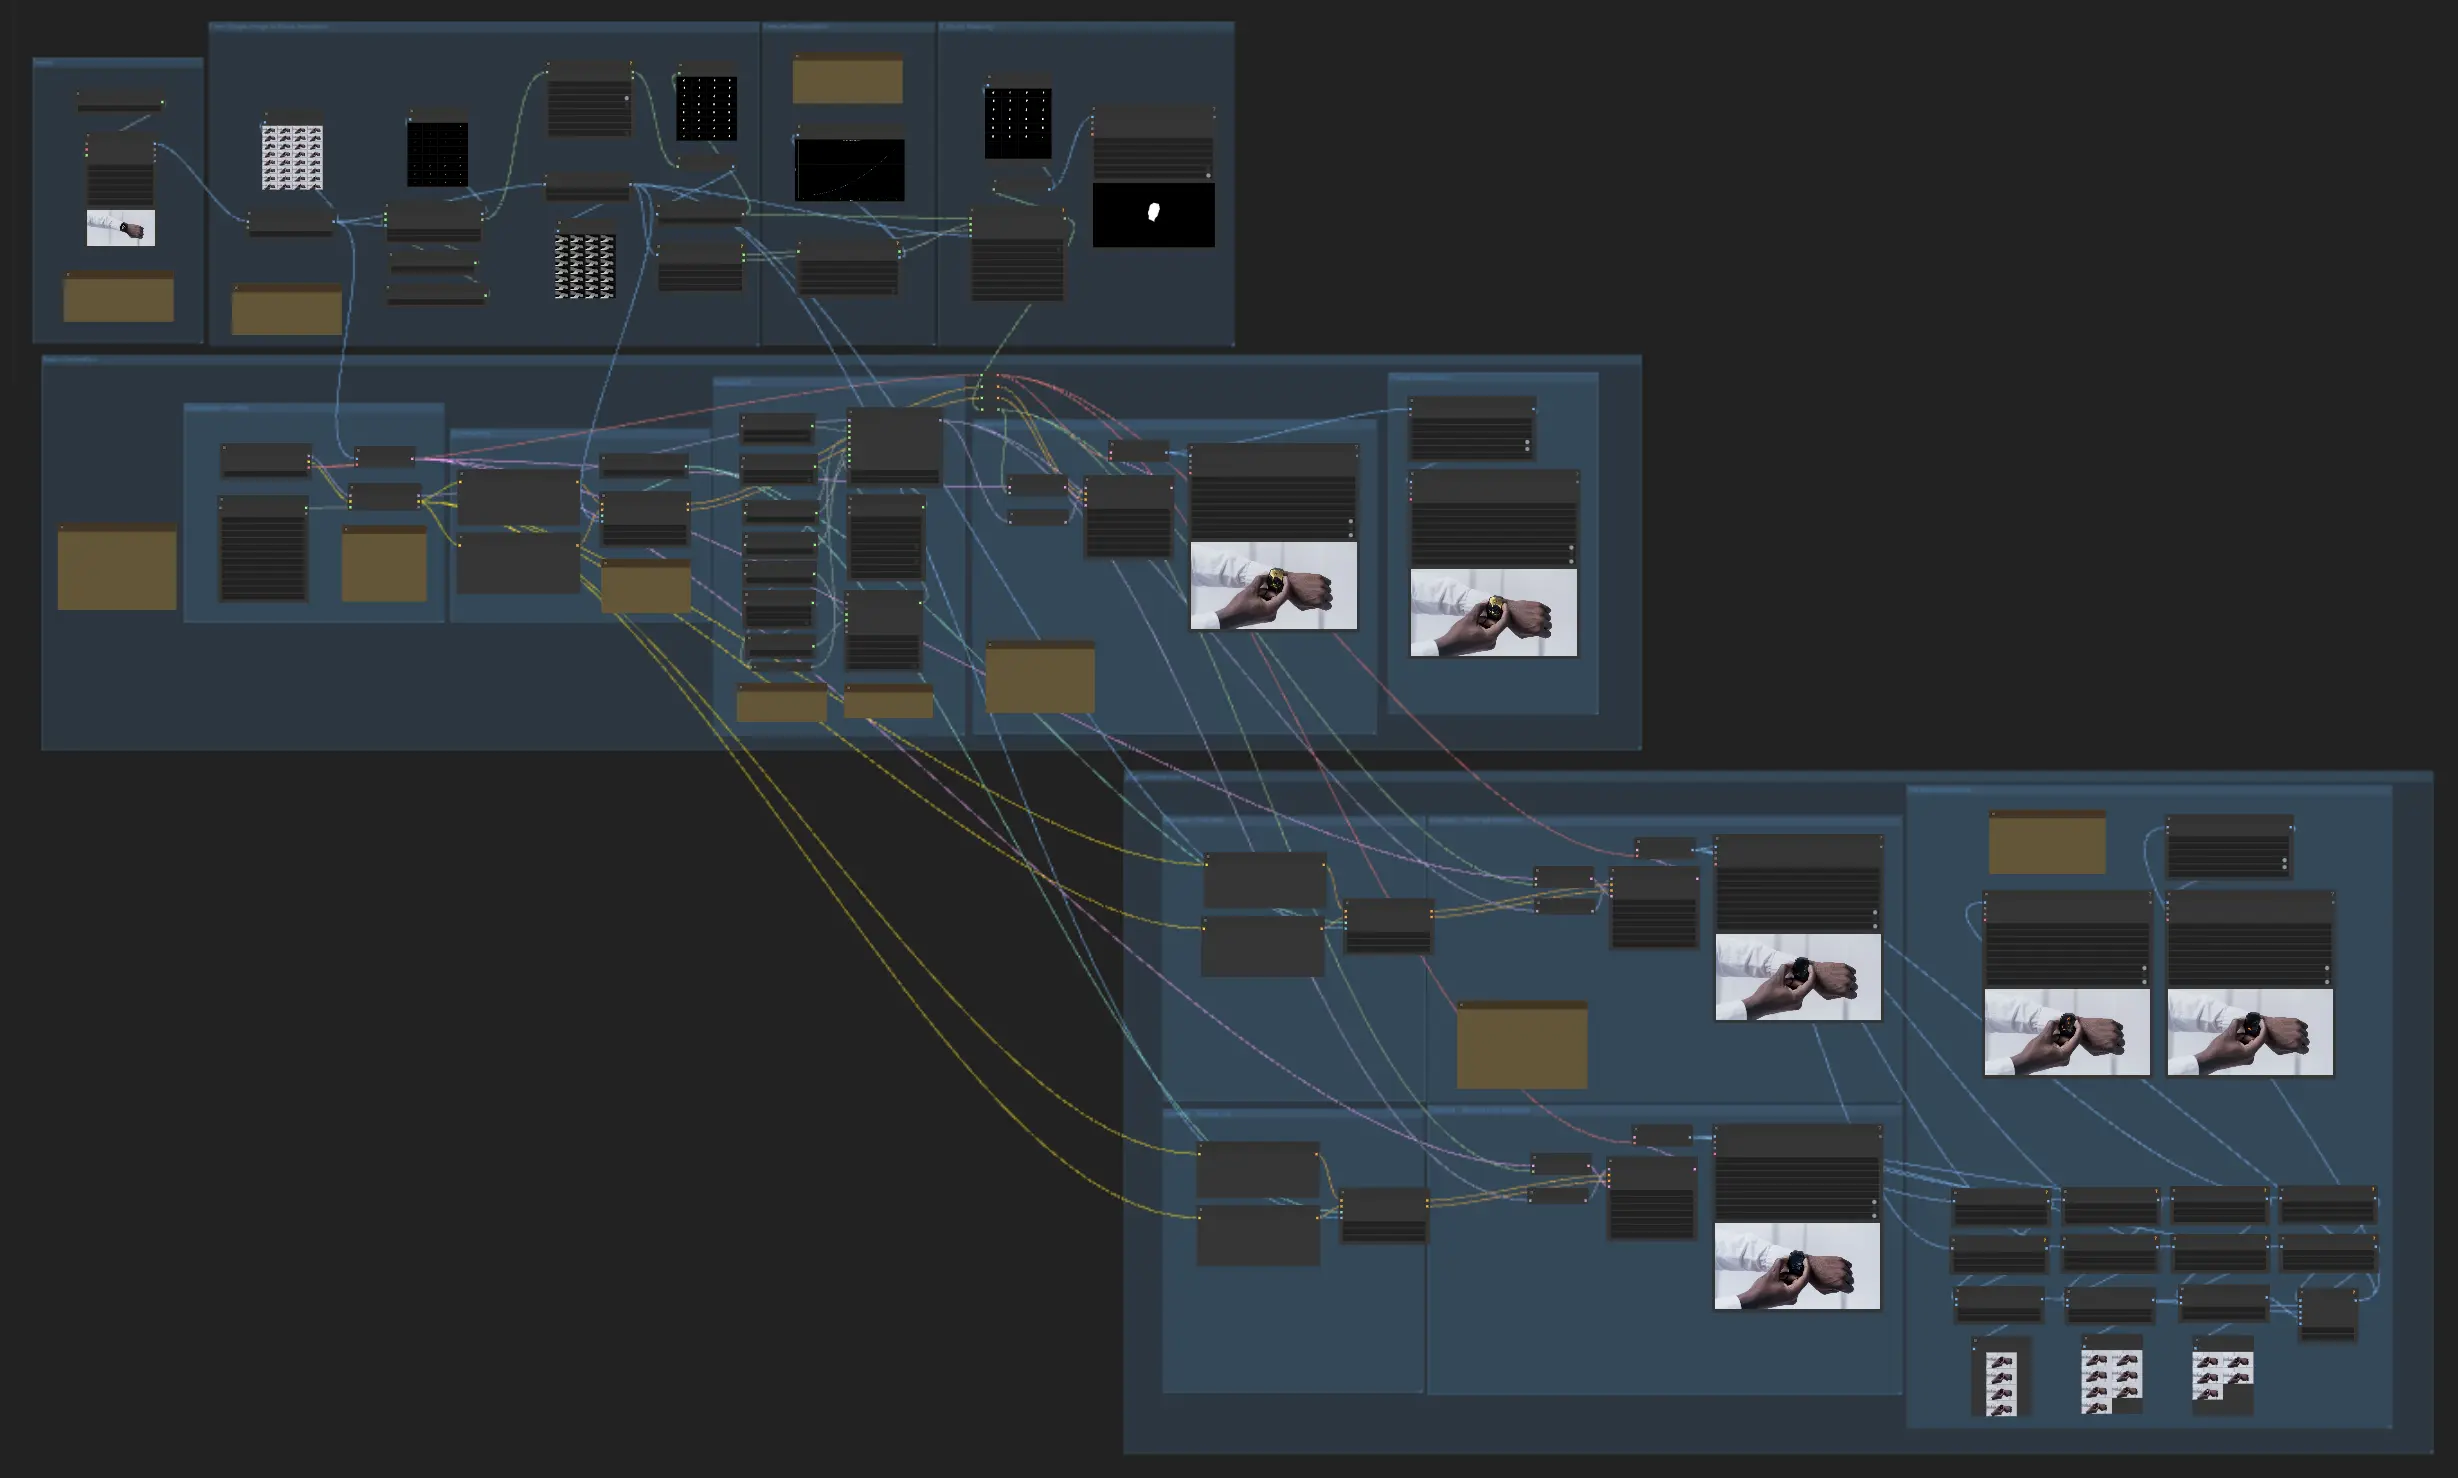
This ComfyUI motion graphics workflow empowers you to create stunning motion graphics animation effects by transforming pre-existing video inputs into captivating animations with 3D effects and smooth transitions.
Step 1: Input Selection and Preprocessing for Motion Graphics#
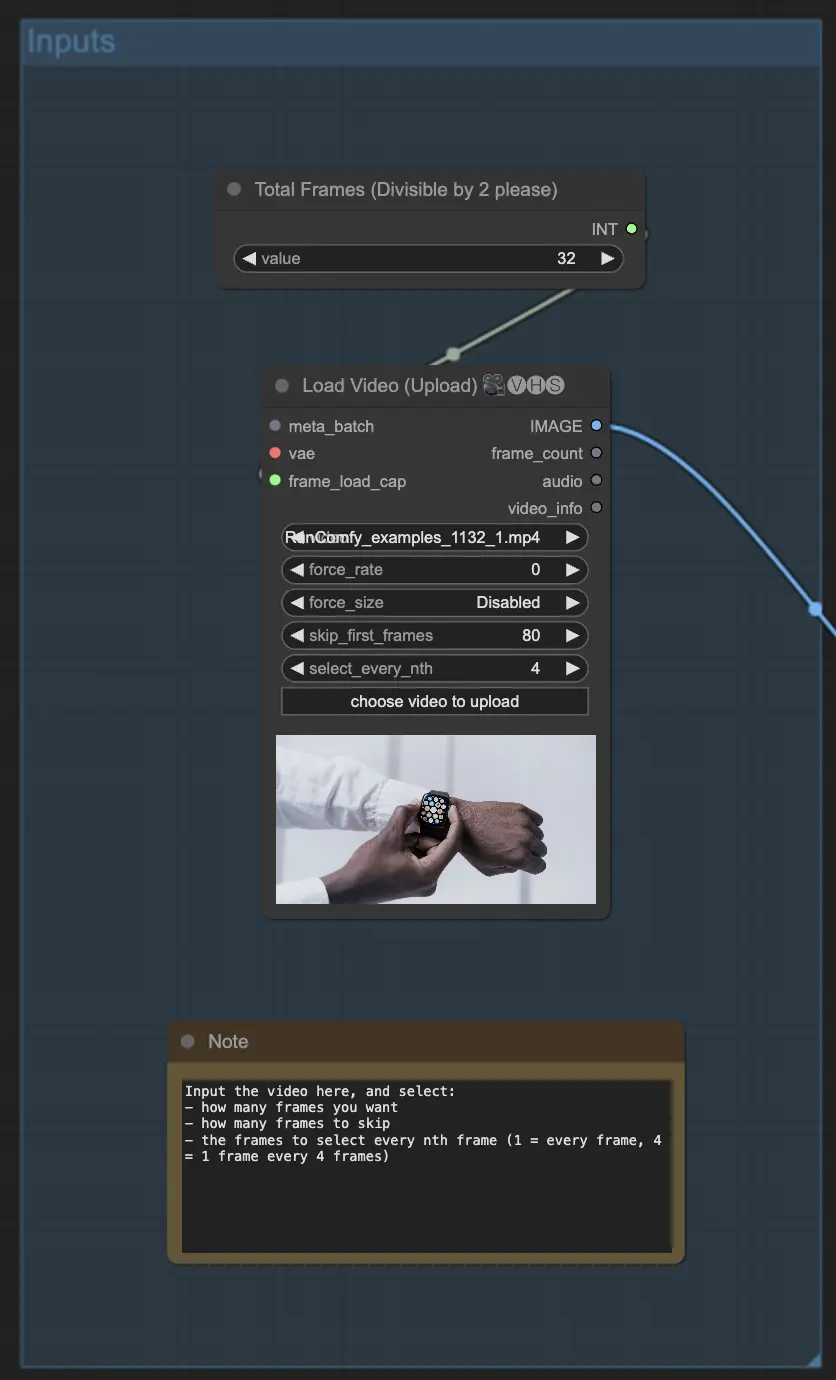
1.1. Begin by selecting your input video using the LoadVideoInput node. Adjust the "Skip First Frames" and "Select Every Nth Frame" parameters to control which frames from the video will be used in the motion graphics animation. This is useful for reducing the number of frames to process, especially if your input video has a high frame rate or if you're working with limited hardware resources.
1.2. Scale the selected frames to your desired resolution using the ImageScaleToMegapixels node. A resolution of around 1 megapixel (e.g., 1280x720) is generally sufficient for most motion graphics animations, but you can adjust this based on your specific needs and hardware capabilities.
Step 2: Subject Segmentation and Mask Generation for Motion Graphics#
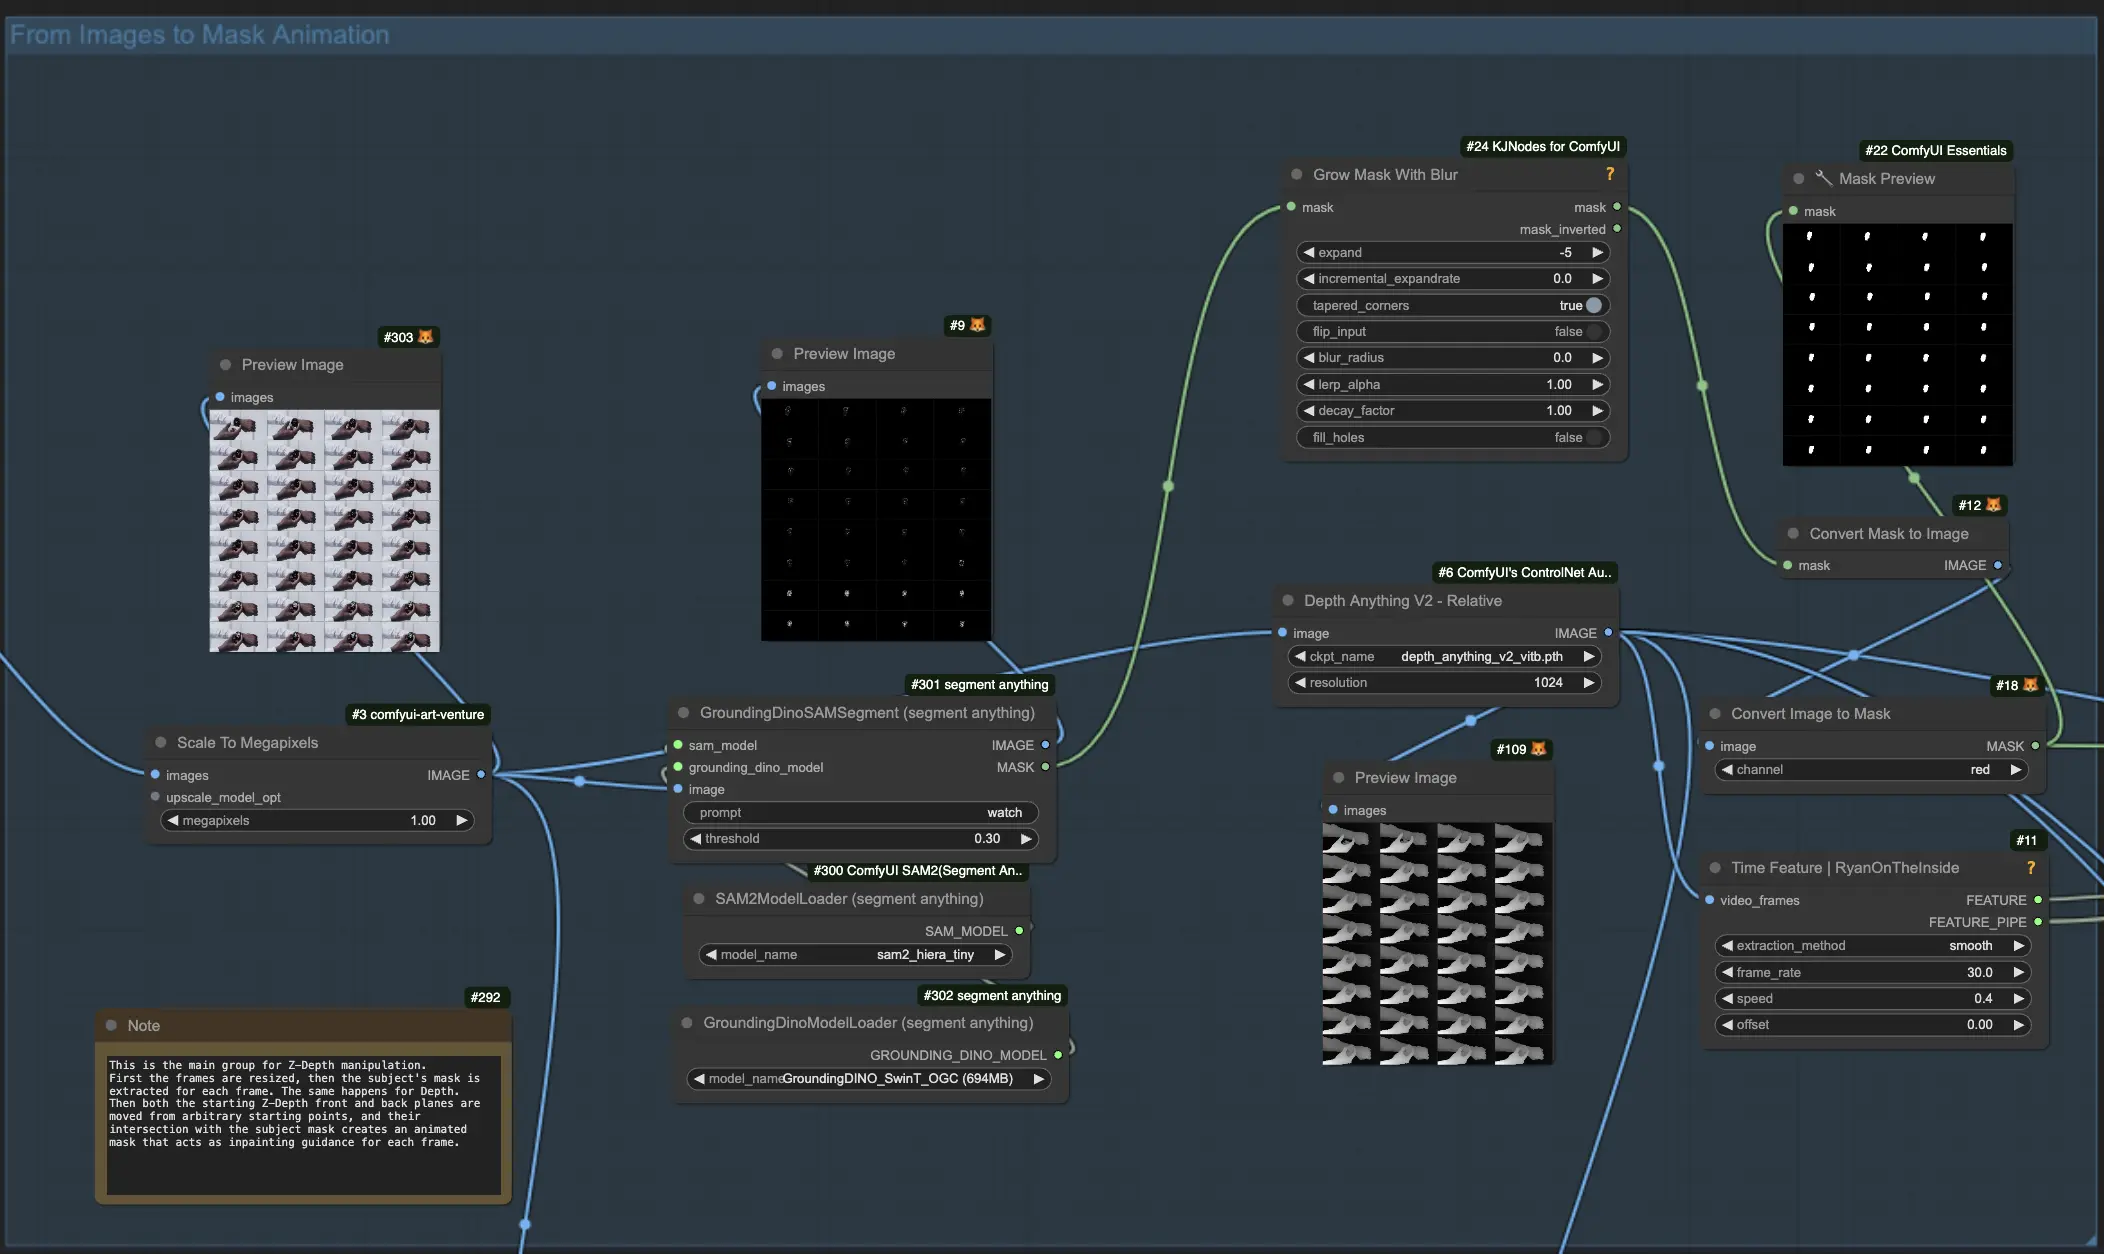
2.1. Load the GroundingDINO and SAM models using their respective nodes. These models will be used to segment the main subject from the input video frames, which is crucial for creating compelling motion graphics.
2.2. Use the GroundingDinoSAMSegment node to extract the subject based on a text prompt. This node takes the preprocessed frames from step 1 and generates a segmentation mask for each frame, isolating the main subject you want to animate in your motion graphics project.
2.3. To ensure a smooth and seamless motion graphics animation, slightly grow the segmentation mask using the GrowMaskWithBlur node. This will help to include any edges or details that may have been missed during the initial segmentation.
2.4. Convert the grown mask into an image format using the MaskToImage node. This step prepares the mask for use in the subsequent motion graphics animation steps.
Step 3: Feature Manipulation and Animation Control for Motion Graphics#
3.1. Create a time-based animation feature using the TimeFeatureNode. This node extracts features from the input frames and generates a control signal that can be used to manipulate various parameters throughout the motion graphics animation, such as z-depth and mask position.
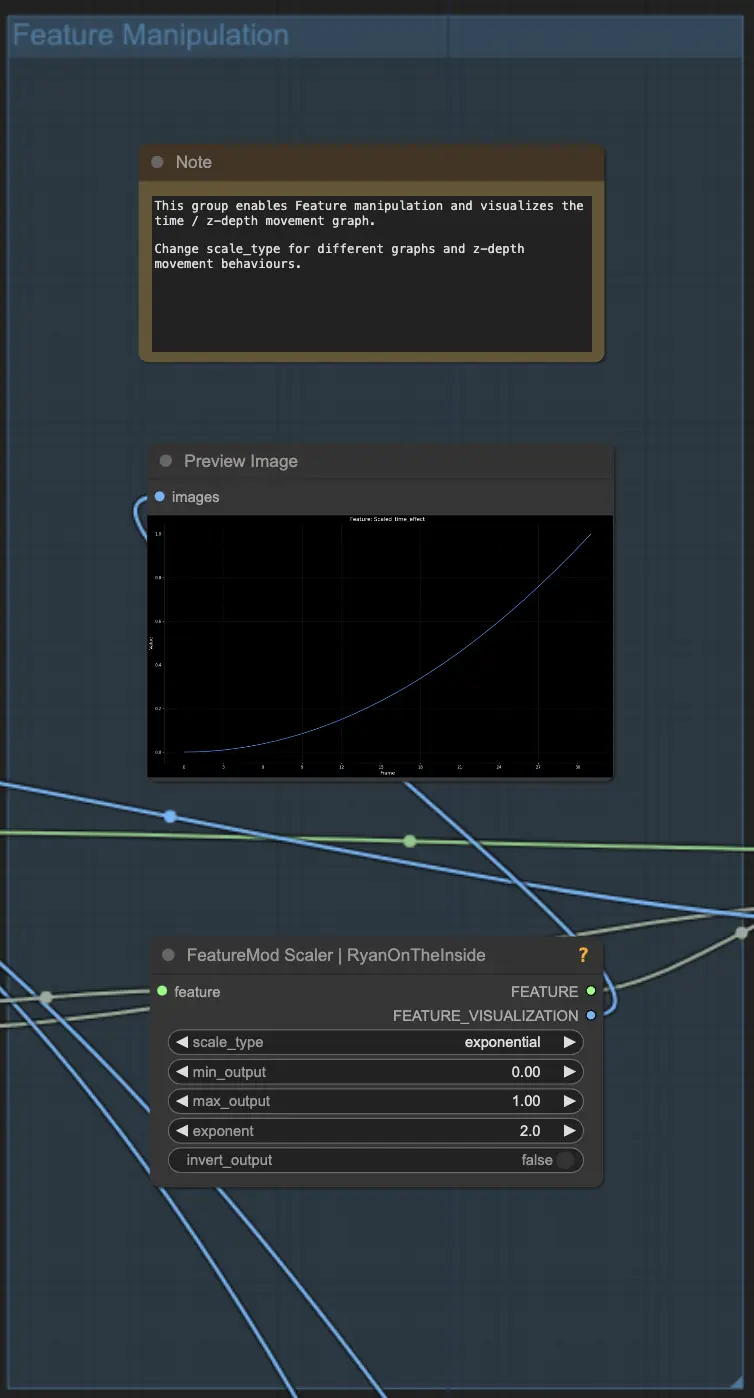
3.2. Visualize and adjust the animation curve using the FeatureScaler node. This node allows you to fine-tune the behavior of the time feature, such as setting the effect type (e.g., smooth, accelerate) and scale type (e.g., linear, logarithmic, exponential). By tweaking these settings, you can control how the z-depth plane moves through the motion graphics animation and achieve the desired timing and pacing.
Step 4: Z-Depth Masking and 3D Effect for Motion Graphics#
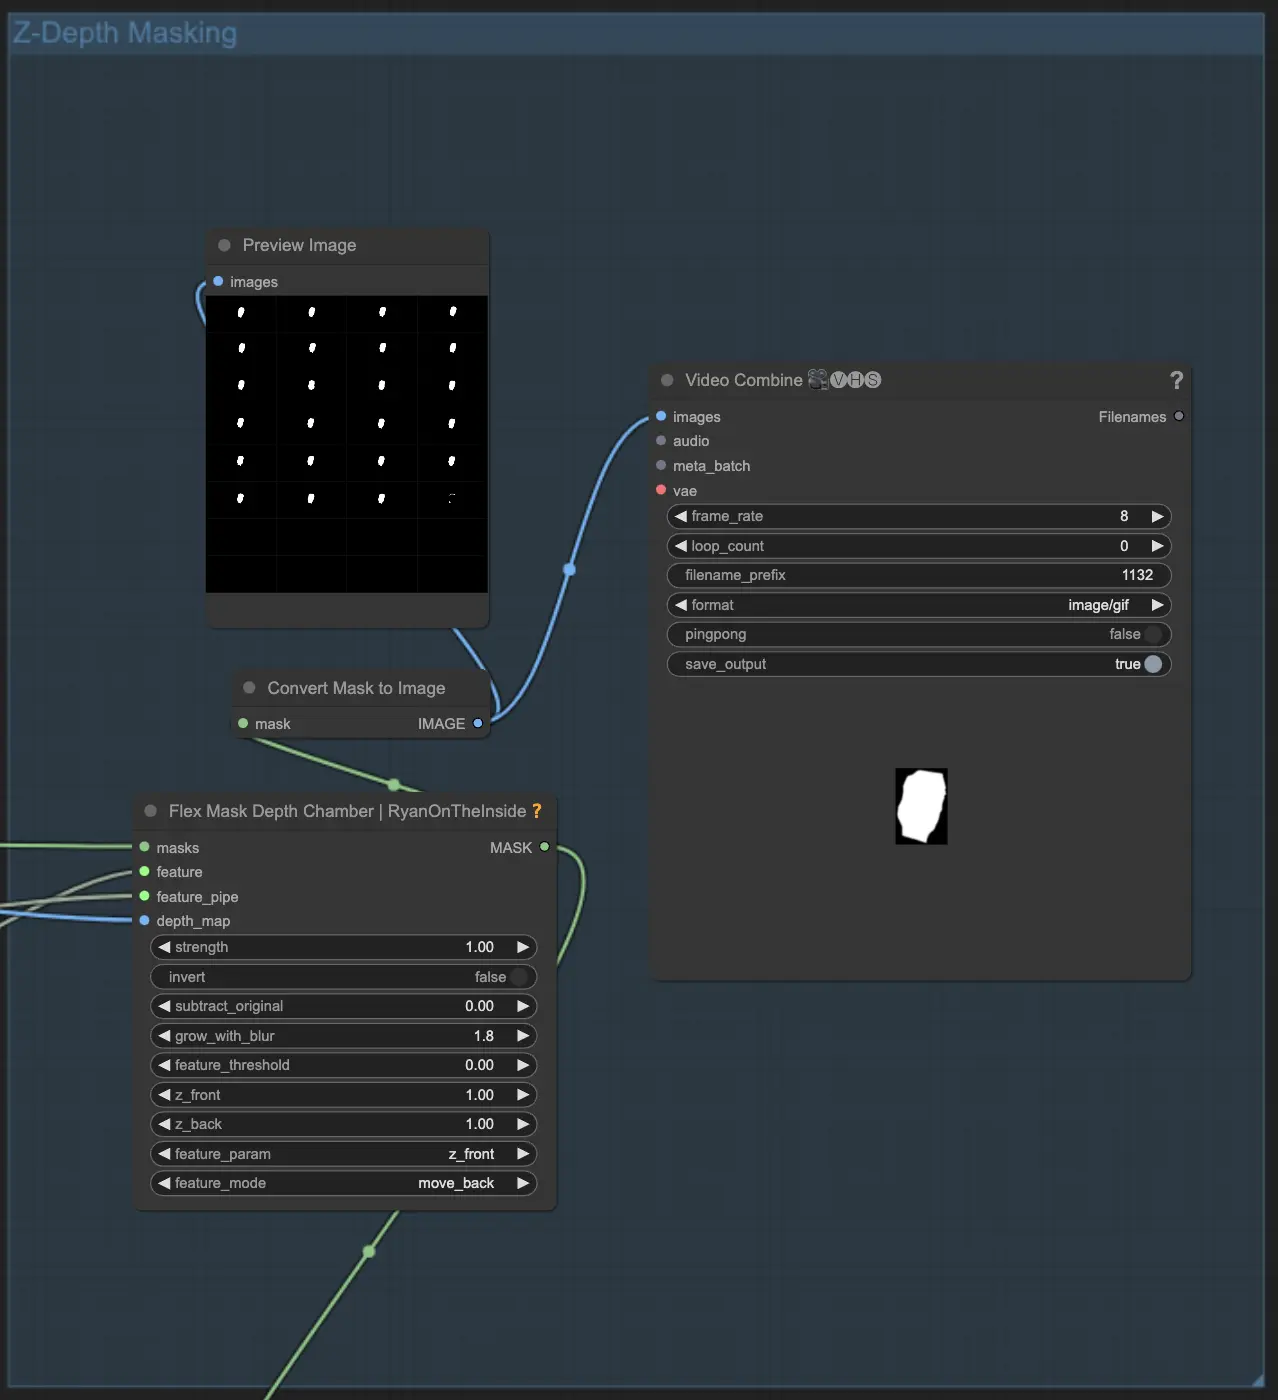
4.1. Generate a depth-based inpainting mask using the FlexMaskDepthChamber node. This node takes the segmented subject mask from step 2, the time feature from step 3, and a depth map generated from the input frames. It then creates an animated z-depth mask that will be used to add a stunning 3D effect to your motion graphics video.
4.2. Adjust the starting position of the z-depth plane using the "Z Front" and "Z Back" parameters in the FlexMaskDepthChamber node. These settings control where the plane begins and ends in relation to the subject's depth, allowing you to create visually striking motion graphics with a sense of depth and dimensionality.
Step 5: Motion Graphics Video Generation and Frame Interpolation#
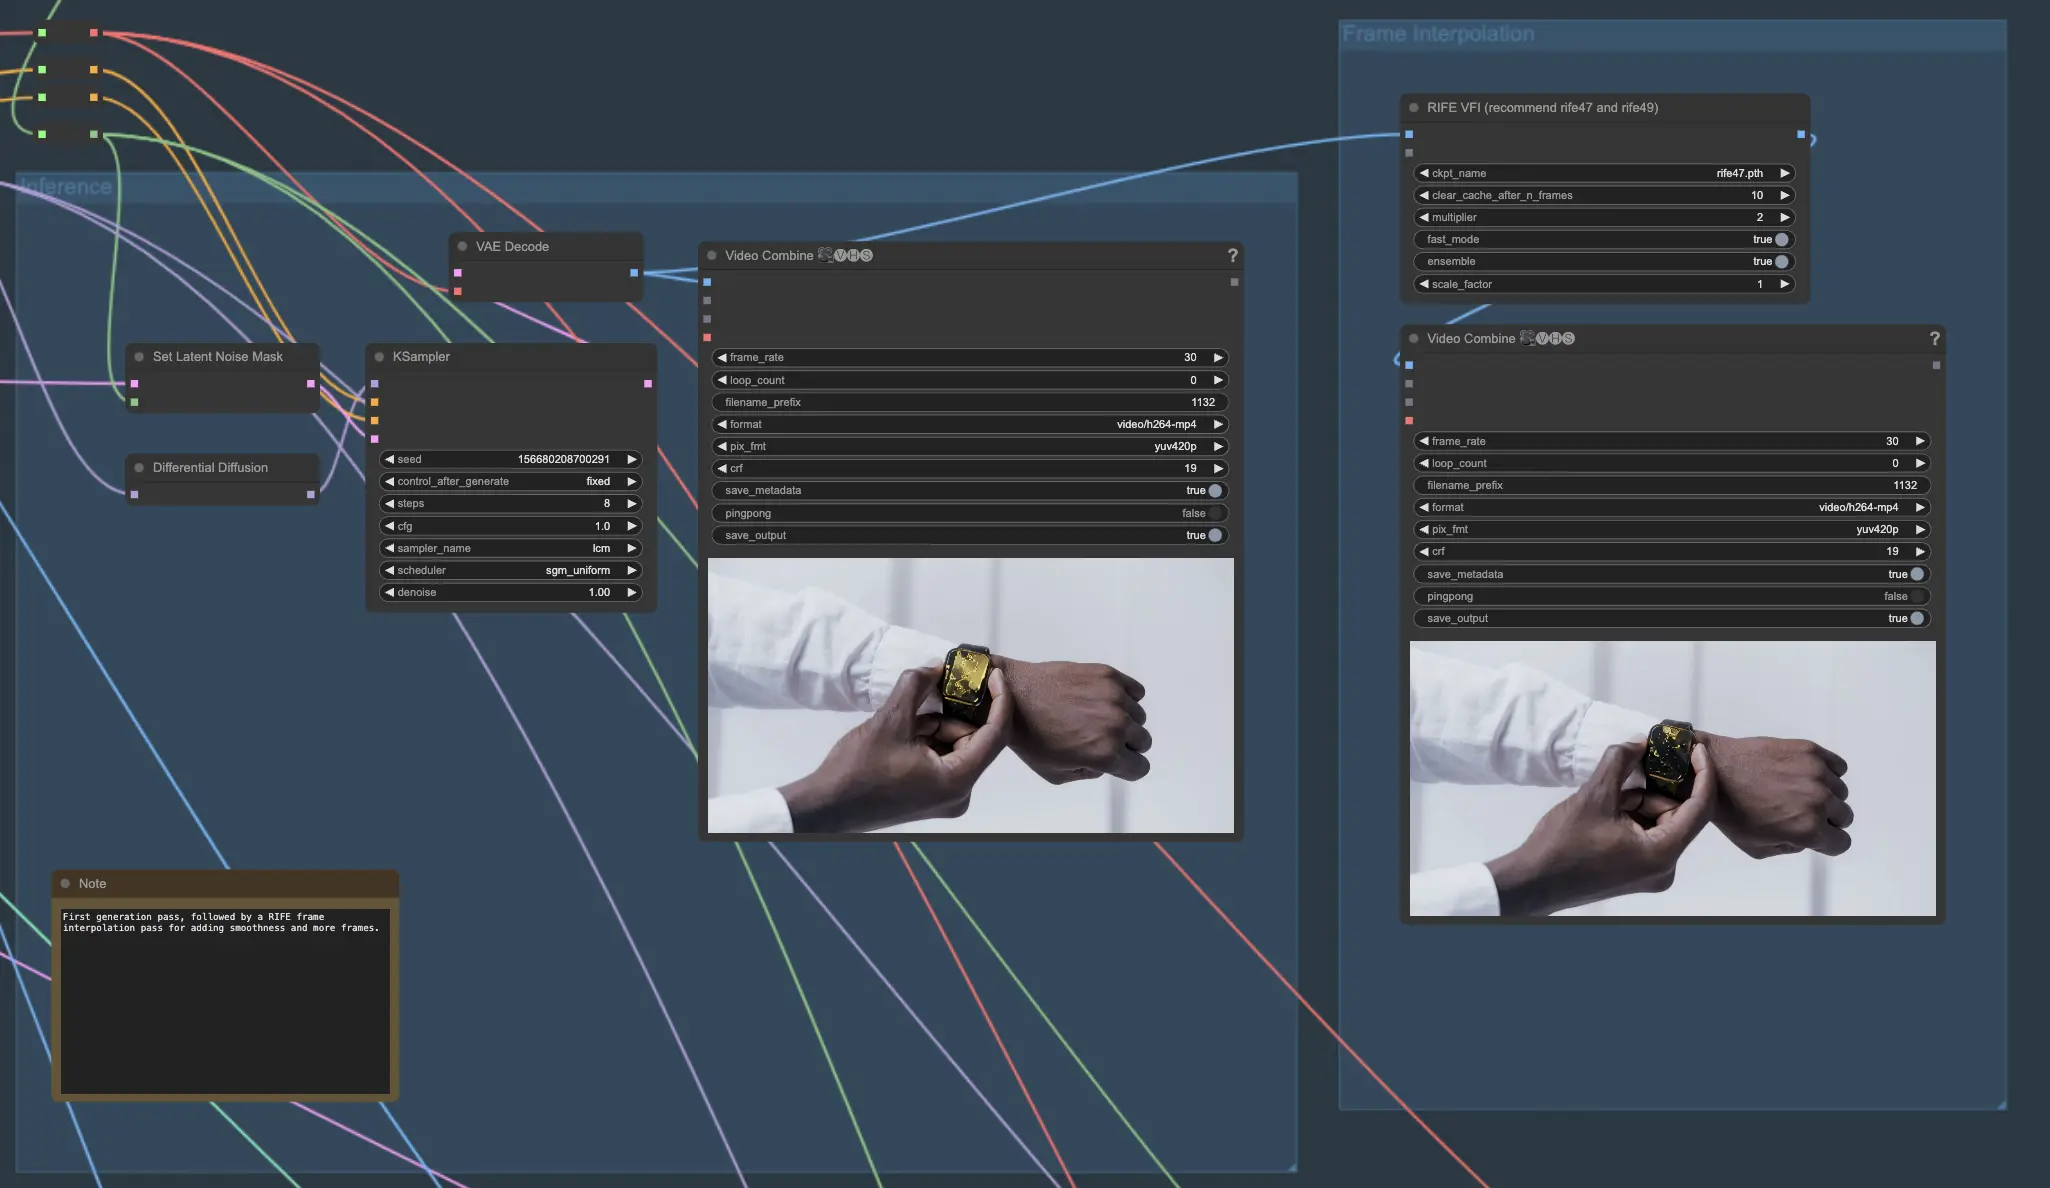
5.1. This section covers the core components of the generative process. Load your checkpoint model and apply additional LoRAs. Set your prompts and apply ControlNet if desired. Use the AnimateDiff model and associated nodes for video generation.
5.2. To further enhance the smoothness and fluidity of your generated motion graphics video, interpolate between the frames using the RIFE VFI node. This node uses advanced algorithms to create transitional frames between the generated ones, effectively doubling the frame rate and reducing any jitter or abrupt movements in your motion graphics animation.
Step 6: Multi-Generation Blending for Advanced Motion Graphics (Optional)#
For even more impressive motion graphics results, you can combine the best elements from multiple generation passes using the following steps:
6.1. Run the pipeline multiple times with different prompts to create a variety of styles and visual elements for your motion graphics project. Each pass will generate a unique animation based on the given prompts, allowing you to explore different creative directions for your motion graphics.
6.2. Use the ImageIntervalSelectPercentage node to select specific frames from each generation pass based on their position in the timeline. For example, you might choose frames from the beginning of one pass, the middle of another, and the end of a third to create a dynamic and visually engaging motion graphics animation.
6.3. Blend the selected frames from each pass using the ImageBlend node. This will create smooth transitions between the different styles, allowing you to combine the best aspects of each generation into a cohesive motion graphics piece.
6.4. Use the ImageBatchMulti node to combine the blended frames from each transition stage into a single cohesive sequence. This node takes the output from multiple ImageBlend nodes and concatenates them in the specified order, resulting in a seamless motion graphics animation.
6.5. Finally, interpolate the combined frames once more using the RIFE VFI node to increase the frame rate and overall smoothness of your final motion graphics animation.
