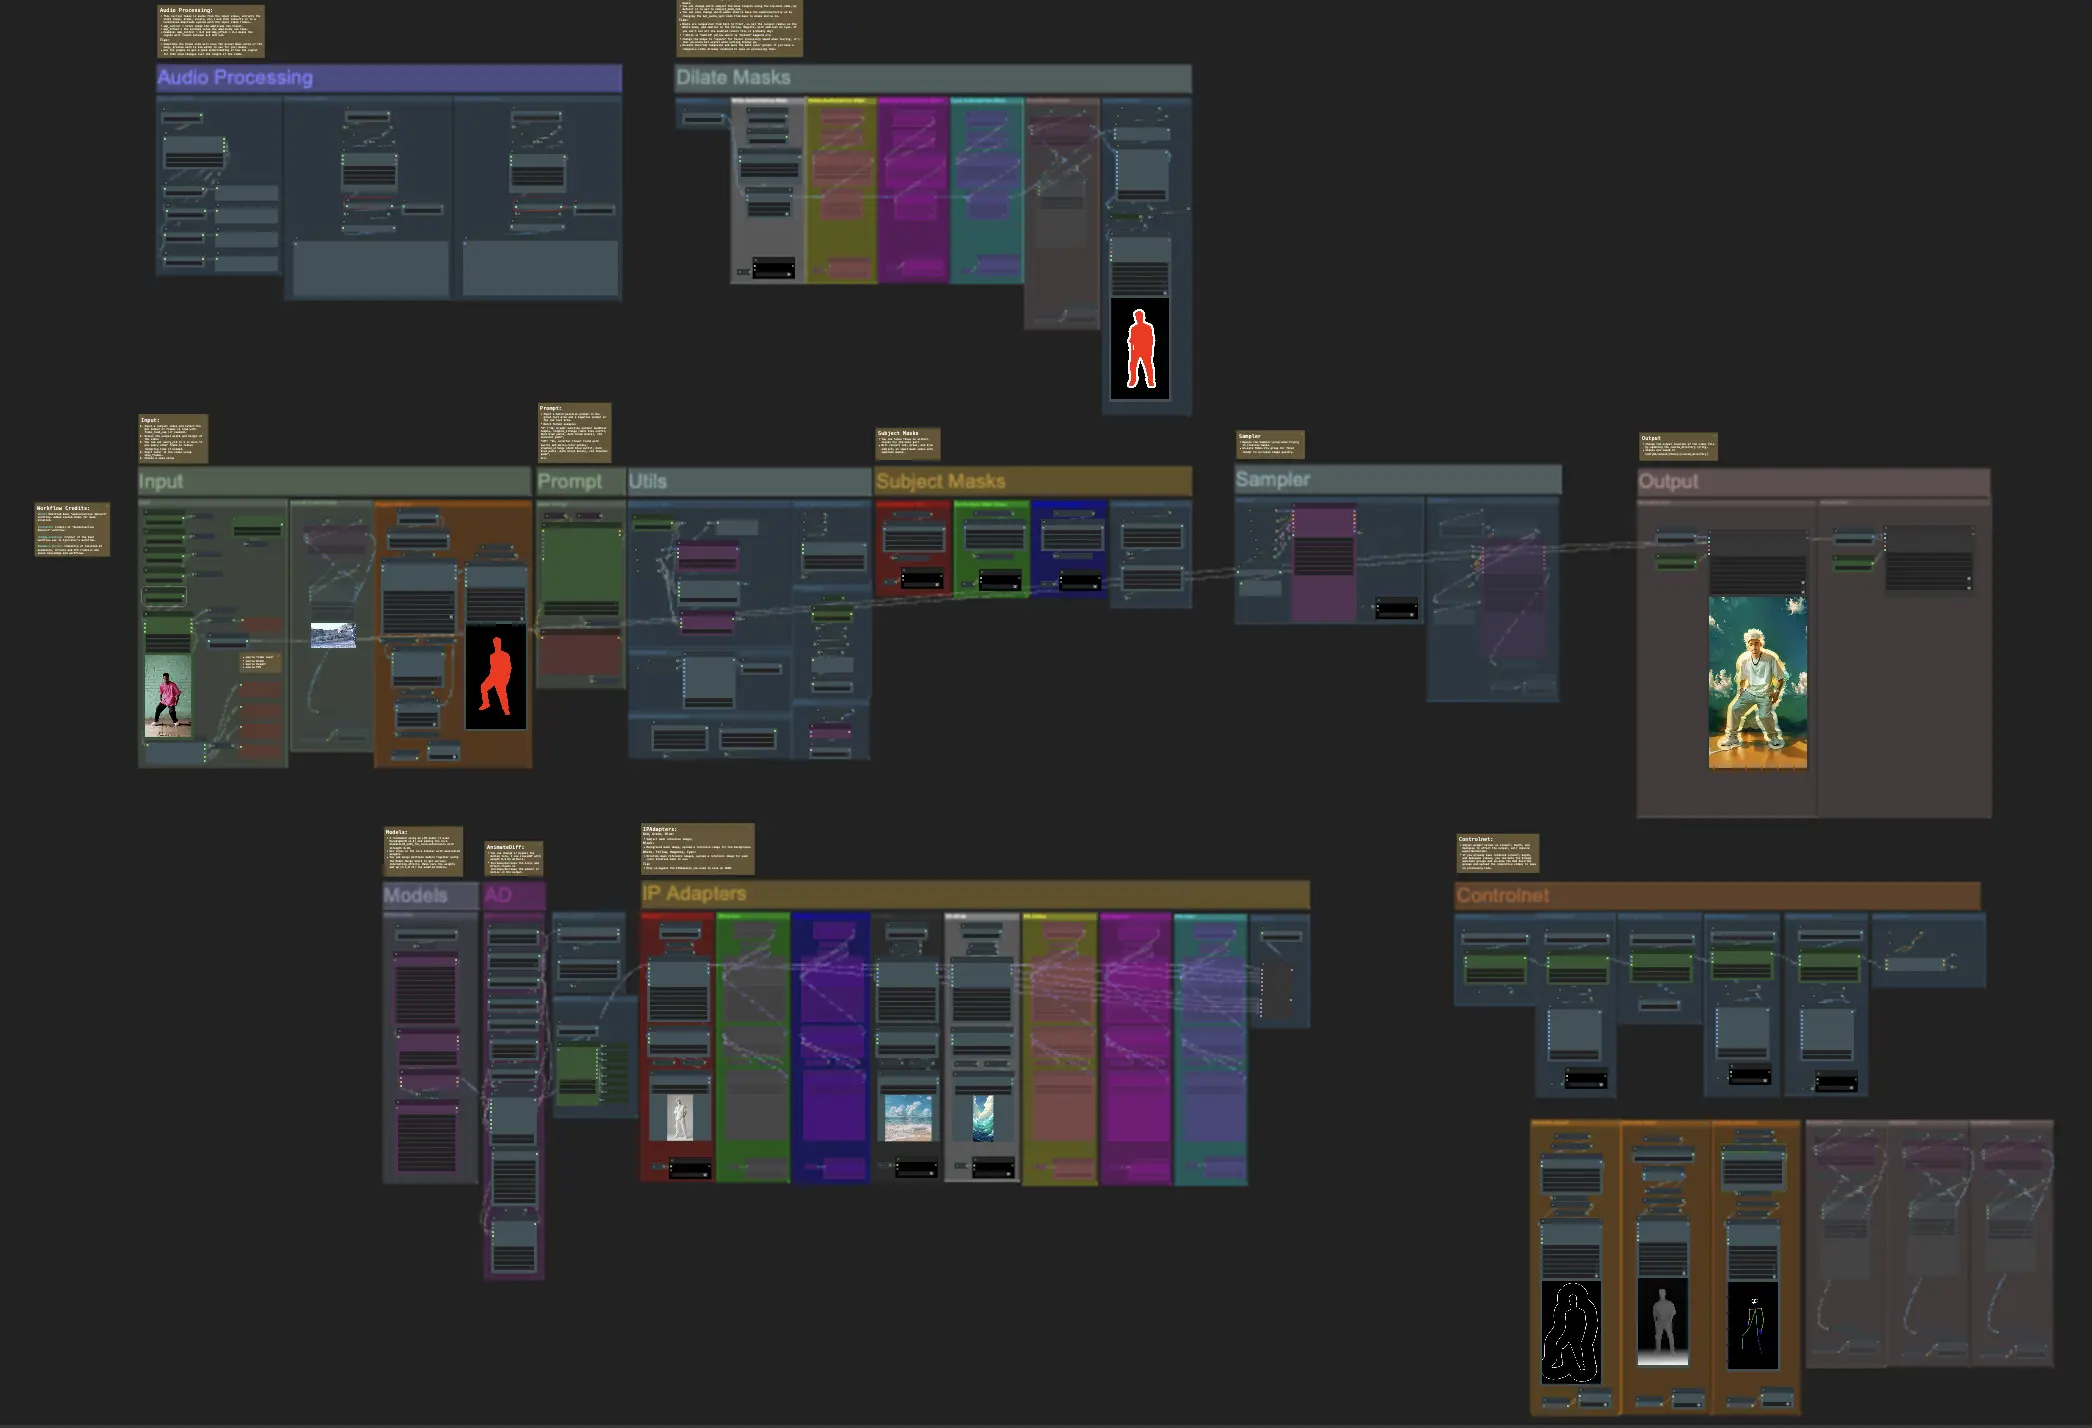
Audioreactive Mask Dilation | Stunning Animations
This ComfyUI Audioreactive Mask Dilation workflow empowers you to creatively transform your video subjects. It enables you to envelop your subjects, whether it's an individual or a group of performers, with a dynamic and responsive aura that expands and contracts in perfect synchronization with the music's rhythm. This effect adds a captivating visual dimension to your videos, enhancing their overall impact and engagement.ComfyUI Audioreactive Mask Dilation Workflow
Want to run this workflow?
- Fully operational workflows
- No missing nodes or models
- No manual setups required
- Features stunning visuals
ComfyUI Audioreactive Mask Dilation Examples
ComfyUI Audioreactive Mask Dilation Description
Create stunning video animations by transforming your subject (e.g., a dancer) with a dynamic aura that rhythmically expands and contracts in sync with the beat. Use this workflow with single subjects or multiple subjects as seen in the examples.
How to use Audioreactive Mask Dilation Workflow:
- Upload a subject video in the Input section
- Select the desired width and height for the final video, along with how many frames from the input video should be skipped with 'every_nth'. You can also limit the total number of frames to render with 'frame_load_cap'.
- Fill out the positive and negative prompt. Set batch frame times to match when you’d like the scene transitions to occur.
- Upload images for each of the default IP Adapter subject mask colors:
- Red = subject (dancer)
- Black = Background
- White = White audioreactive dilation mask
- Load a good LCM checkpoint (I use ParadigmLCM by Machine Delusions) in the 'Models' section.
- Add any loras using the Lora stacker below the model loader
- Hit Queue Prompt
Input
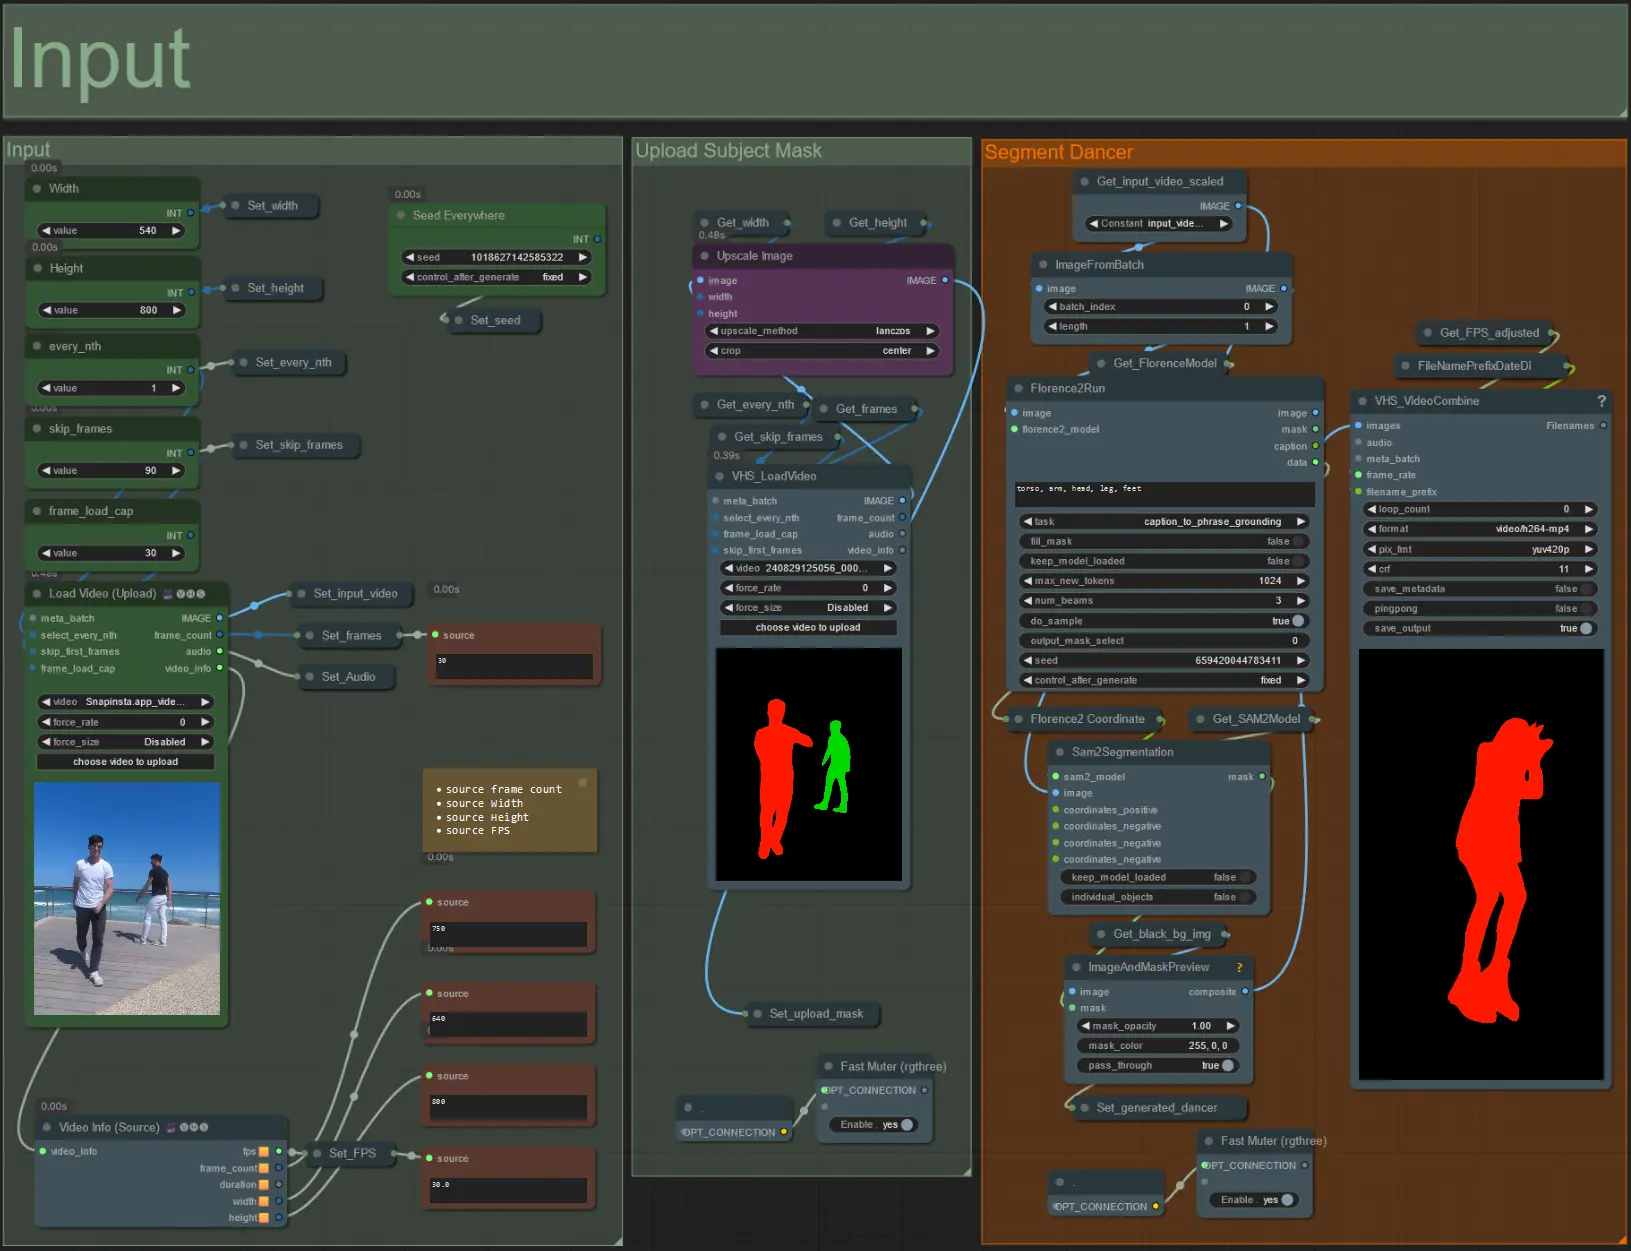
- Upload your desired subject video to the Load Video (Upload) node.
- Adjust the output width and height using the top left two inputs.
- every_nth sets whether to use every other frame, every third frame and so on (2 = every other frame). Left at 1 by default.
- skip_frames is used to skip frames at the video’s beginning. (100 = skip the first 100 frames from input video). Left at 0 by default.
- frame_load_cap is used to specify how many total frames from the input video should be loaded. Best to keep low when testing settings (30 - 60 for example) and then increase or set to 0 (no frame cap) when rendering the final video.
- The number fields in bottom right display info about the uploaded input video: total frames, width, height, and FPS from top to bottom.
- If you already have a mask video of the subject generated , un-mute the 'Upload Subject Mask' section and upload the mask video. Optionally mute the 'Segment Dancer' section to save some processing time.
- Sometimes the segmented subject will not be perfect, then check the mask quality using the preview box in the bottom right seen above. If that is the case you can play around with the prompt in the 'Florence2Run' node to target different body parts such as 'head', 'chest', 'legs', etc. and see if you get a better result.
Prompt
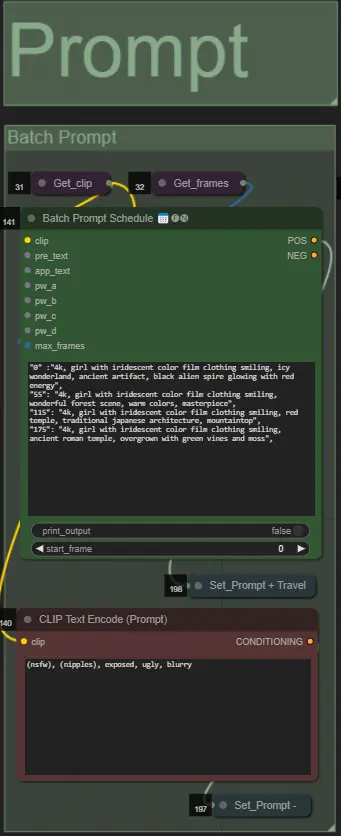
- Set the positive prompt using batch formatting:
- e.g. '0': '4k, masterpiece, 1girl standing on the beach, absurdres', '25': 'HDR, sunset scene, 1girl with black hair and a white jacket, absurdres', …
- Negative prompt is normal format, add embeddings if desired.
Audio Processing
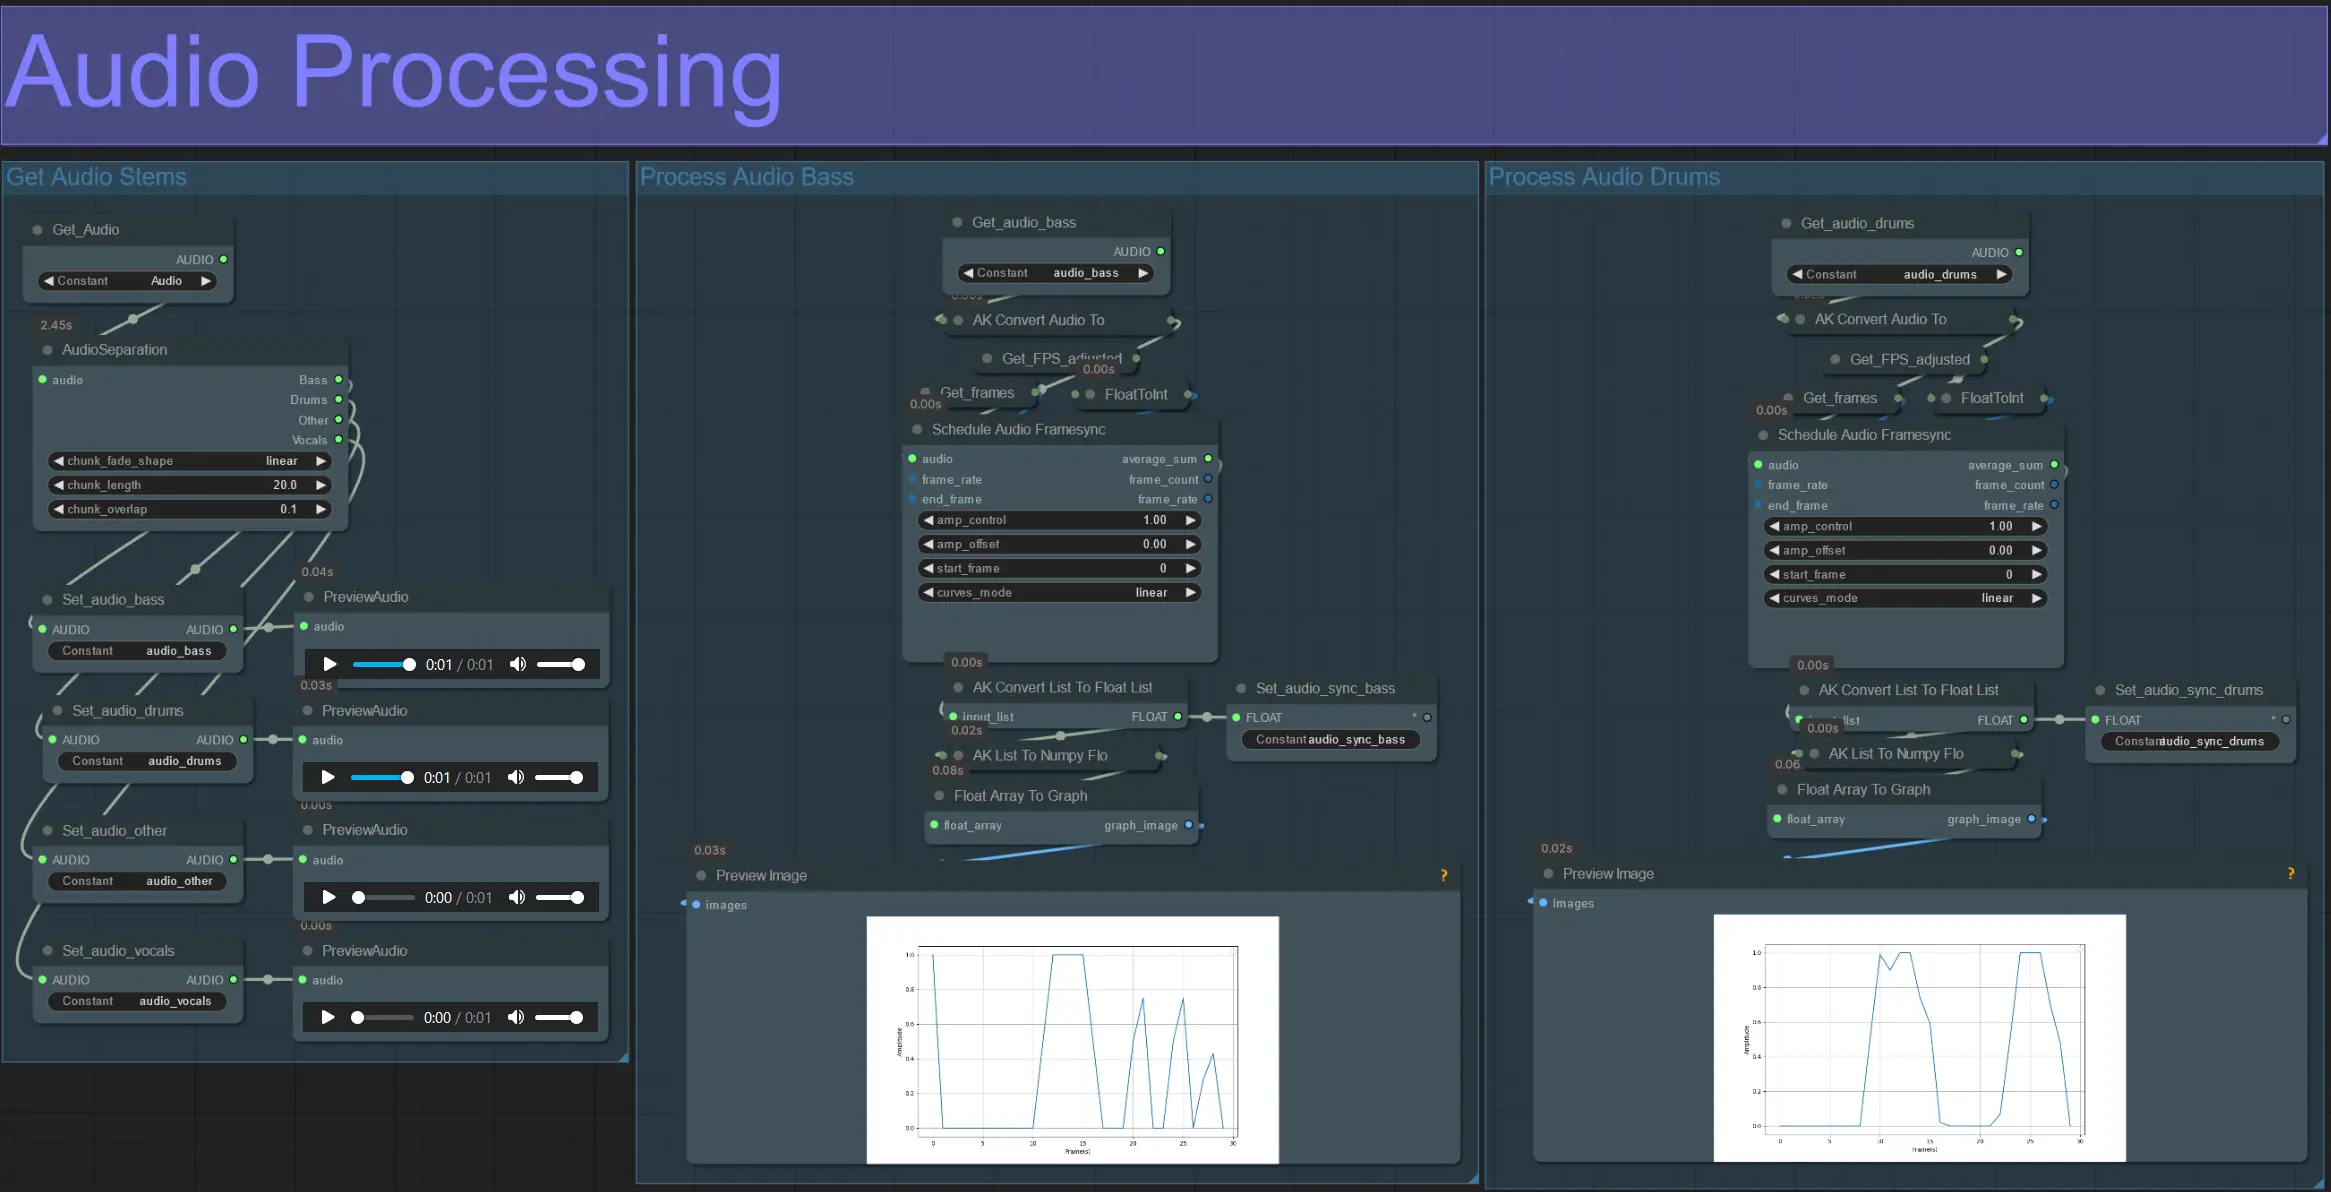
- This section takes in audio from the input video, extracts the stems (bass, drums, vocals, etc.) and then converts it to a normalized amplitude synced with the input video frames.
- amp_control = total range the amplitude can travel.
- amp_offset = the minimum value the amplitude can take.
- Example: amp_control = 0.8 and amp_offset = 0.2 means the signal will travel between 0.2 and 1.0.
- Sometimes the Drums stem contains the actual Bass notes from the song; preview each to determine which is best for your masks.
- Use the graphs to gain a clear understanding of how the signal for that stem changes throughout the video's duration.
Dilate Masks
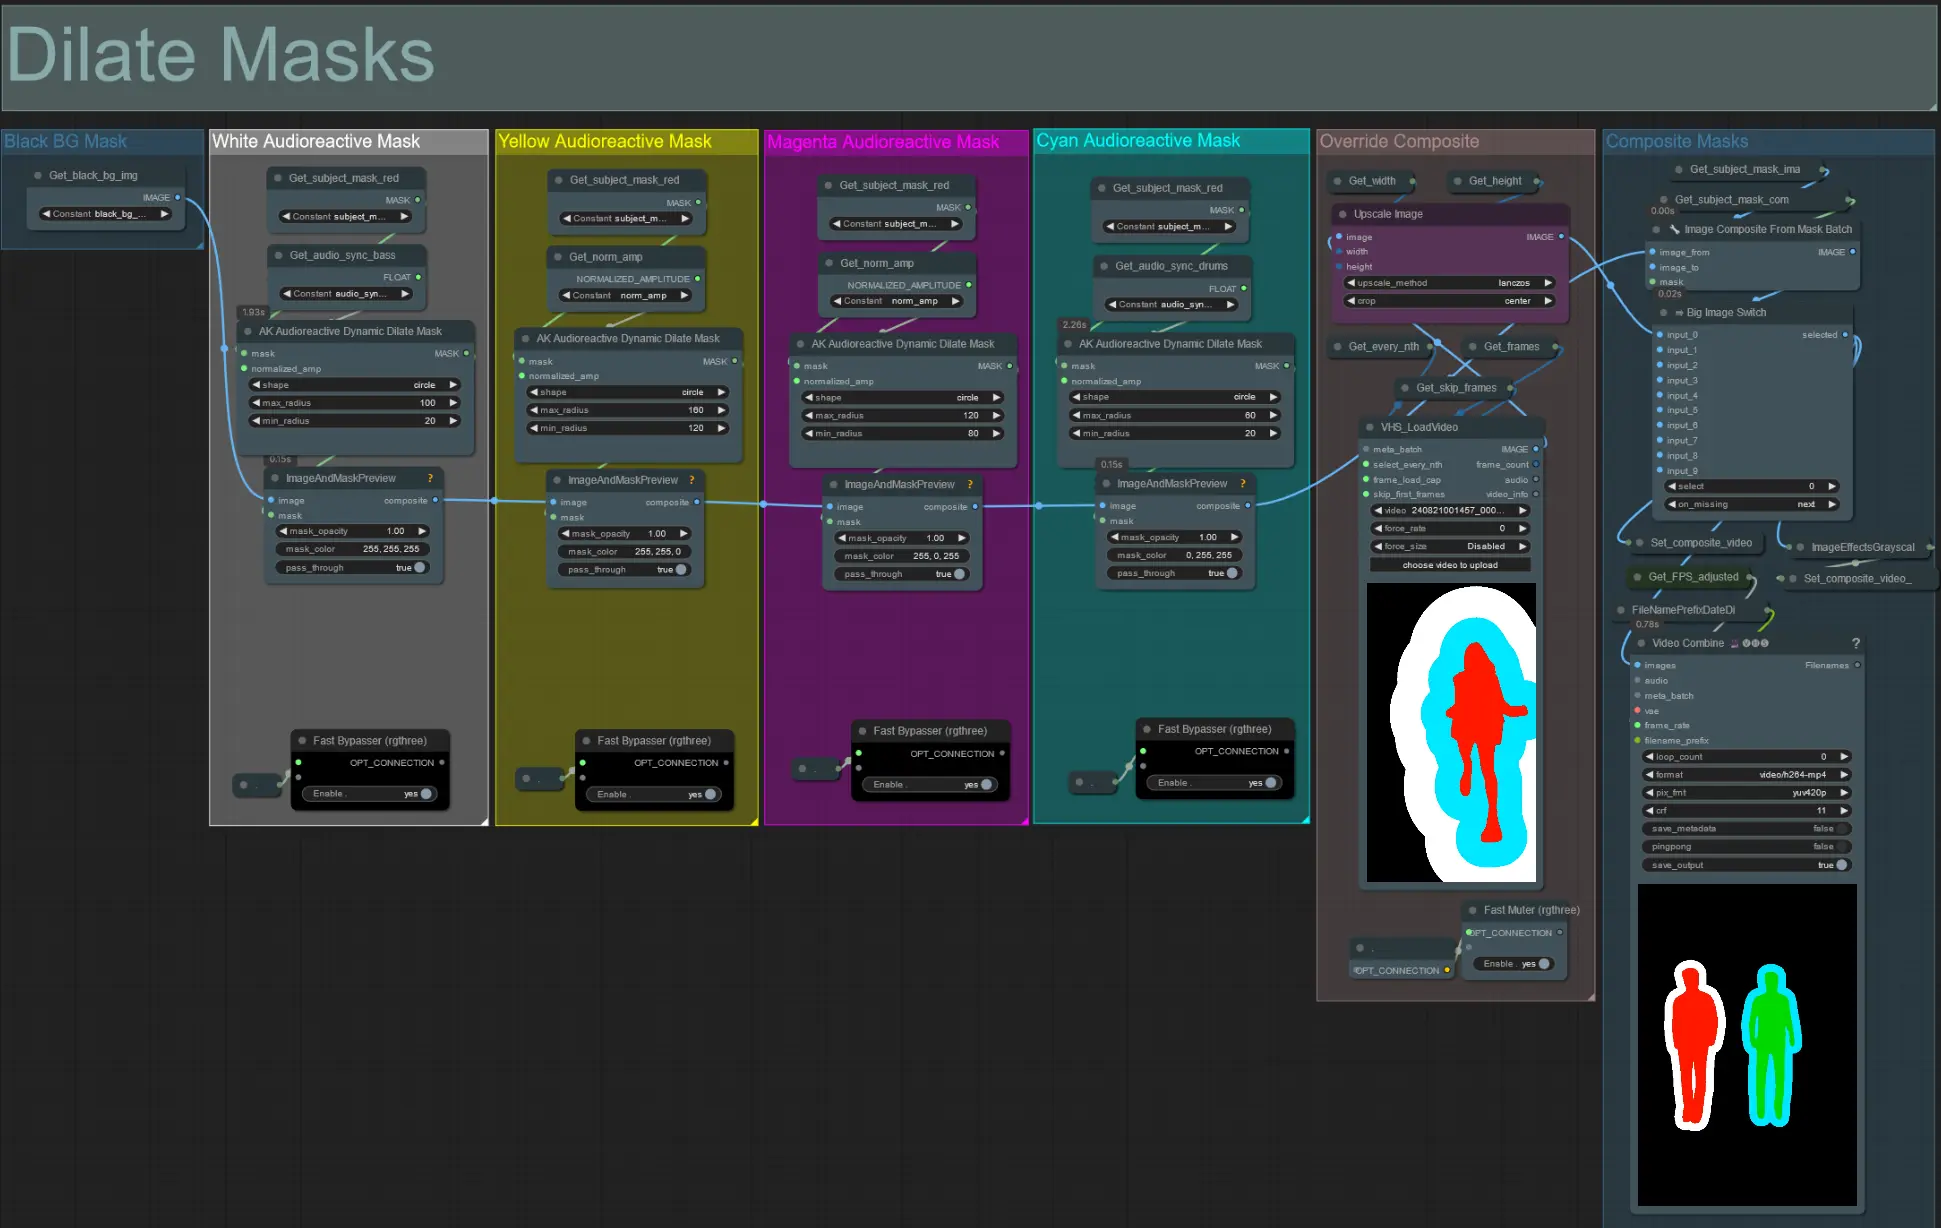
- Each colored group corresponds to the color of dilation mask that will be generated by it.
- Set the min and max radius for the dilation mask, along with its shape, using the following node:
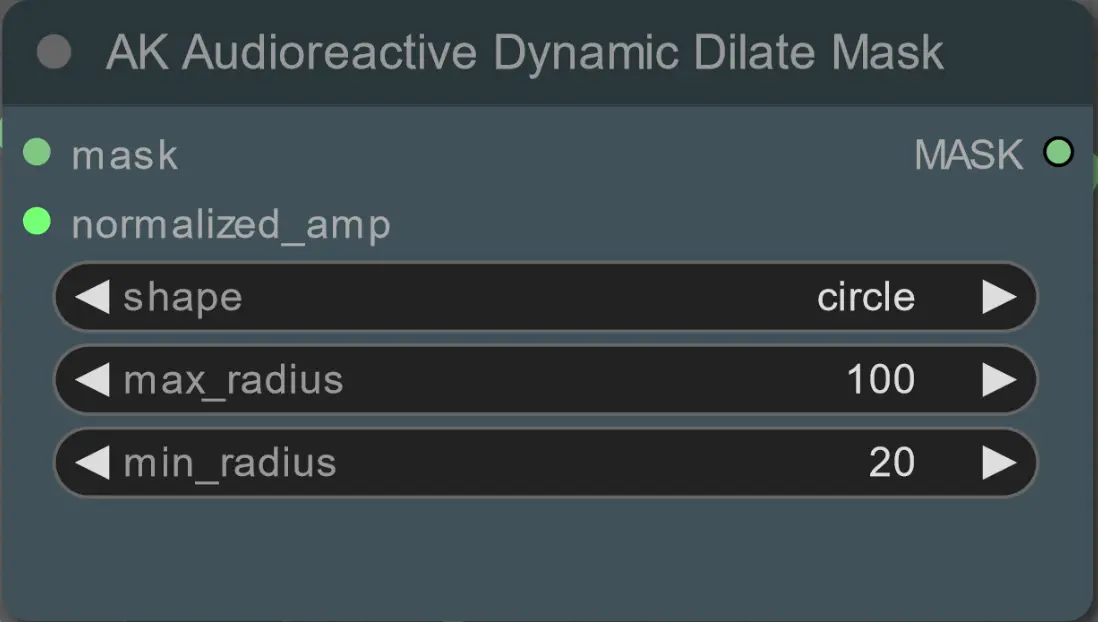
- shape: 'circle' is the most accurate but takes longer to generate. Set this when you are ready to perform the final rendering. 'square' is fast to compute but less accurate, best for testing out the workflow and deciding on IP adapter images.
- max_radius: The mask radius in pixels when amplitude value is max (1.0).
- min_radius: The mask radius in pixels when amplitude value is min (0.0).
- If you already have a composite mask video generated you can un-mute the 'Override Composite Mask' group and upload it. It’s recommended to bypass the dilation mask groups if overriding to save on processing time.
Models
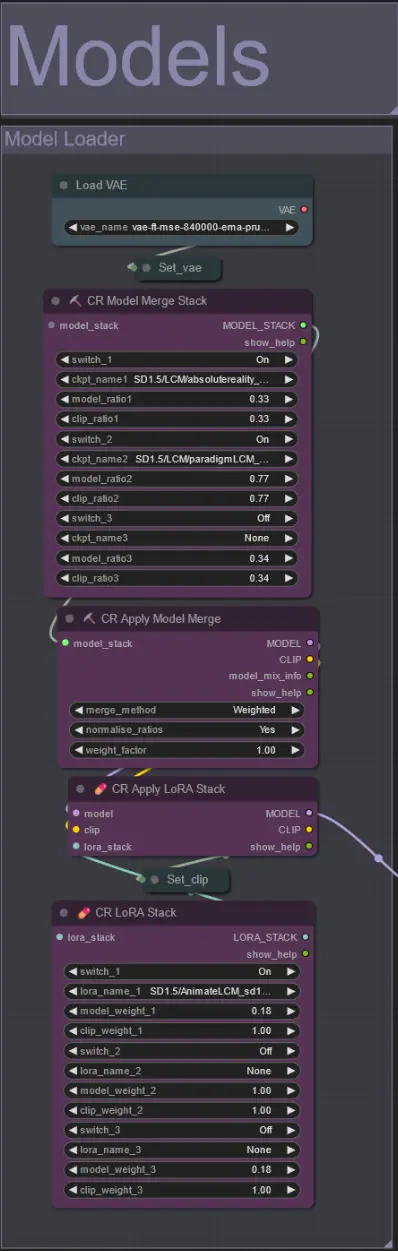
- Use a good LCM model for the checkpoint. I recommend ParadigmLCM by Machine Delusions.
- Merge multiple models together using the Model Merge Stack to get various interesting effects. Make sure the weights add up to 1.0 for the enabled models.
- Optionally specify the AnimateLCM_sd15_t2v_lora.safetensors with a low weight of 0.18 to further enhance the final result.
- Add any additional Loras to the model using the Lora stacker below the model loader.
AnimateDiff

- Set a different Motion Lora instead of the one I used (LiquidAF-0-1.safetensors)
- Increase/decrease the Scale and Effect floats to increase/decrease the amount of motion in the output.
IP Adapters

- Here you can specify the reference images that will be used to render the backgrounds for each of the dilation masks, as well as your video subject(s).
- The color of each group represents the mask it targets:
Red, Green, Blue:
- Subject mask reference images.
Black:
- Background mask image, upload a reference image for the background.
White, Yellow, Magenta, Cyan:
- Dilation mask reference images, upload a reference image for each color dilation mask in use.
ControlNet
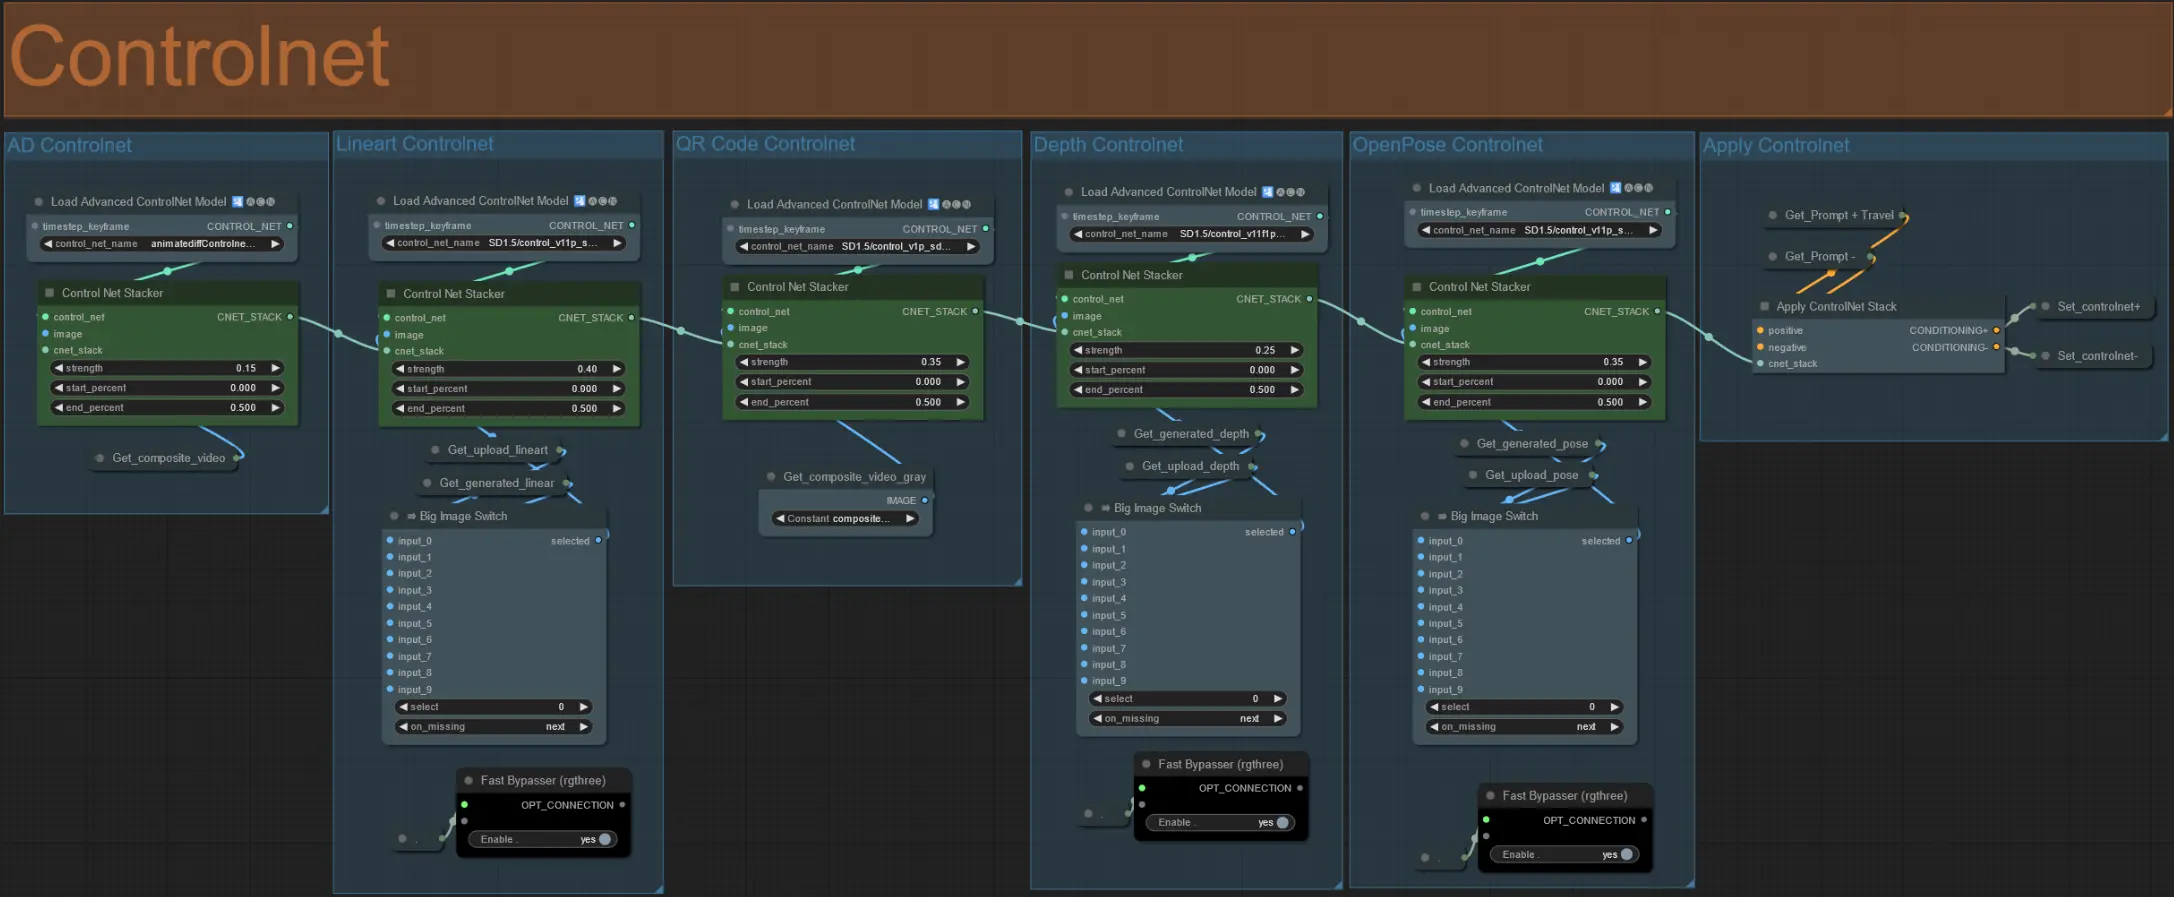
- This workflow makes use of 5 different controlnets, including AD, Lineart, QR Code, Depth, and OpenPose.
- All of the inputs to the controlnets are generated automatically
- You can choose to override the input video for the Lineart, Depth, and Openpose controlnets if desired by un-muting the 'Override ' groups as seen below:
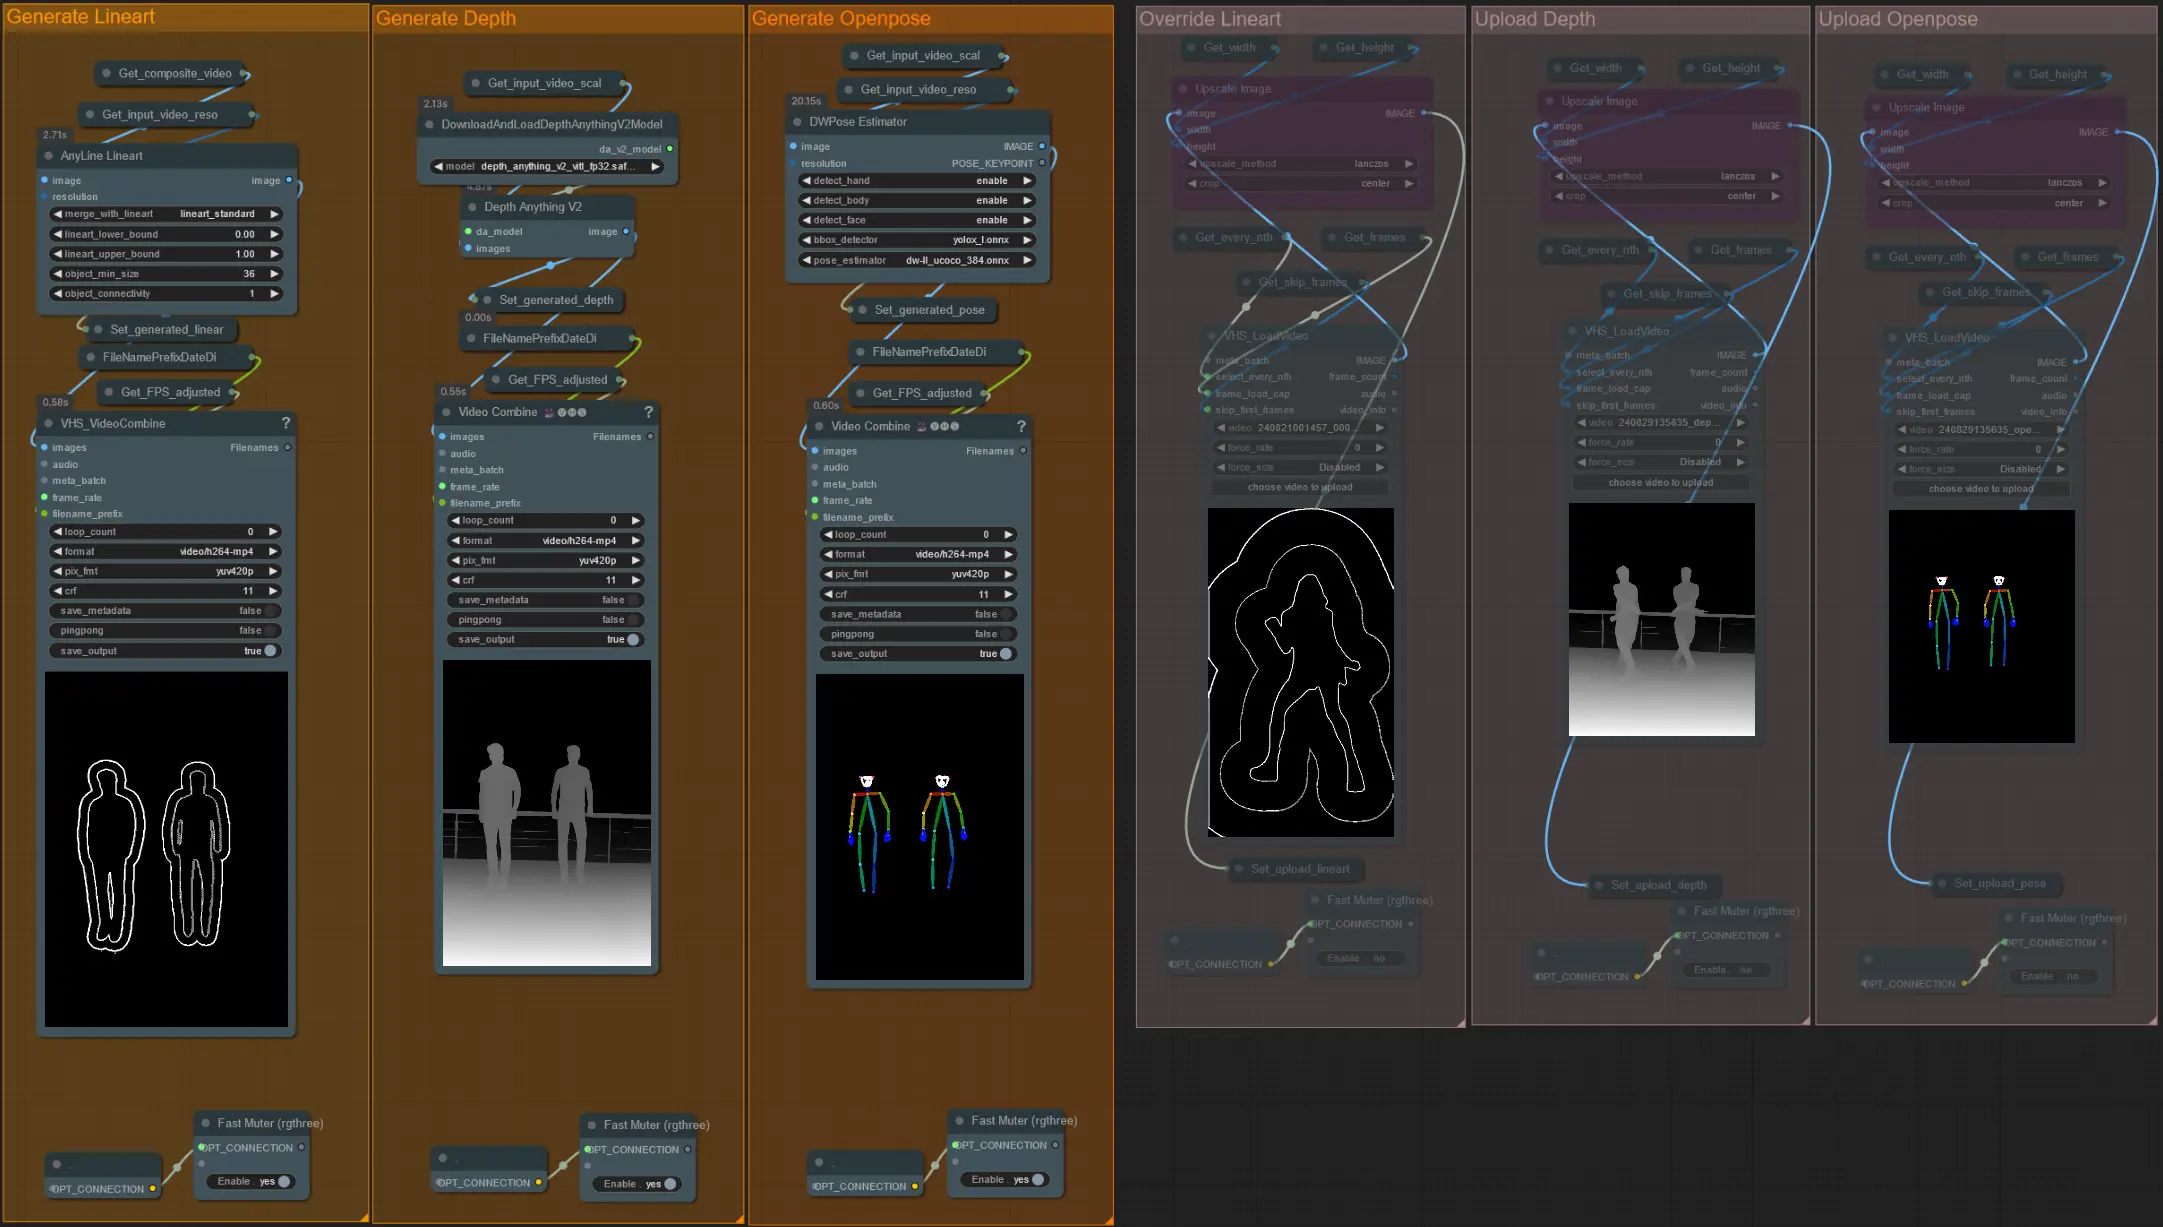
- It is recommended you also mute the 'Generate' groups if overriding to save processing time.
Tip:
- Bypass the Ksampler and commence a render with your full input video. Once all the preprocessor videos are generated save them and upload them to the respective overrides. From now on when testing the workflow you will not have to wait for each preprocessor video to be generated individually.
Sampler
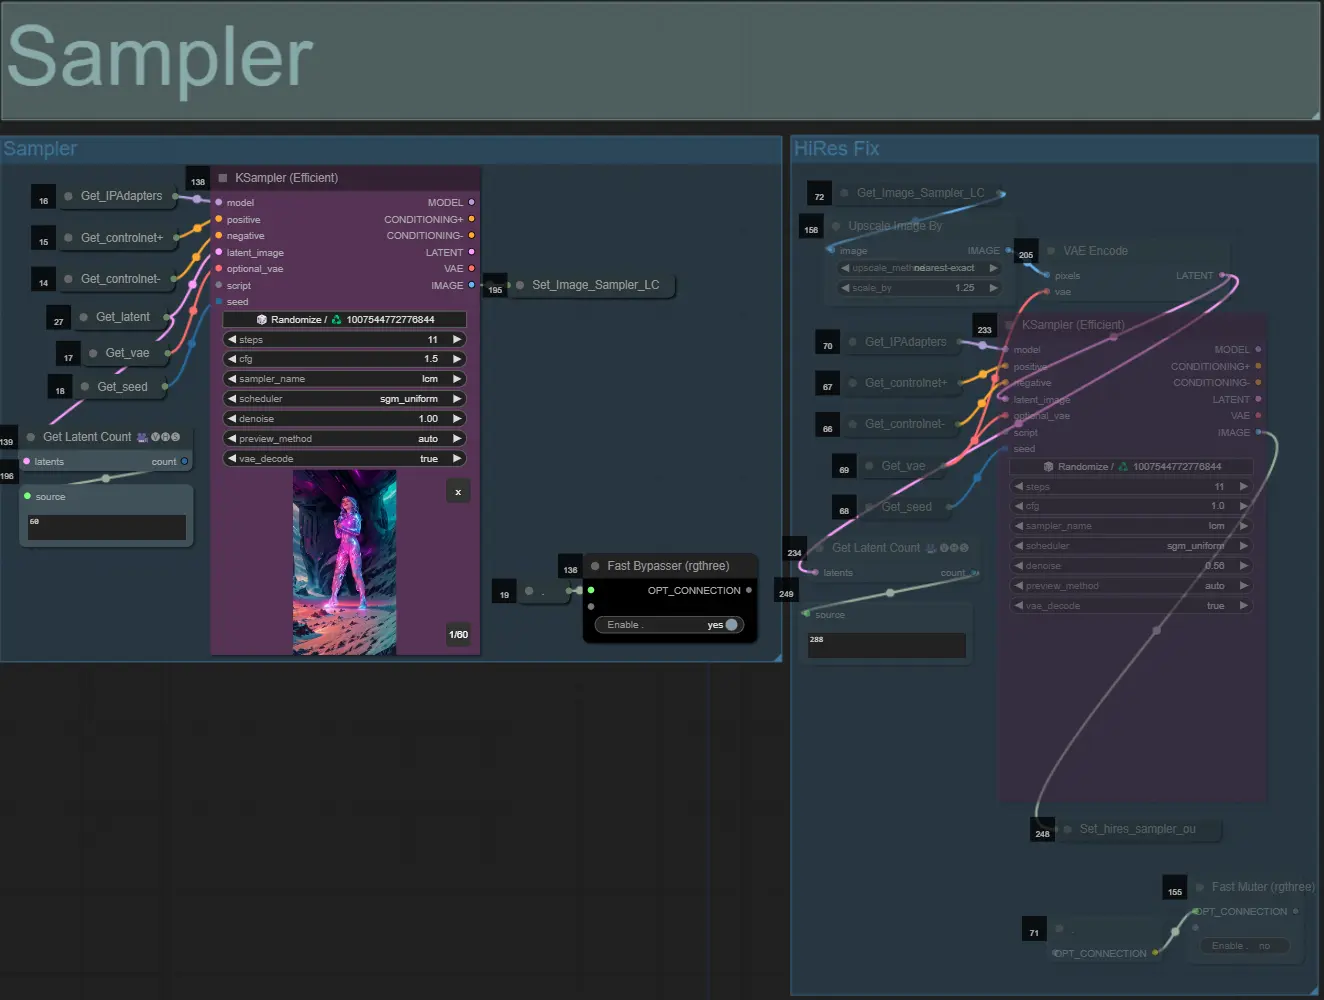
- By default the HiRes Fix sampler group will be muted to save processing time when testing
- I recommend bypassing the Sampler group as well when trying to experiment with dilation mask settings to save time.
- On final renders you can un-mute the HiRes Fix group which will upscale and add details to the final result.
Output
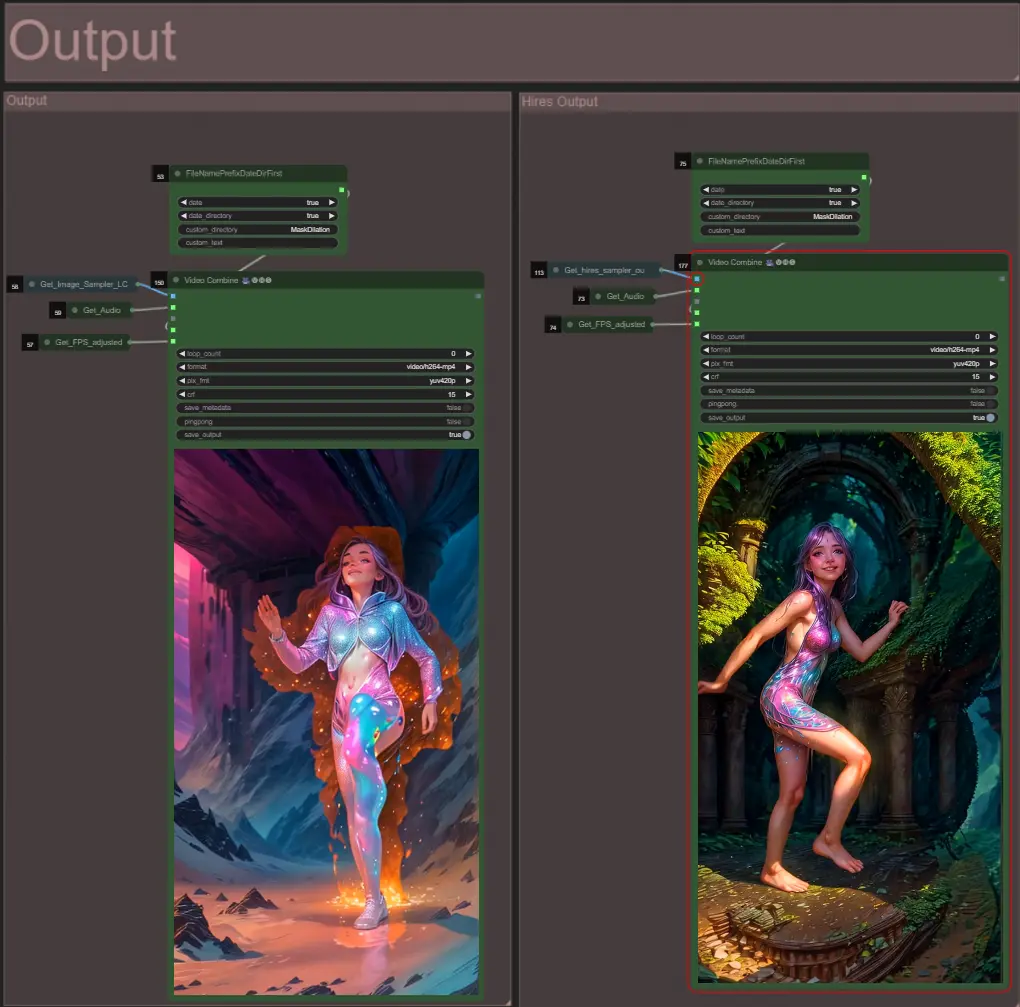
- There are two output groups: the left is for standard sampler output, and the right is for the HiRes Fix sampler output.
About Author
Akatz AI:
- Website:
- http://patreon.com/Akatz
- https://civitai.com/user/akatz
- https://www.youtube.com/@akatz_ai
- https://www.instagram.com/akatz.ai/
- https://www.tiktok.com/@akatz_ai
- https://x.com/akatz_ai
- https://github.com/akatz-ai
Contacts:
- Email: akatz.hello@gmail.com