FLUX Inpainting | Seamless Image Editing
The ComfyUI FLUX Inpainting workflow allows you to fill missing areas, remove unwanted objects, and refine AI-generated images.ComfyUI FLUX Inpainting Workflow
- Fully operational workflows
- No missing nodes or models
- No manual setups required
- Features stunning visuals
ComfyUI FLUX Inpainting Examples

ComfyUI FLUX Inpainting Description
FLUX is a new image generation model developed by .
About FLUX
The FLUX models are preloaded on RunComfy, named flux/flux-schnell and flux/flux-dev.
- When launch a RunComfy Medium-Sized Machine: Select the checkpoint
flux-schnell, fp8and clipt5_xxl_fp8to avoid out-of-memory issues. - When launch a RunComfy Large-Sized or Above Machine: Opt for a large checkpoint
flux-dev, defaultand a high clipt5_xxl_fp16.
For more details, visit:
What is the ComfyUI Flux Inpainting?
The ComfyUI FLUX Inpainting workflow leverages the inpainting capabilities of the Flux family of models developed by Black Forest Labs. FLUX Inpainting is a valuable tool for image editing, allowing you to fill in missing or damaged areas of an image with impressive results. It is particularly useful for restoring old photographs, removing unwanted objects, or refining AI-generated images. By utilizing the advanced image processing techniques of the Flux model, FLUX Inpainting seamlessly integrates newly generated content with the existing image, resulting in natural and cohesive outputs.
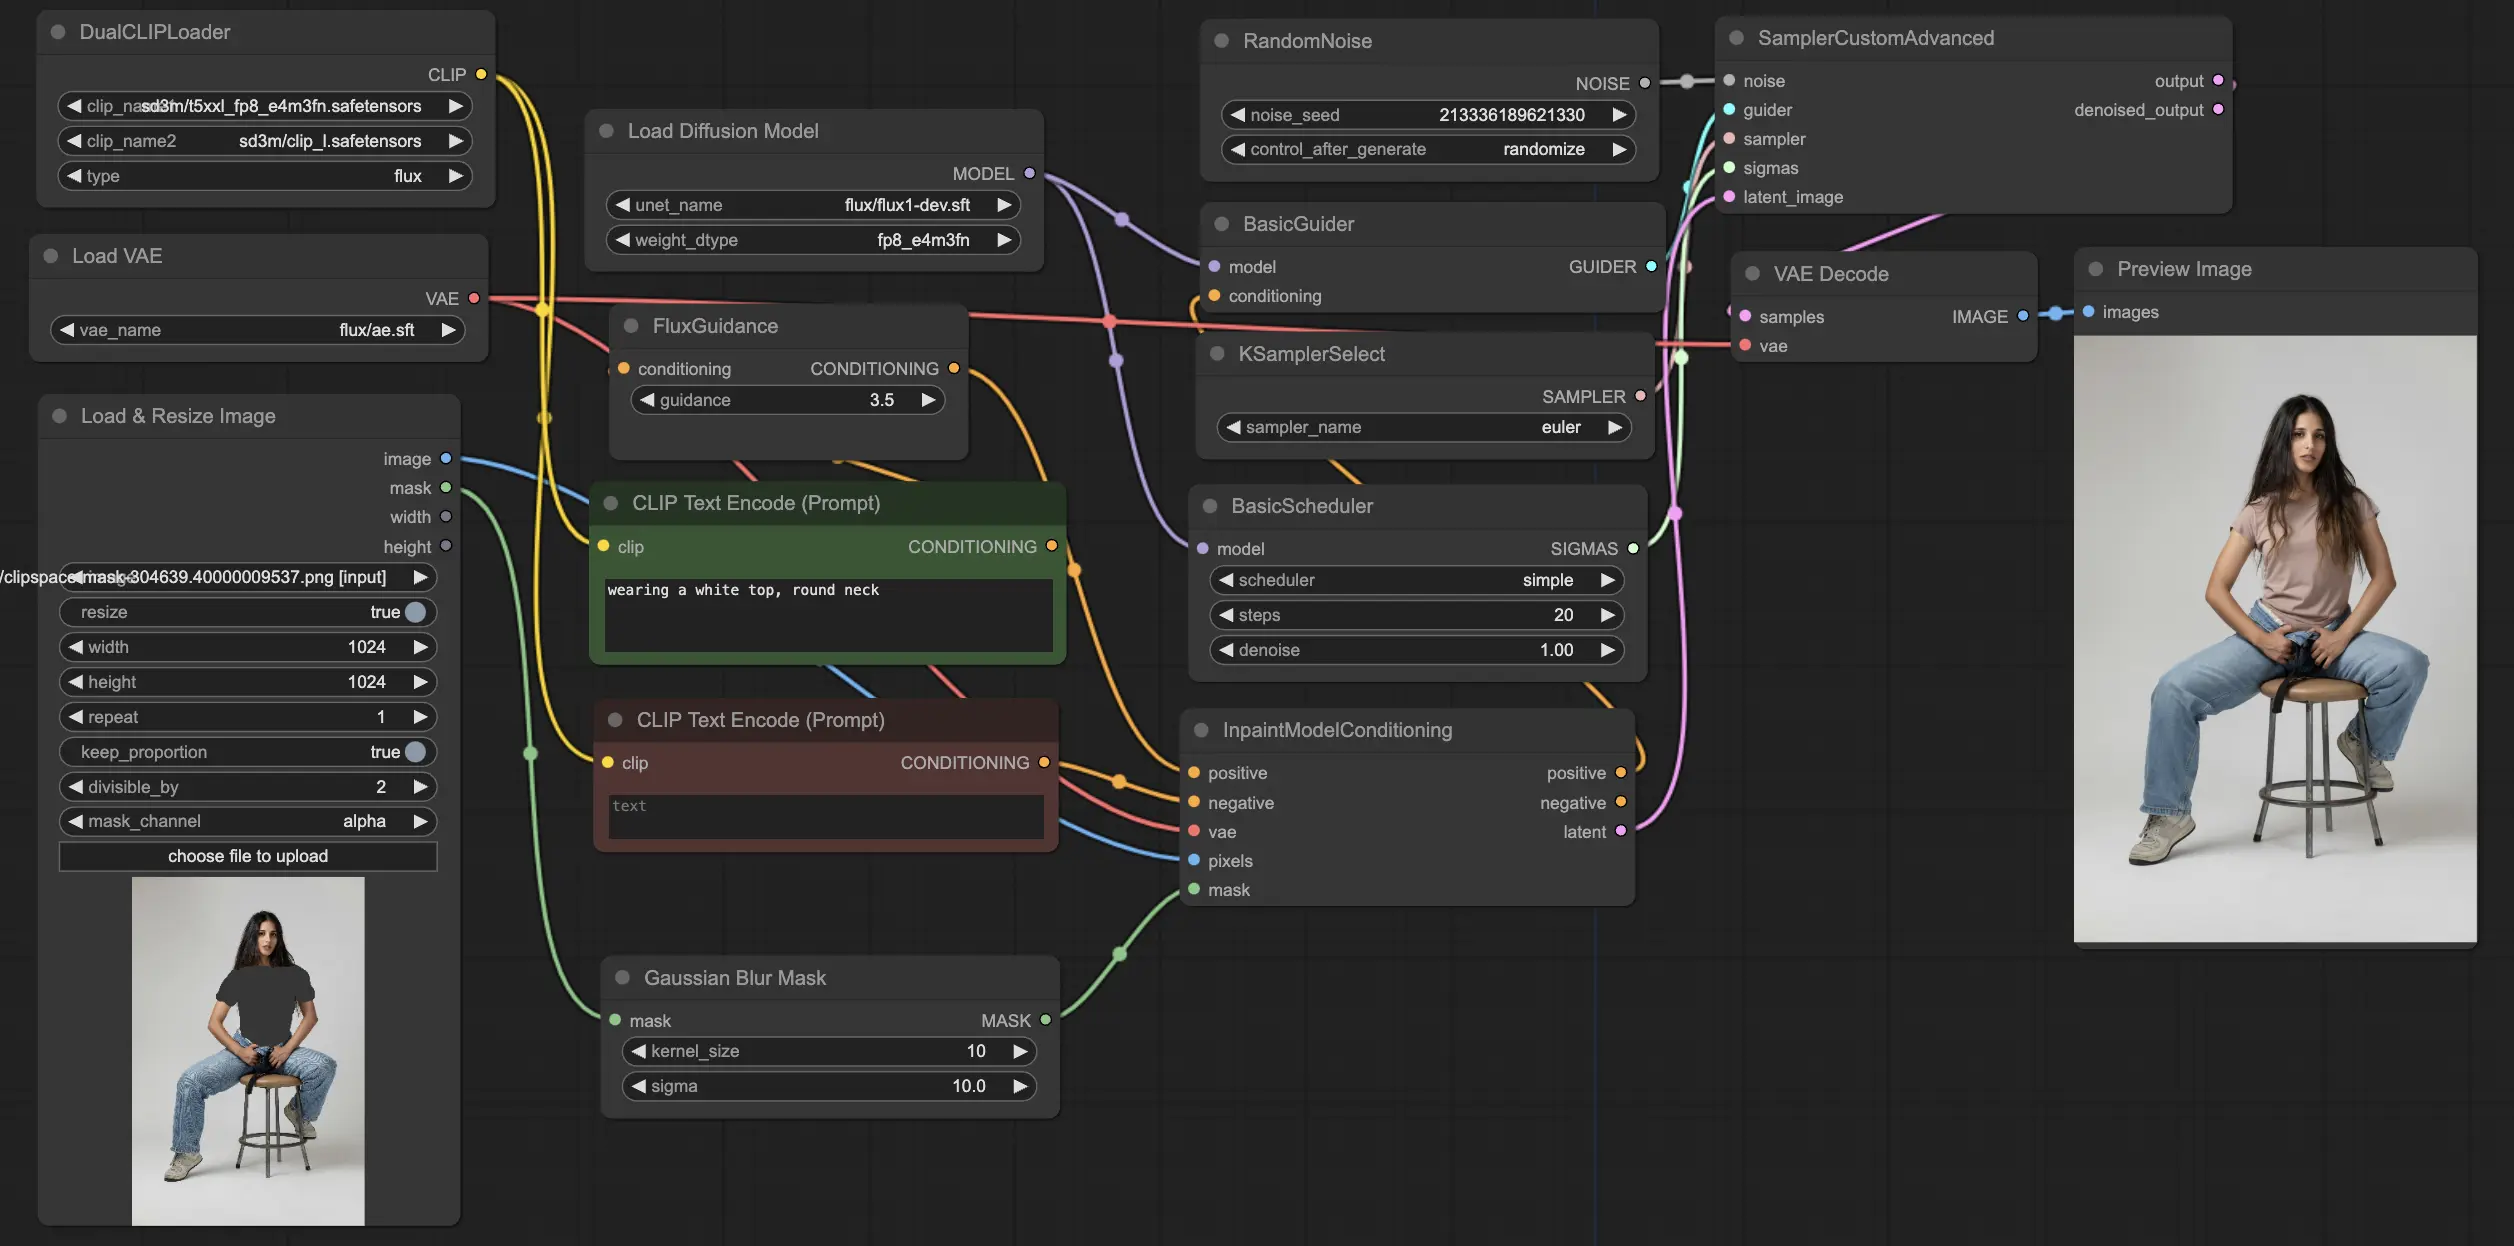
How to use the ComfyUI Flux Inpainting
To use the ComfyUI Flux Inpainting workflow effectively, follow these steps:
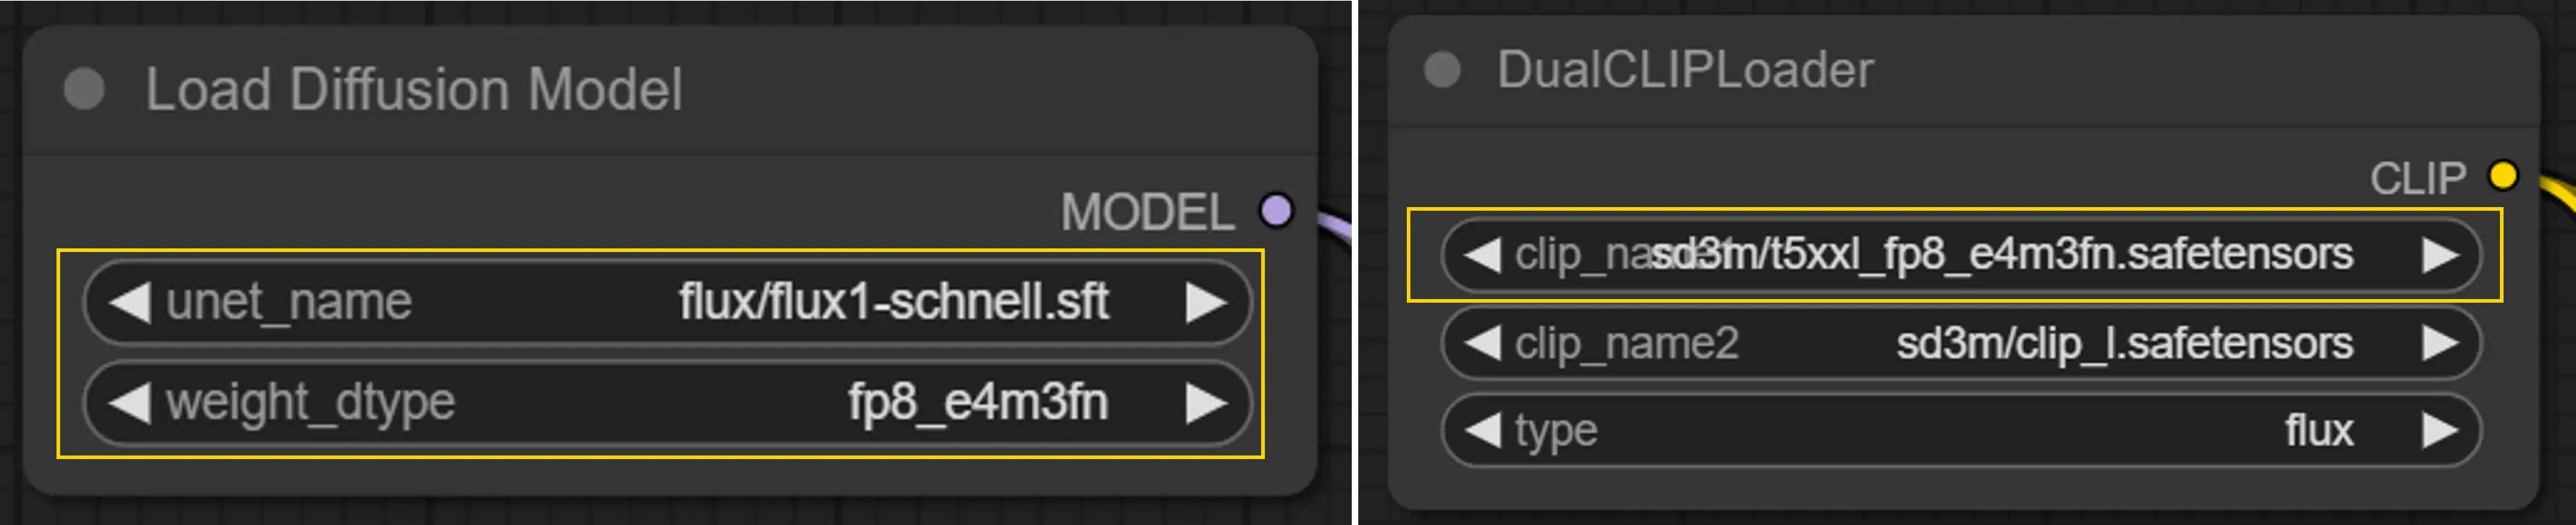
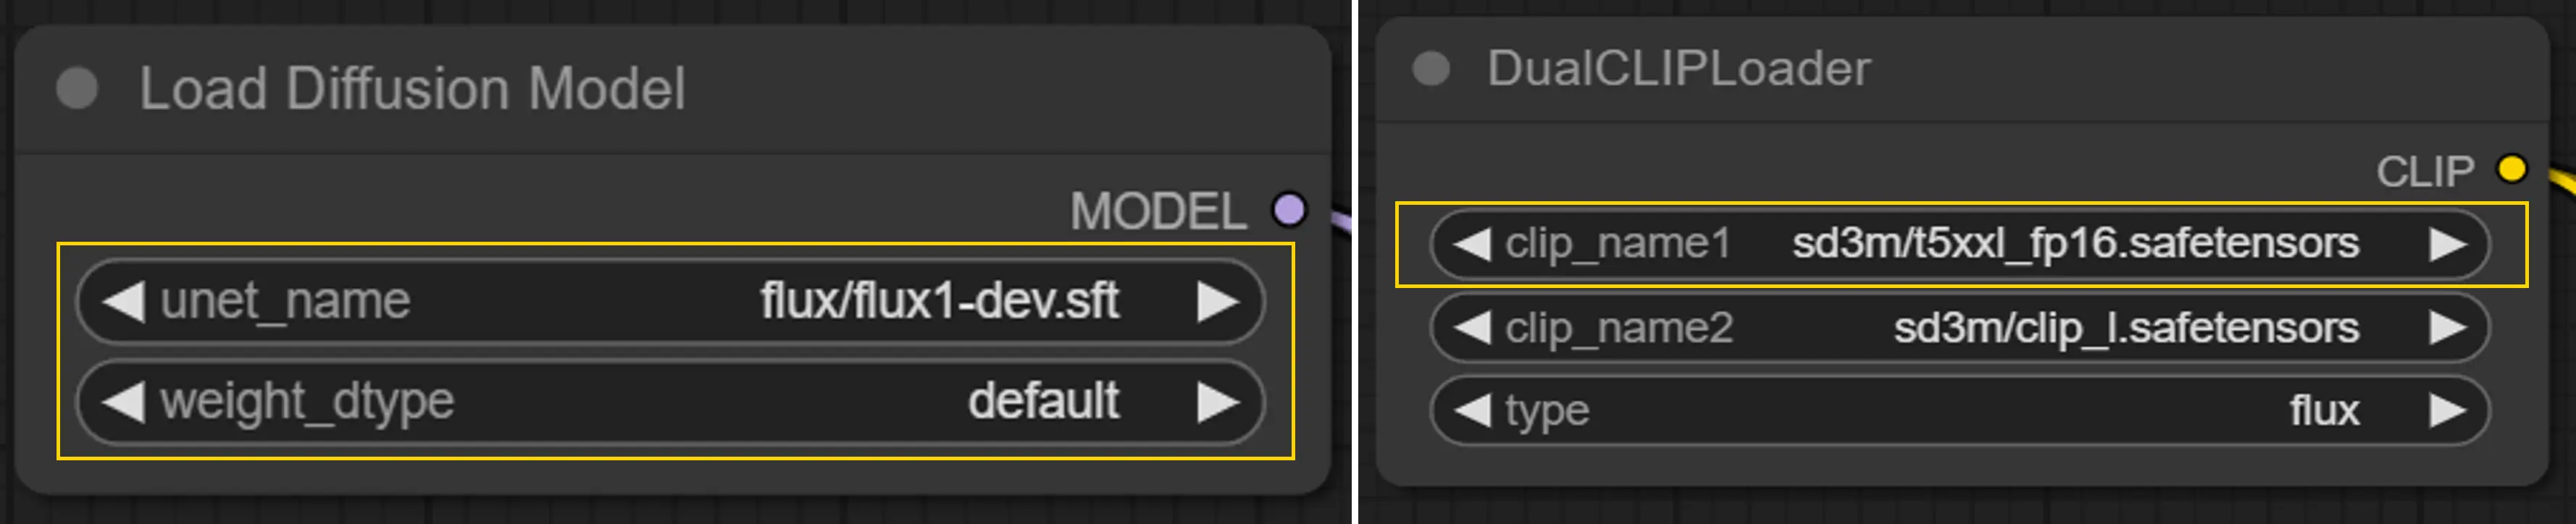
Step 1: Configure DualCLIPLoader Node
For lower memory usage, load the sd3m/t5xxl_fp8_e4m3fn.safetensors. For higher memory setups, load the sd3m/t5xxl_fp16.safetensors.
Step 2: Configure Load Diffusion Model Node
For RunComfy medium-sized machines, set the checkpoint to flux_schnell,fp8 and clip to t5_xxl_fp8.
For RunComfy large-sized machines or above, use flux_dev,default with t5_xxl_fp16 for better performance.
Step 3: Configure VAELoader Node
Ensure the required VAE model for FLUX is preloaded.
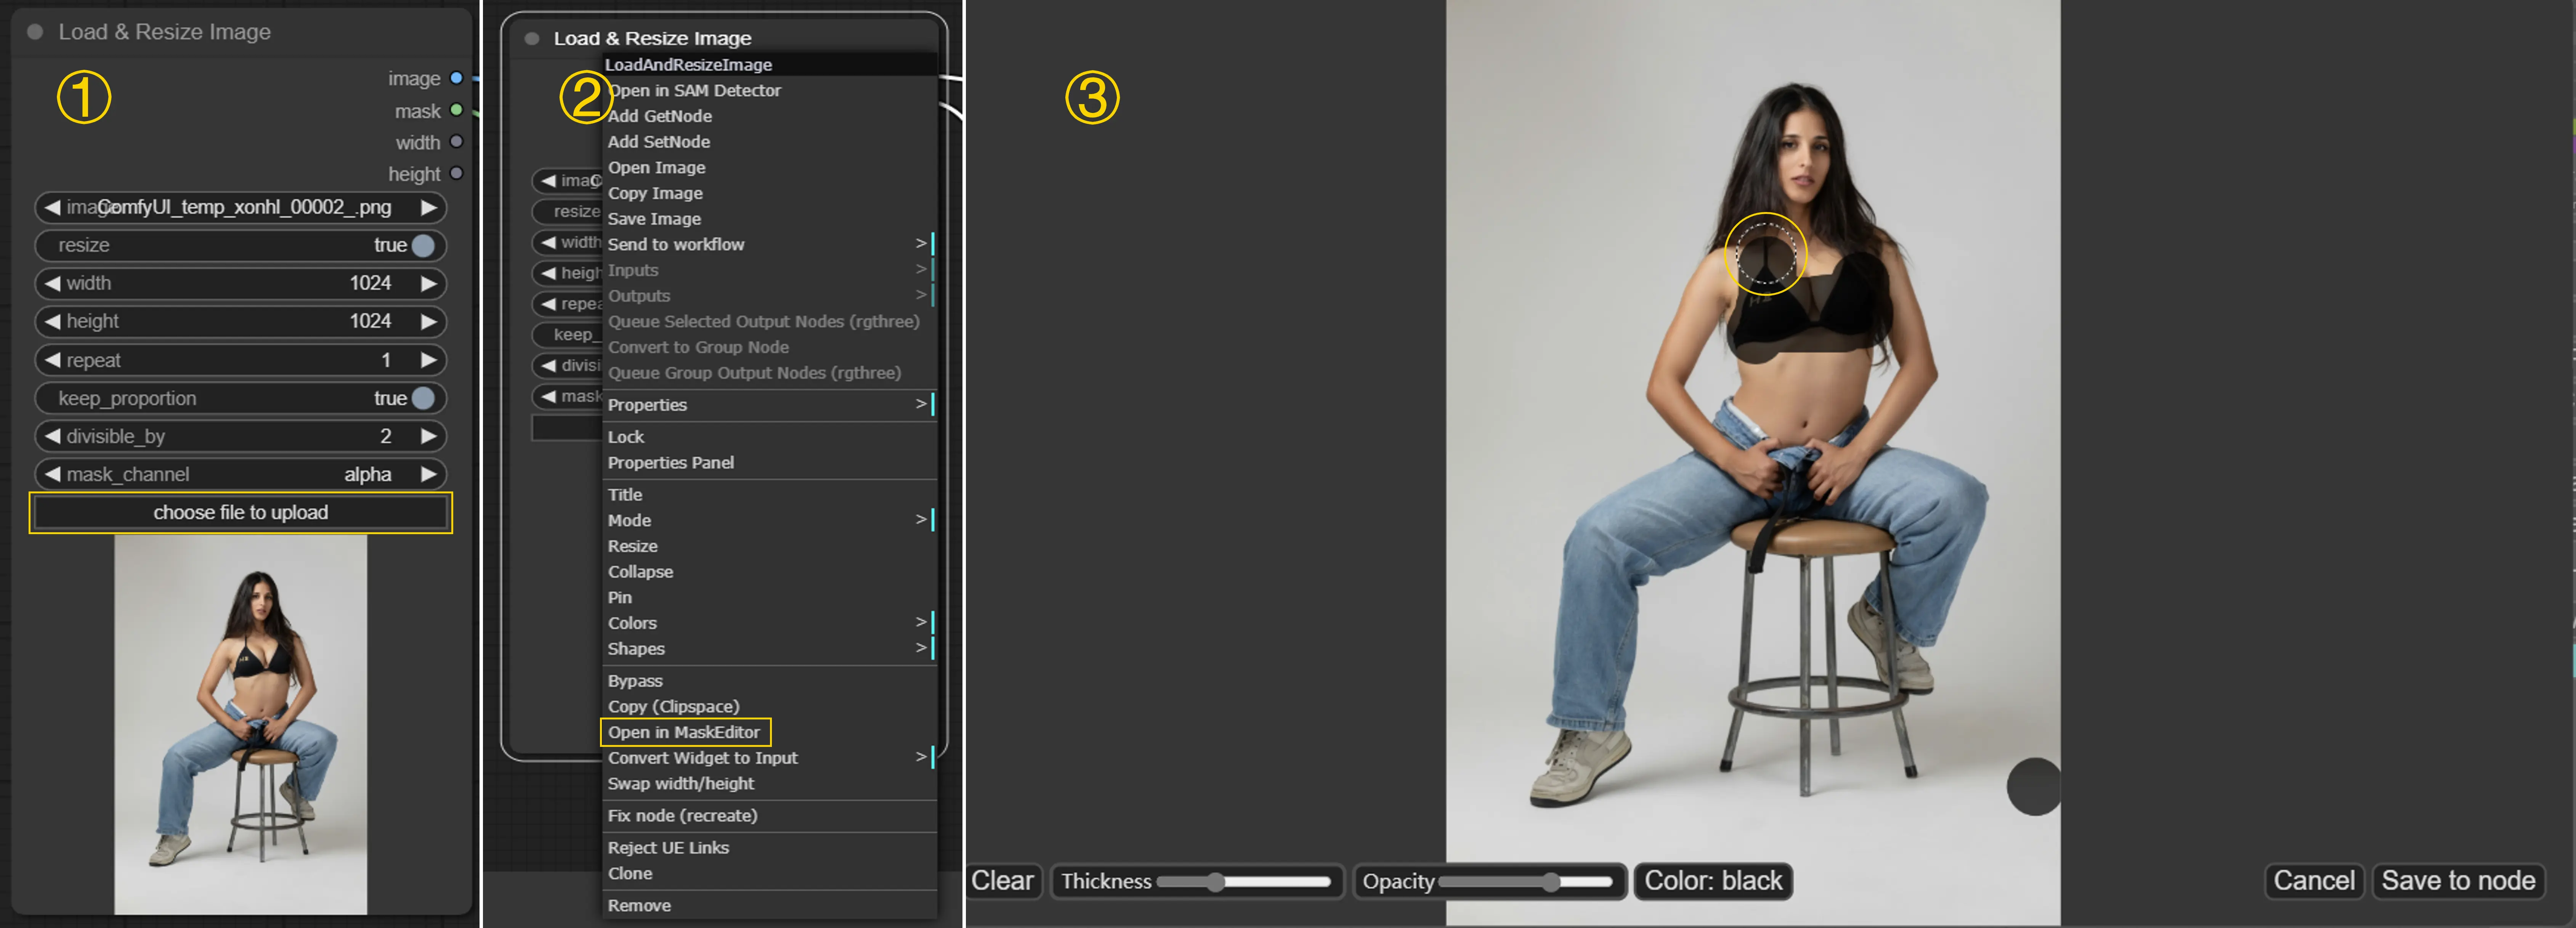
Step 4: Load and Mask the Image for Inpainting
Load the image you want to transform with FLUX Inpainting. Then Right-click on the image and select the "Open in MaskEditor" option to access the powerful masking tools. Use the MaskEditor to precisely select the areas you want to apply FLUX Inpainting to.
Step 5: Set Up CLIPTextEncode Node
Enter your desired text prompt in the node's properties to guide the FLUX Inpainting process and achieve your desired outcome.
Step 6: Generate the Image
With all the pieces in place, proceed to generate your image using the FLUX Inpainting technology.
The ComfyUI FLUX Inpainting workflow is a powerful tool for enhancing images, making it an essential addition to any image editing toolkit. By leveraging the capabilities of FLUX Inpainting, you can achieve professional-quality results with ease.
License
View license files:
The FLUX.1 [dev] Model is licensed by Black Forest Labs. Inc. under the FLUX.1 [dev] Non-Commercial License. Copyright Black Forest Labs. Inc.
IN NO EVENT SHALL BLACK FOREST LABS, INC. BE LIABLE FOR ANY CLAIM, DAMAGES OR OTHER LIABILITY, WHETHER IN AN ACTION OF CONTRACT, TORT OR OTHERWISE, ARISING FROM, OUT OF OR IN CONNECTION WITH USE OF THIS MODEL.