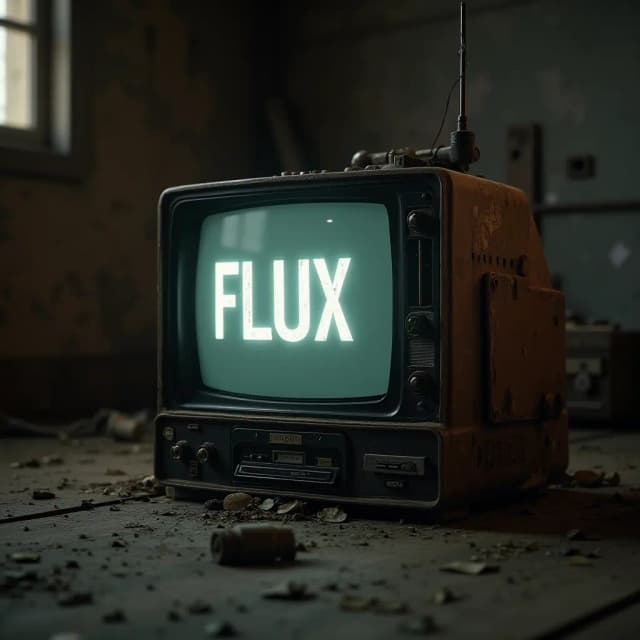
FLUX NF4 | Speed Up FLUX ImgGen
Boost your ComfyUI FLUX performance with FLUX NF4 in ComfyUI. This guide shows you how to leverage NF4 quantization for faster image generation and better resource management, offering a significant upgrade for efficient image creation.ComfyUI FLUX NF4 Workflow
- Fully operational workflows
- No missing nodes or models
- No manual setups required
- Features stunning visuals
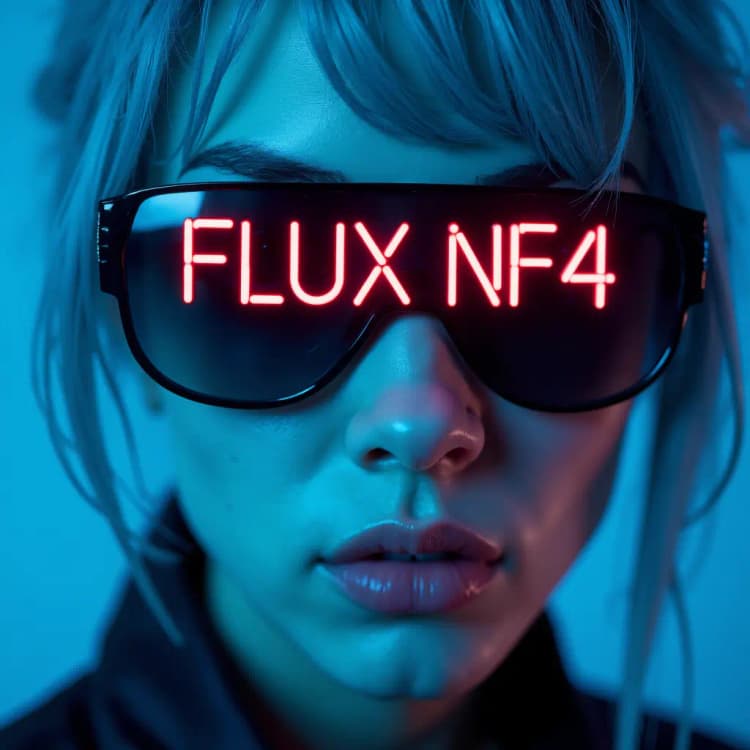
ComfyUI FLUX NF4 Examples
ComfyUI FLUX NF4 Description
FLUX is a new image generation model developed by . This FLUX NF4 model is created by lllyasviel, please visit for more information.
About FLUX
The FLUX models are preloaded on RunComfy, named flux/flux-schnell and flux/flux-dev.
- When launch a RunComfy Medium-Sized Machine: Select the checkpoint
flux-schnell, fp8and clipt5_xxl_fp8to avoid out-of-memory issues. - When launch a RunComfy Large-Sized or Above Machine: Opt for a large checkpoint
flux-dev, defaultand a high clipt5_xxl_fp16.
For more details, visit:
Introduction to FLUX NF4
FLUX NF4 is a specialized model checkpoint designed for performance optimization in Stable Diffusion workflows. Developed by the author lllyasviel, this model utilizes NF4 (Normal Float 4-bit) quantization to significantly improve inference speed and reduce memory usage compared to traditional FP8 (Float 8-bit) models. FLUX NF4 is part of a series of models aimed at enhancing efficiency, particularly on newer GPU architectures like the NVIDIA RTX 3000 and 4000 series. The model includes advanced features such as "Distilled CFG Guidance," which refines the process of generating images with more accurate prompts. On a high-end GPU like the RTX 4090, the regular FLUX model takes around 50 seconds to generate an image, while FLUX NF4 only takes about 13-14 seconds. This makes FLUX NF4 accessible to a wider range of users who may not have top-of-the-line hardware.
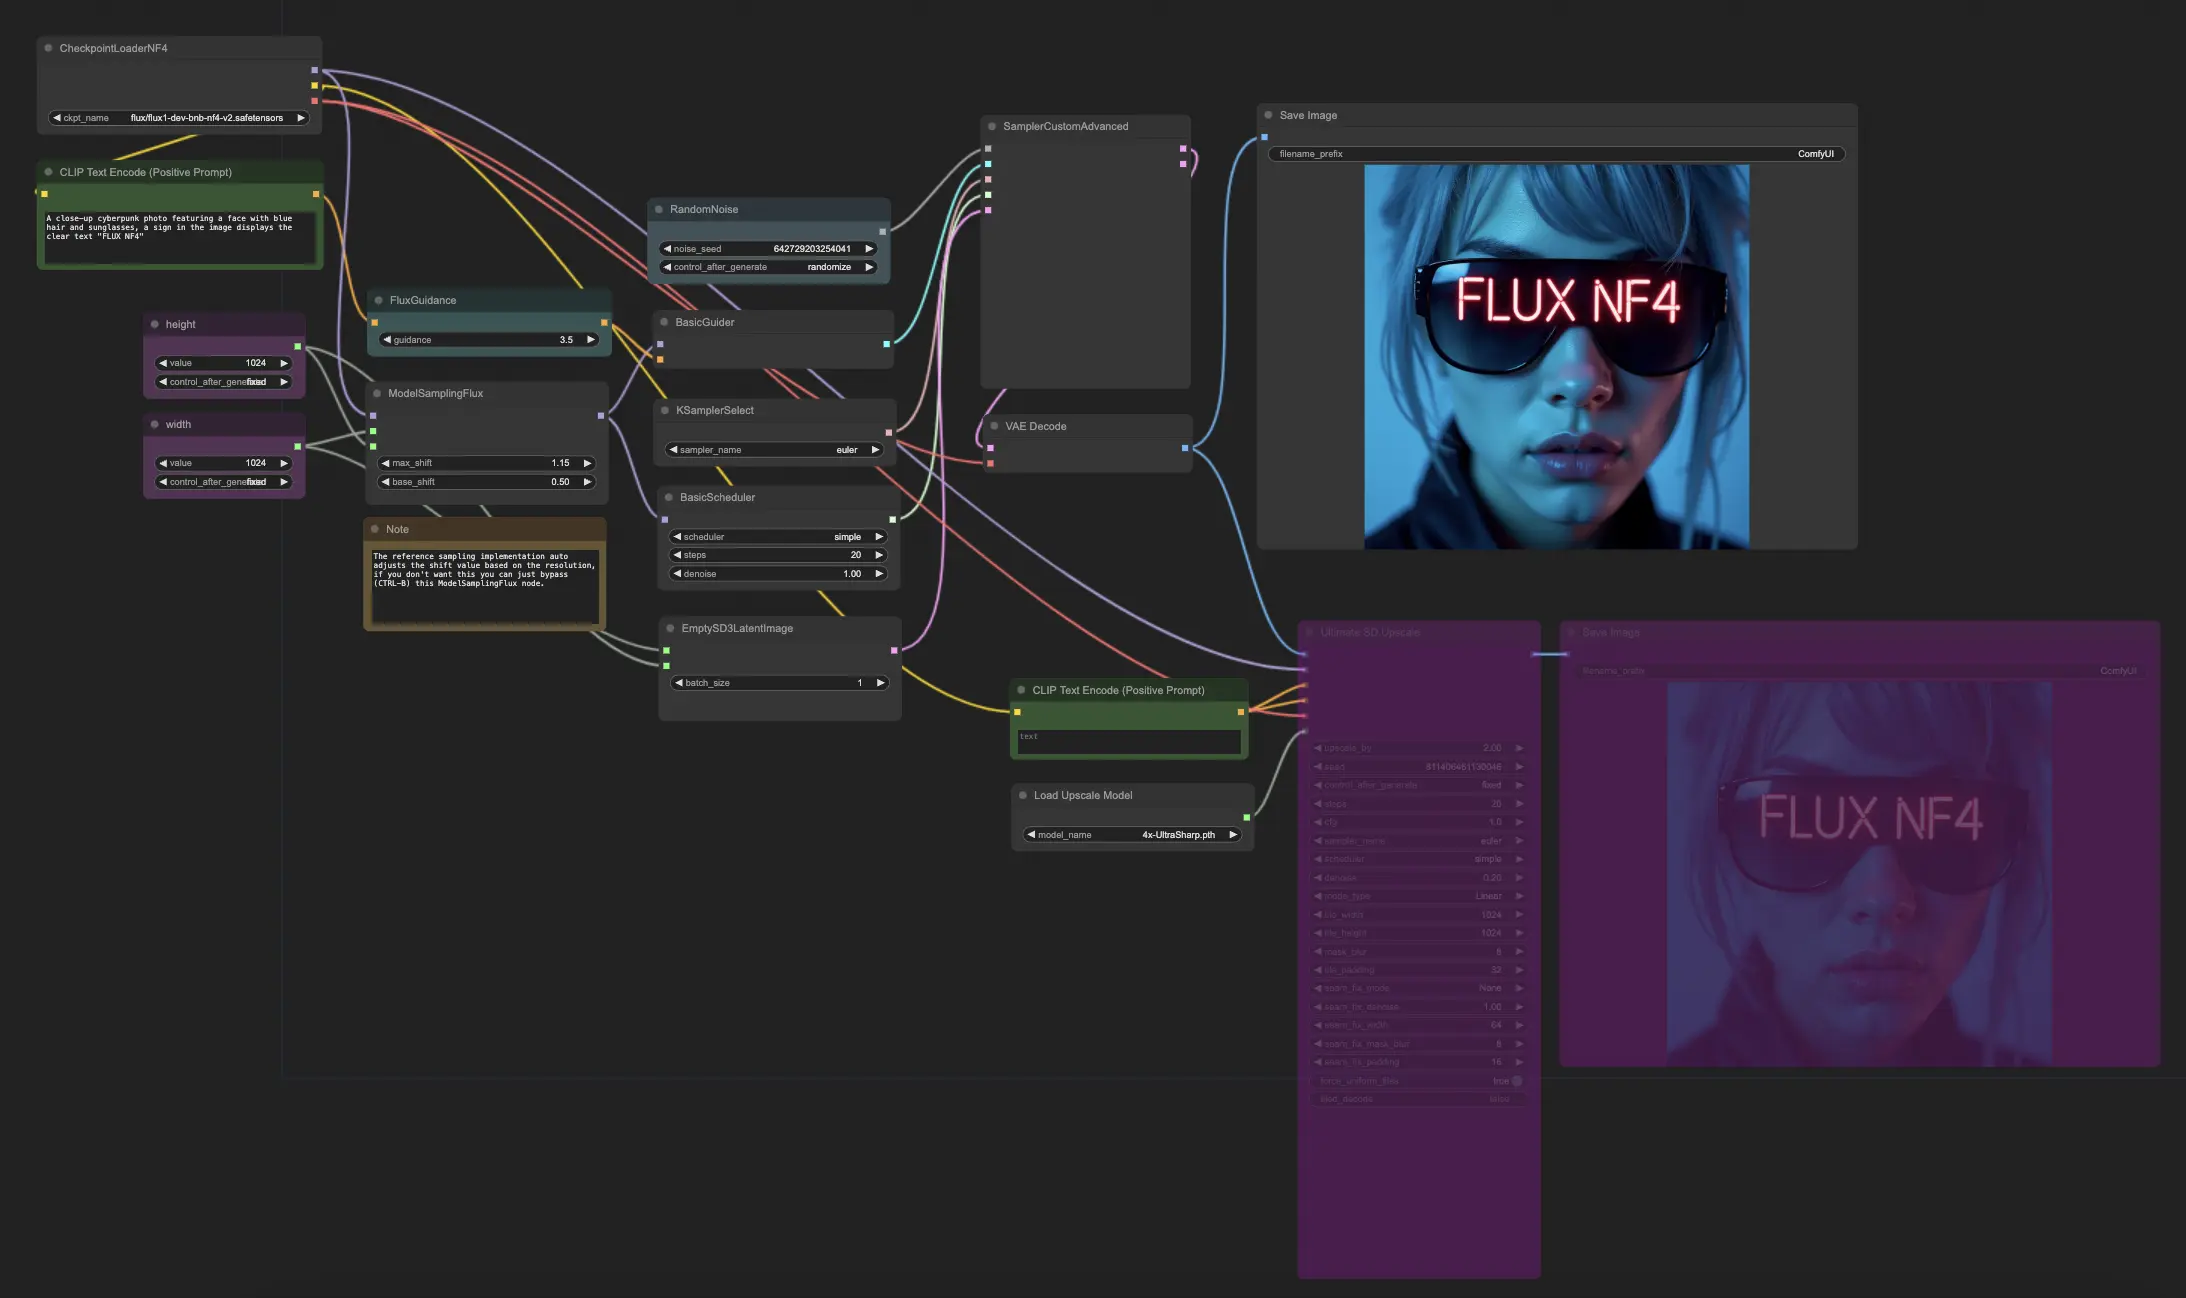
How to use ComfyUI FLUX NF4
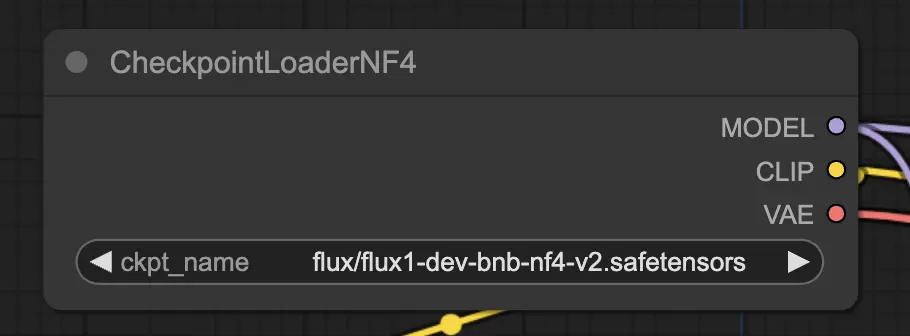
1. Loading the Model: CheckpointLoaderNF4
This node loads the FLUX model (flux/flux1-dev-bnb-nf4-v2.safetensors). The model is responsible for guiding the entire image generation process by providing the underlying framework that controls the behavior and characteristics of the generated images.
2. Generating Random Noise: RandomNoise
This node generates a random noise pattern, which serves as the initial input for image generation. The noise acts as the starting point that will be transformed into a final result.
3.*Model Sampling Flux: ModelSamplingFlux
The ModelSamplingFlux node adjusts the model's sampling behavior based on resolution and other parameters. It optimizes the model's output, ensuring that the image quality is maintained as transformations are applied. If you prefer not to adjust the sampling behavior, this node can be bypassed.
4. Setting Image Dimensions: PrimitiveNode (Width and Height)
These nodes define the dimensions of the image (width and height), typically set to 1024x1024. The specified dimensions influence the resolution and detail level of the generated image.
5. Conditioning with CLIP Text: CLIPTextEncode (Positive and Negative)
The CLIPTextEncode nodes encode text prompts into conditioning data that guides the image generation process. Positive prompts enhance desired features, while negative prompts suppress undesired ones, giving you control over the content and style of the output.
6. Applying Flux Guidance: FluxGuidance
The FluxGuidance node applies a guidance scale (e.g., 3.5) to the conditioning data. This scale adjusts the influence of the text prompts on the final result, allowing for fine-tuning of the generated output.
7. Scheduling with BasicScheduler: BasicScheduler
This node manages the scheduling of the image generation process, controlling the transition from noise to the final image. The scheduling parameters affect how quickly and smoothly the image evolves during generation.
8. Custom Sampling: SamplerCustomAdvanced
This advanced sampler node refines the image by applying additional transformations to the latent image. It integrates the noise, guider, sampler, sigmas, and latent image data to produce a high-quality output.
9. Decoding the VAE: VAEDecode
The VAEDecode node decodes the latent image into an actual visual image using a VAE (Variational Autoencoder). This step is crucial for translating the abstract latent space into a visible and interpretable image.
10. Upscaling the Image: UpscaleModelLoader and UltimateSDUpscale
The UpscaleModelLoader loads an upscaling model (e.g., 4x-UltraSharp.pth), and the UltimateSDUpscale node applies this model to enhance the image resolution. This step ensures that the final image is sharp and detailed, even at higher resolutions.
License
View license files:
The FLUX.1 [dev] Model is licensed by Black Forest Labs. Inc. under the FLUX.1 [dev] Non-Commercial License. Copyright Black Forest Labs. Inc.
IN NO EVENT SHALL BLACK FOREST LABS, INC. BE LIABLE FOR ANY CLAIM, DAMAGES OR OTHER LIABILITY, WHETHER IN AN ACTION OF CONTRACT, TORT OR OTHERWISE, ARISING FROM, OUT OF OR IN CONNECTION WITH USE OF THIS MODEL.