ComfyUI IC-Light workflow for Video Relighting
Unlock the full potential of your video projects with the ComfyUI IC-Light workflow, designed specifically for enhancing the lighting in your "Human" character videos using a lightmap. With ComfyUI IC-Light, you can easily transform your videos by simply providing your prompts and lightmap elements, such as shapes and neon lights. The tool will create a new video with significantly improved lighting.
HOW TO USE ComfyUI IC-Light workflow
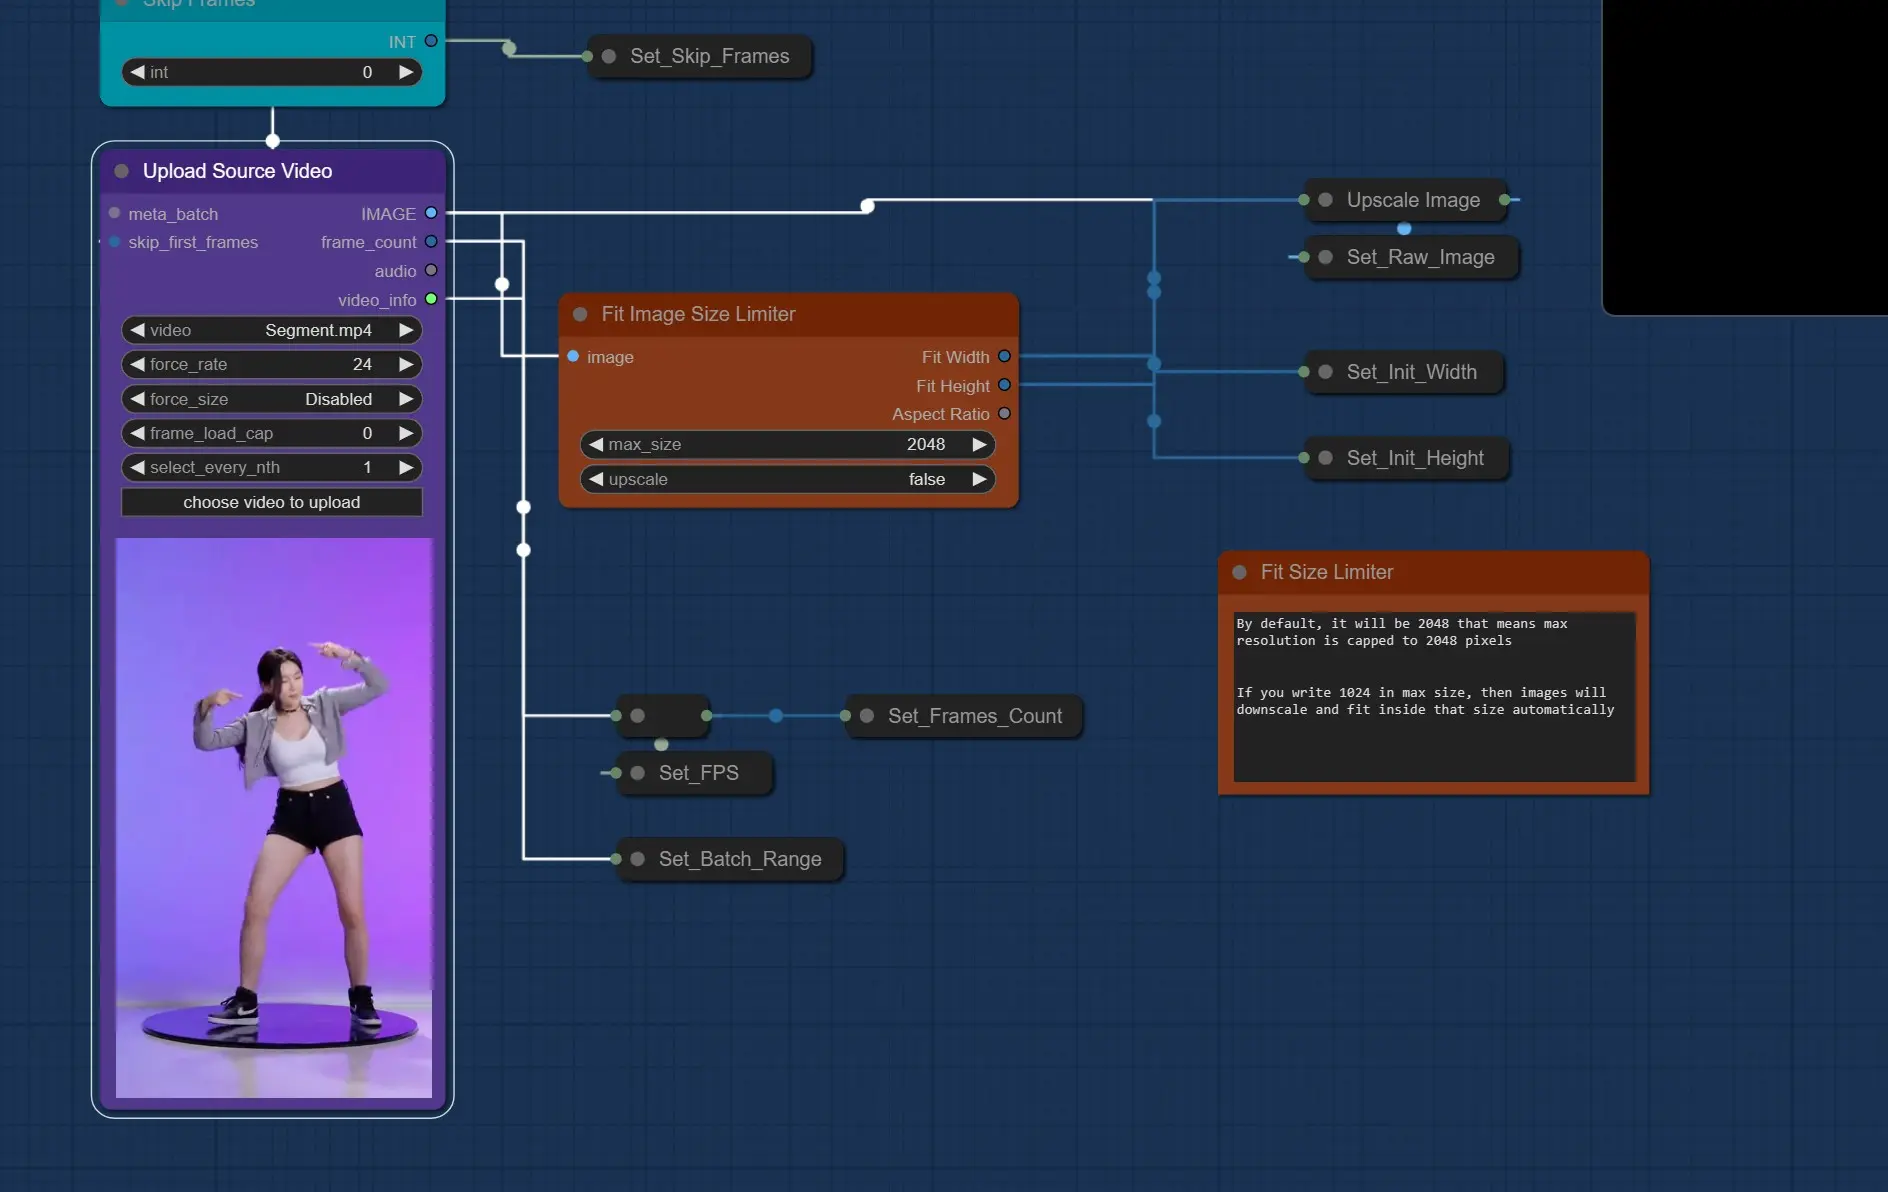
- Upload Source Video: Start by uploading the video you want to enhance.
- Upload Light Map Video or Single Light Map Image: Choose a light map video or a single image to serve as your new lighting template.
- Enter Load Cap and other Settings, same settings should be in Light Map Video.
- Enter Prompts which describes your new light settings like Sunlight or neon lights.
- Select You Model. Realistic model is preferred.
- Change Light Map Composing and other Settings if needed.
- Hit render.
Outputs will be saved in ComfyUI > Outputs
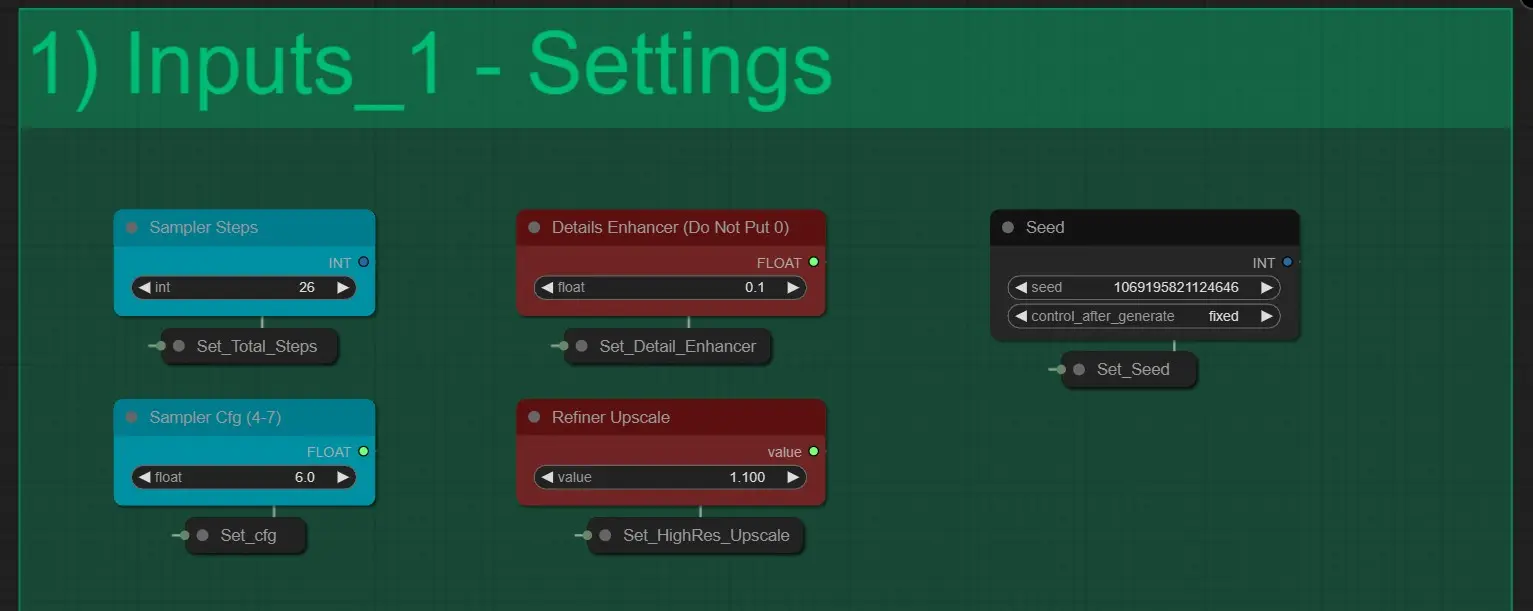
Here we have 5 Settings:
- Sampler Steps: It determines the total number of steps KSampler take to render an image. It should not be changed. [Default Value 26]
- Detail Enhancer: It Increase the minute Details in the Final Render. [Use value Between 0.1 and 1]
- Seed: It controls the Generations Seed for every KSamplers.
- Sampler CFG: This Controls the CFG values of the KSamplers.
- Refiner Upscale: This works like the Highres Fix value. [Use between 1.1 – 1.6 for best results]
Prompts
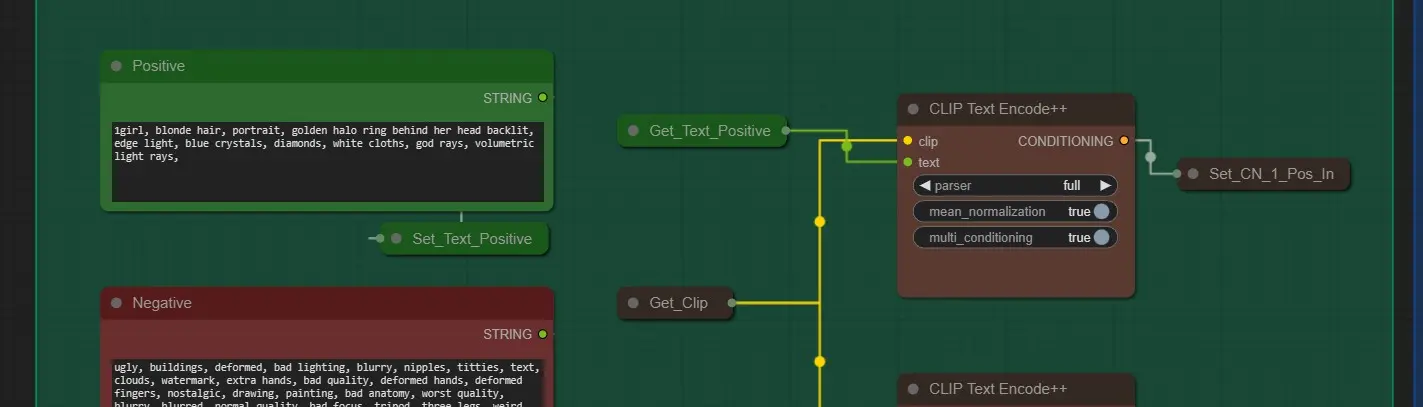
- Positive Prompt: Enter prompts which best describes your Image with the new lighting.
- Negative Prompts: It is configured to give best results. Feel free to edit it.
- Clip Text Encode nodes: It helps in Encoding Text to maximize quality. Leave it at “full”
Models and Loras
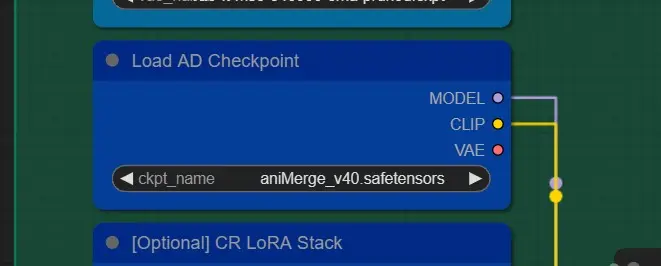
- Checkpoint: Choose any realistic SD 1.5 model for accurate results. Feel to choose any SD 1.5 model for stylistic results.
- Loras: [Optional] Choose any loras from the give list if you desire. Do not use them at full strength. Use around 0.5-0.7 for best effect
- Upload Source Video: Here you click and upload your Human Character video you want to change light of.
- It should be under 100 MB, Comfy will fail to upload large size.
- It should be no longer than 15-20 seconds. It may fail to render longer videos
- It should be in 720p or lower
- Use Skip Frames Nodes if you need to skip some starting frames. [Light Map video’s will also skip this much frames]
- Fit Image Size Limiter: Here you cap the rendering resolution, whether be landscape or portrait, max resolution will always be under or equal to Set value.
- Use Value between 800 – 1200 for best results. [This will impact Vram]
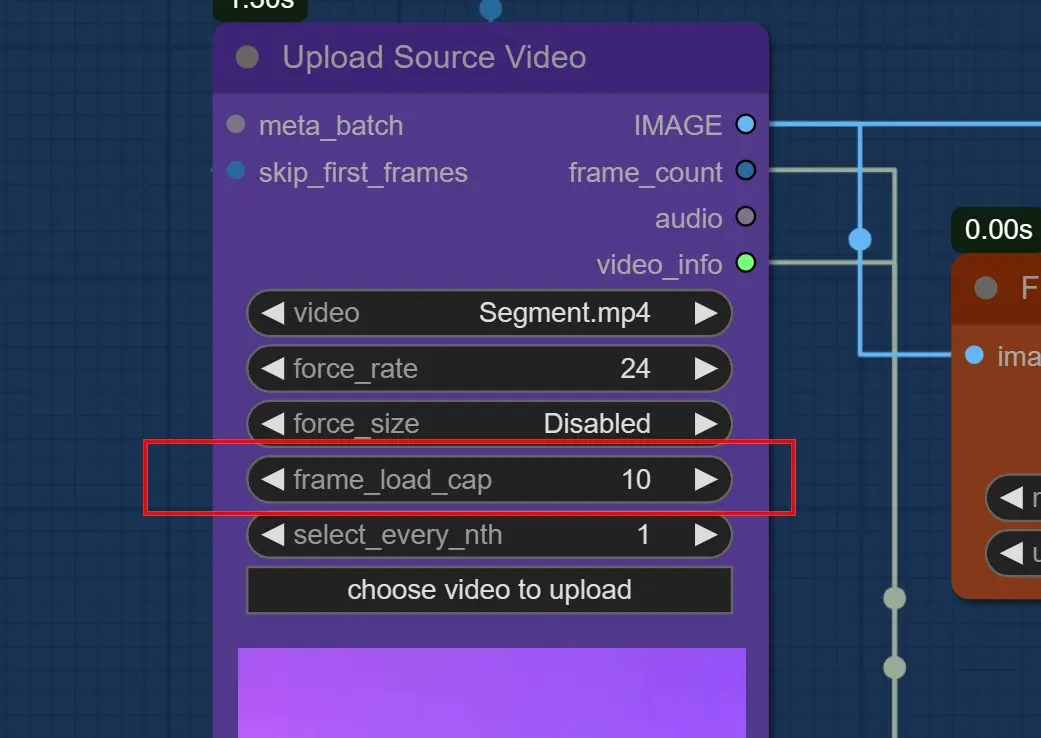
Important: Use Frames Load Cap of 10 to Test Out First
- Use About 200 - 300 frames at 1000 – 1200 fit size, if you have 24 GB.
- Use 0 if you want to render all frames. [Not Recommended for longer videos]
Mask and Depth Settings
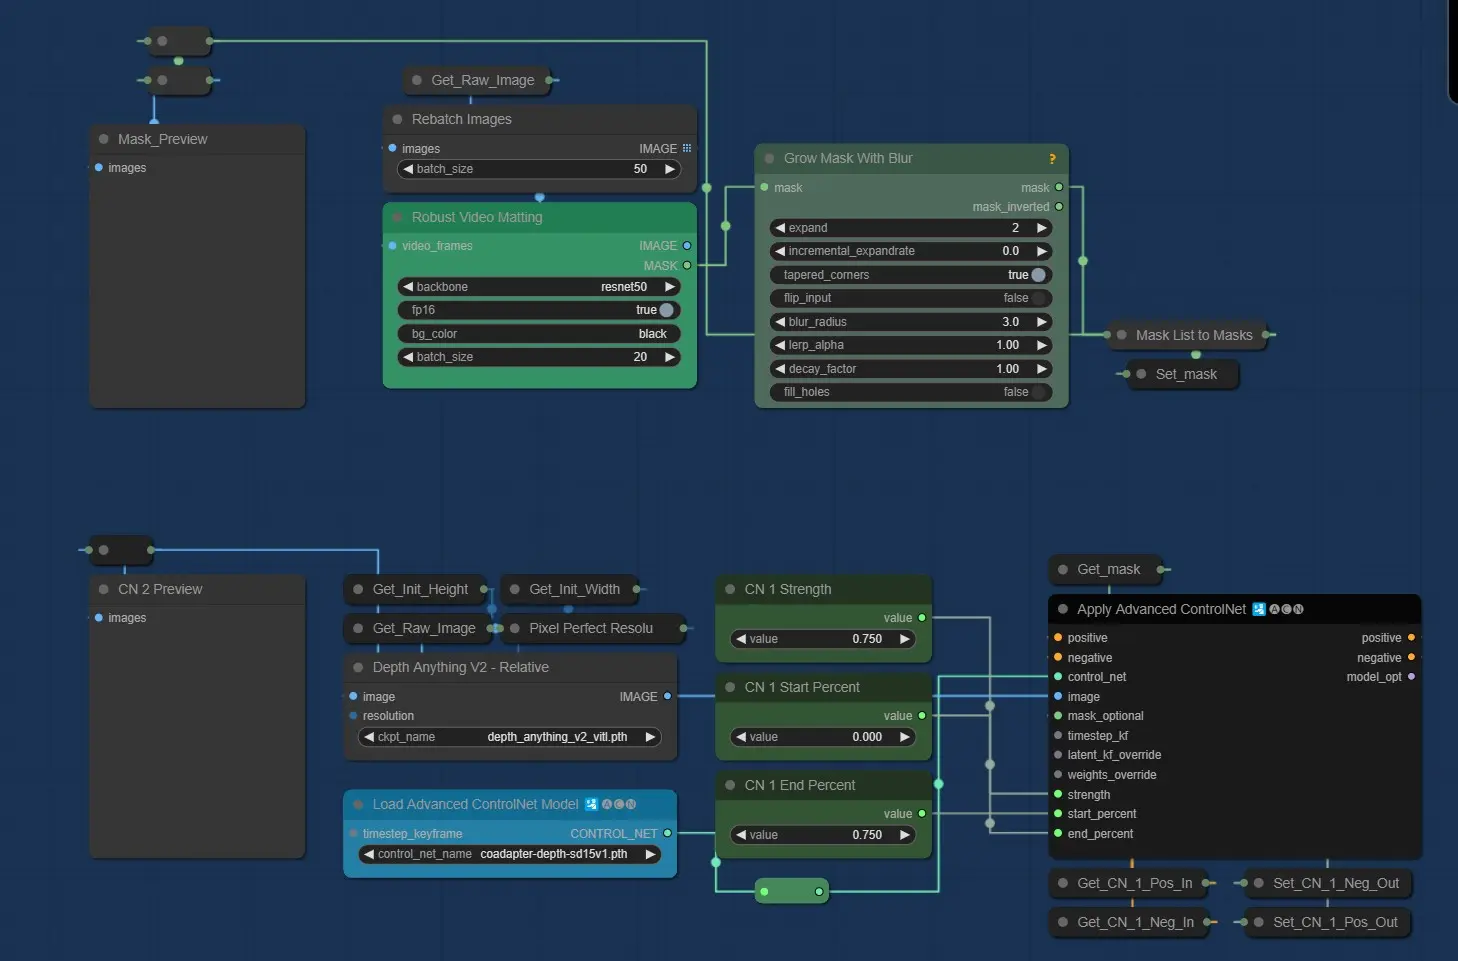
- Mask: It uses the Robust Video Matting, The default settings are fine.
- Depth ControlNet: It uses the latest DepthAnything v2 models.
- Strength and End Percent are Set at 75% to give optimal results
- Use Co Adaptor Depth for best results.
Light Map
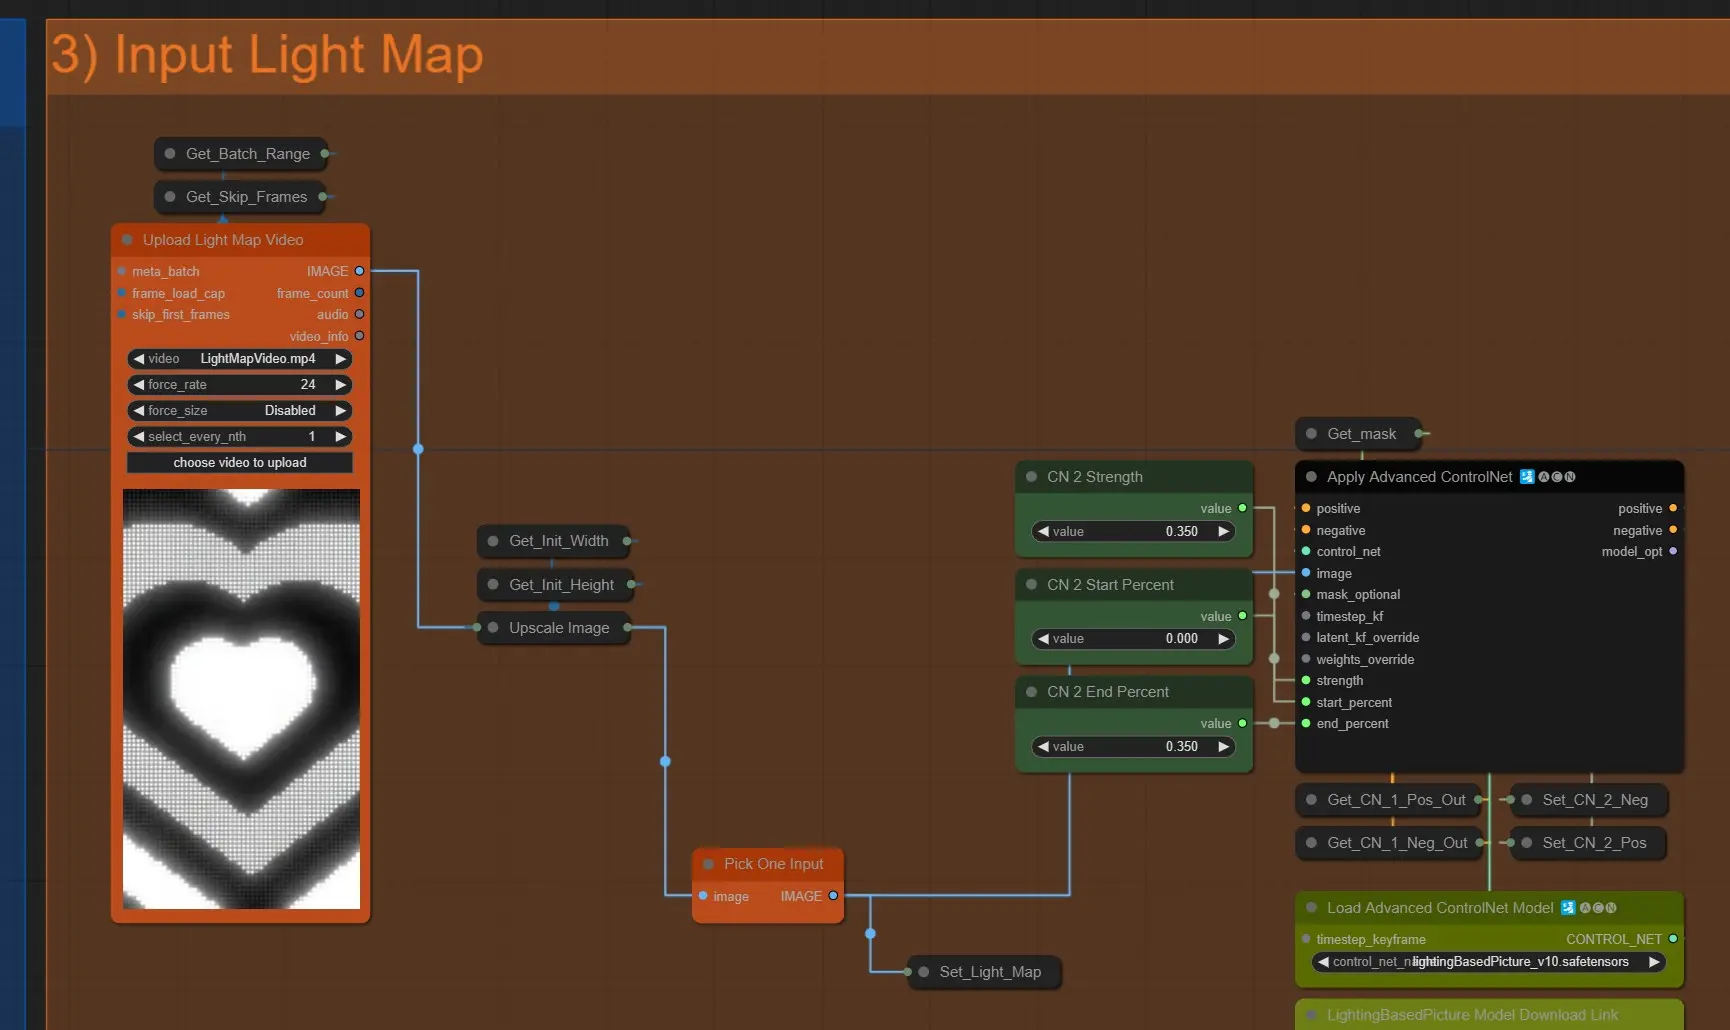
- Upload Light Map: Click and upload a light map video you want.
- It will auto scale to the Source video’s dimensions
- Make Sure it is longer or equal to source video’s dimensions else it will give error.
- Light Map ControlNet: This light map is also used as Light controlnet using this model
- CN Strength and End Percent: Use Low values here, Higher values may cause over exposure or Sharp Light transition.
Single Light Map

- To Use a Single Image as light map, unmute these nodes and connect the reroute node to “Pick one Input” Node.
AnimateDIff
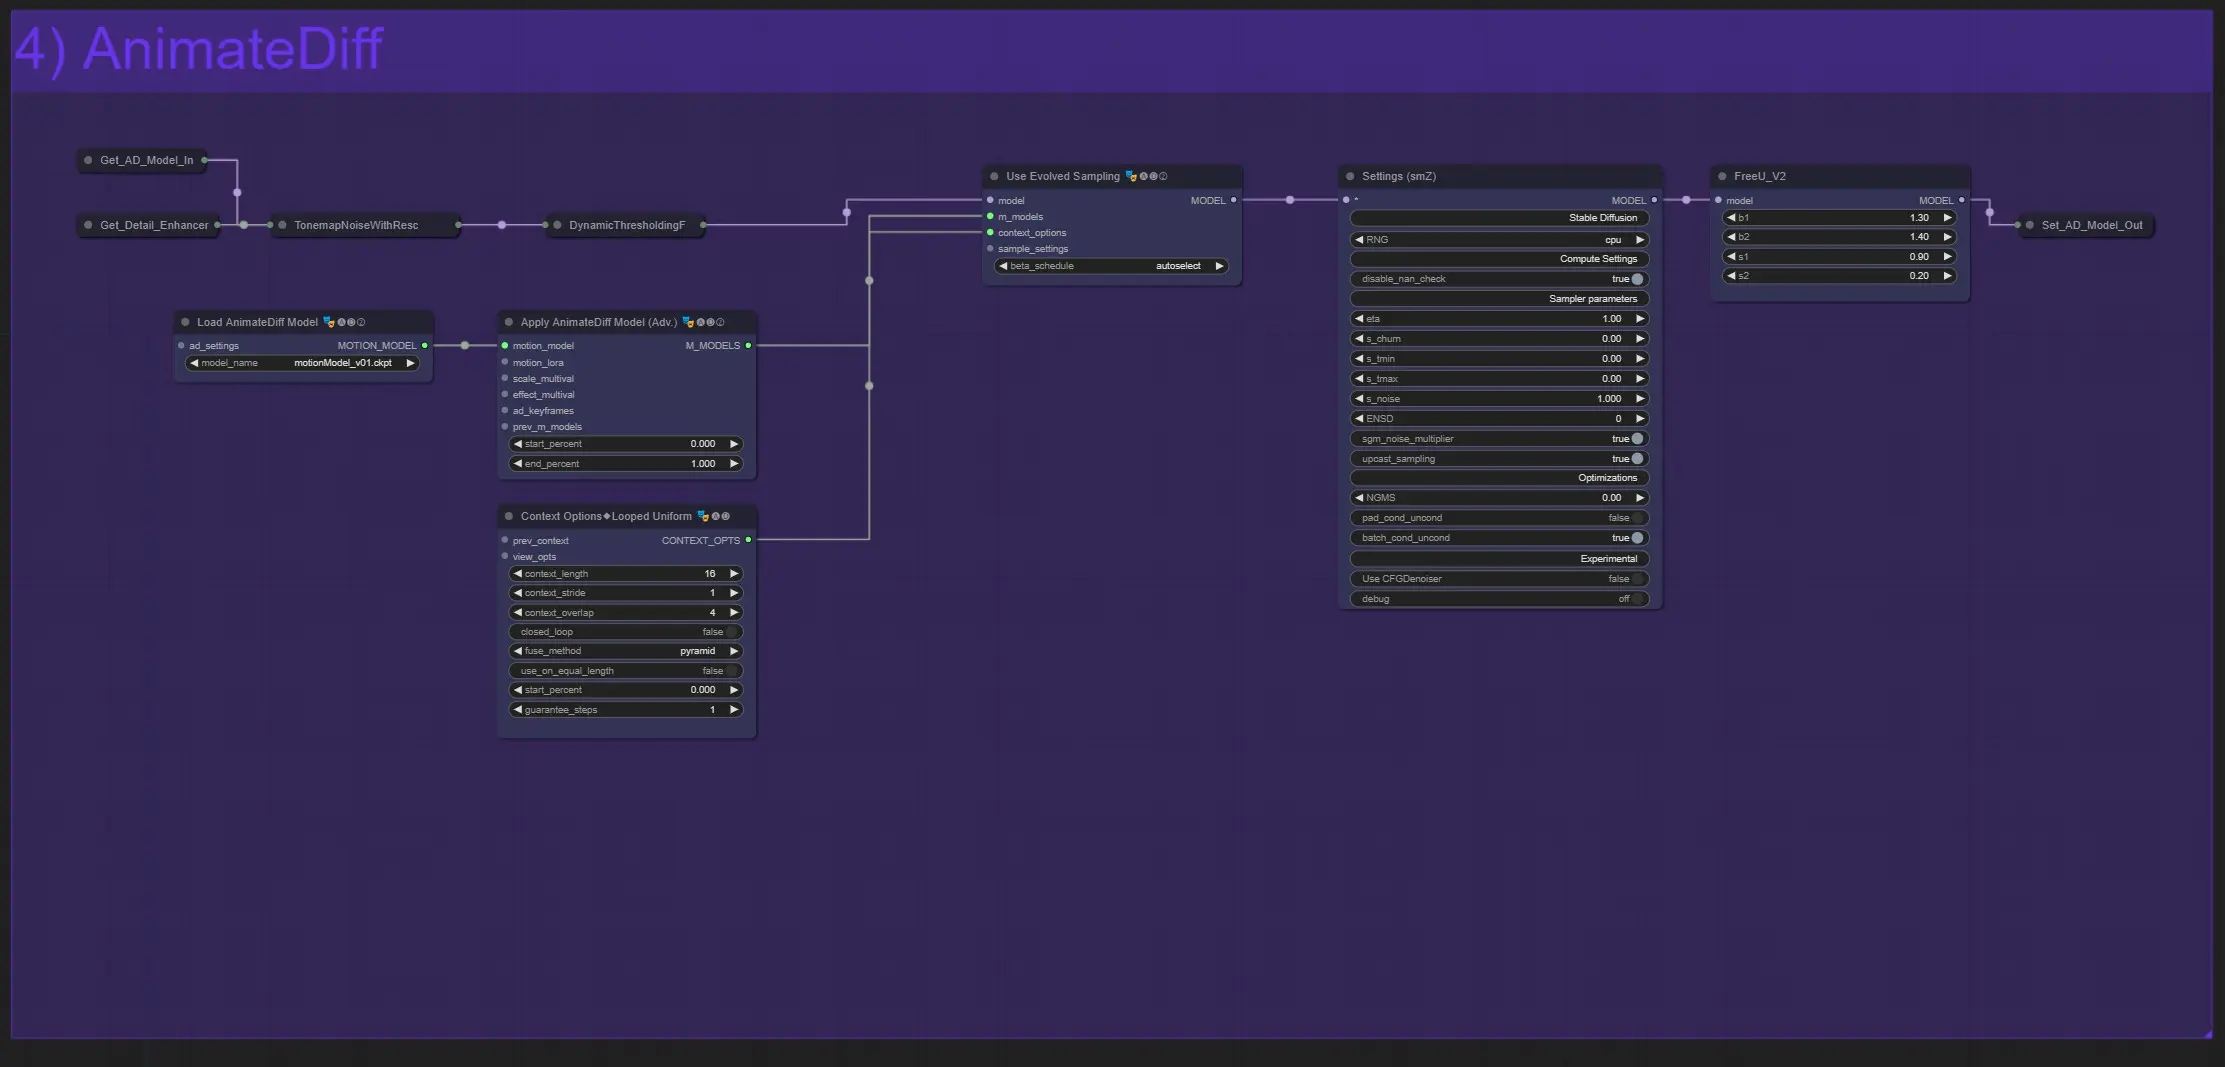
- Load Animatediff Model: You can use any model for different effects.
- Animatediff Other nodes: You need to have some knowledge of animatediff to change other settings [ You can find them here ]
- Settings SMZ: This is node to increase more quality of the model Pipeline, all settings are predefined to work well.
Composing of Light Map and IC Conditioning

- The Above top Adjustment Nodes (In Grey color) are there to control the Conditioning of the IC-Light Conditioning, to make is less contrast and control brightness.
- Generate New background: When Disabled it will the original image inputs and try to map the details similar to the source video’s background according to “Background Prompts” if present in the positive prompt box
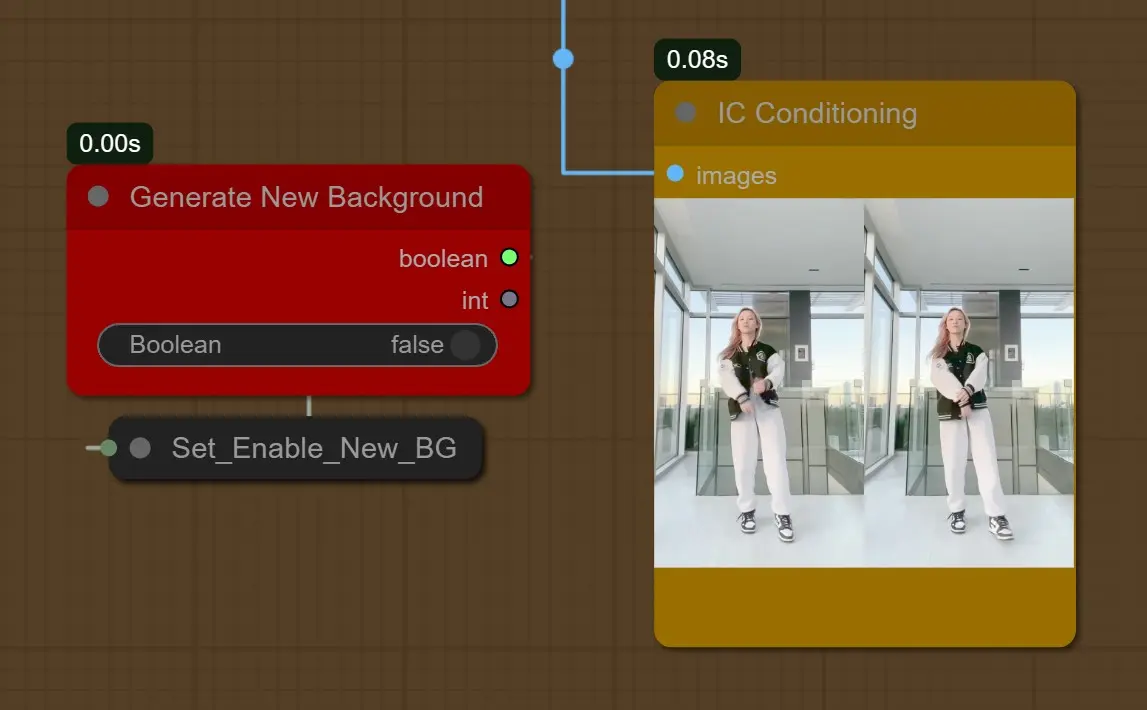
[1girl, sunlight, sunset, white shirt, black short jeans, interior, room]
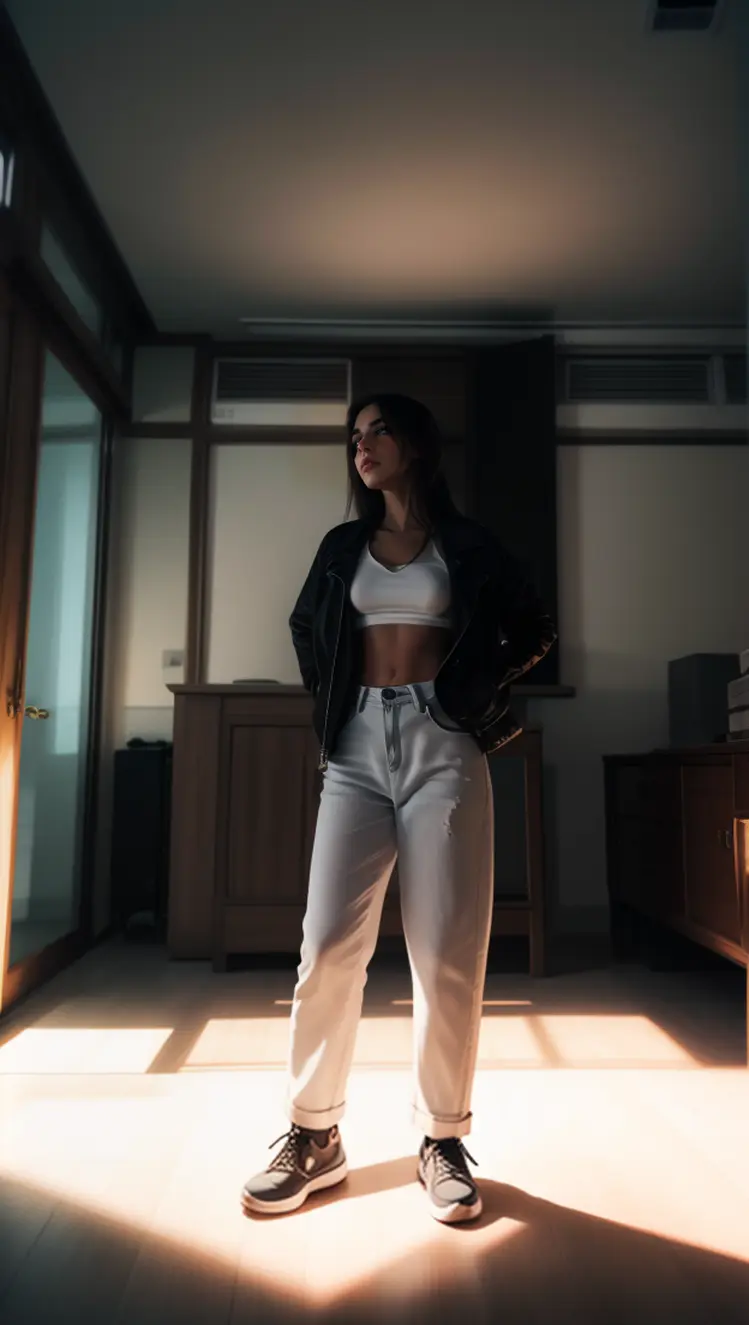
- When Generate New background is Enabled: It will generate a new background considering the depth
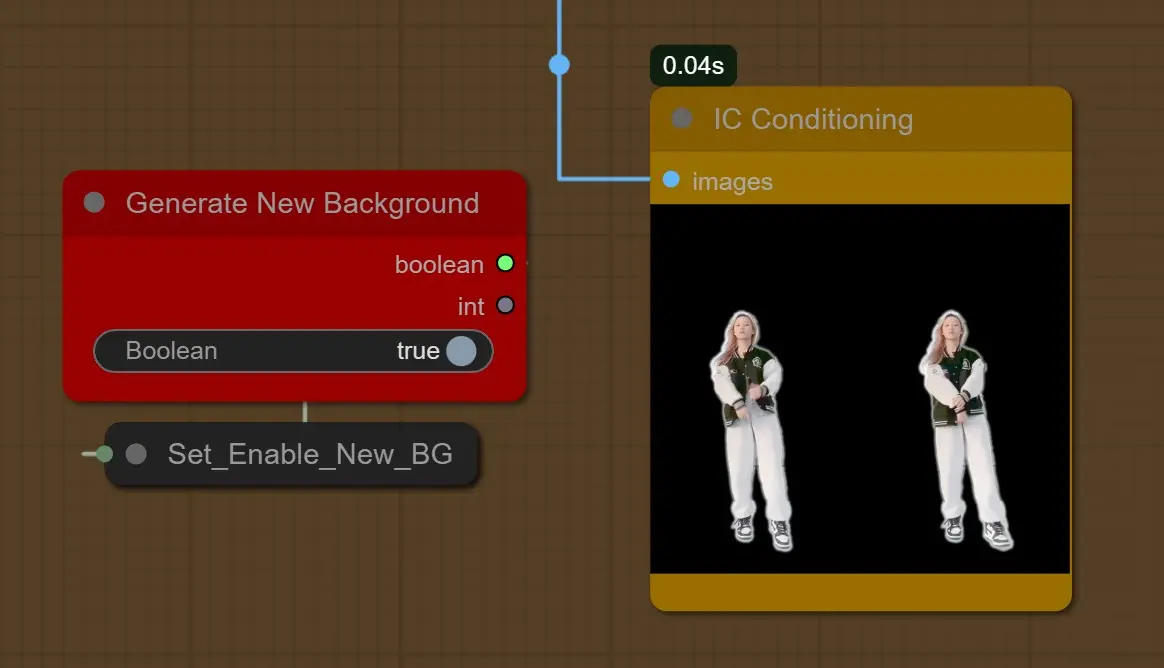
[1girl, sunlight, sunset, nature in the background, sky]
Also Depth ControlNet’s Strength and End Percent was decreased to 45 % to have an Open Area in the background.

- Light Map on Top: When True, Light map will be on top of the Source video and more dominant, When False Source will be on top, more dominant and Brighter
- Subject Affecting Area: 2 Blending modes works the best
- Multiply: It will darker the shadow areas according to light map on top or bottom
- Screen: It will brighten the shadow area according to light map on top or bottom
- Blend Factor is for the intensity.
- Overall Adjustments: This will control the brightness, contrast, gamma, tint of the Final Processed Light map from above.
- Image Remap: Use this node to control the overall global brightness and Darkness the whole image.
- Higher min value will brighten the scene
- Lower Max values will make the Scene Darker and can convert the Brighter areas into morphing objects like the QrCode Monster CN
- Use mostly the Min value to 0.1 or 0.2 to light up a scene a little bit.
- Min Value 0 will have a pitch-black shadow for black pixels of the light map.
KSamplers (Raw and Refine)
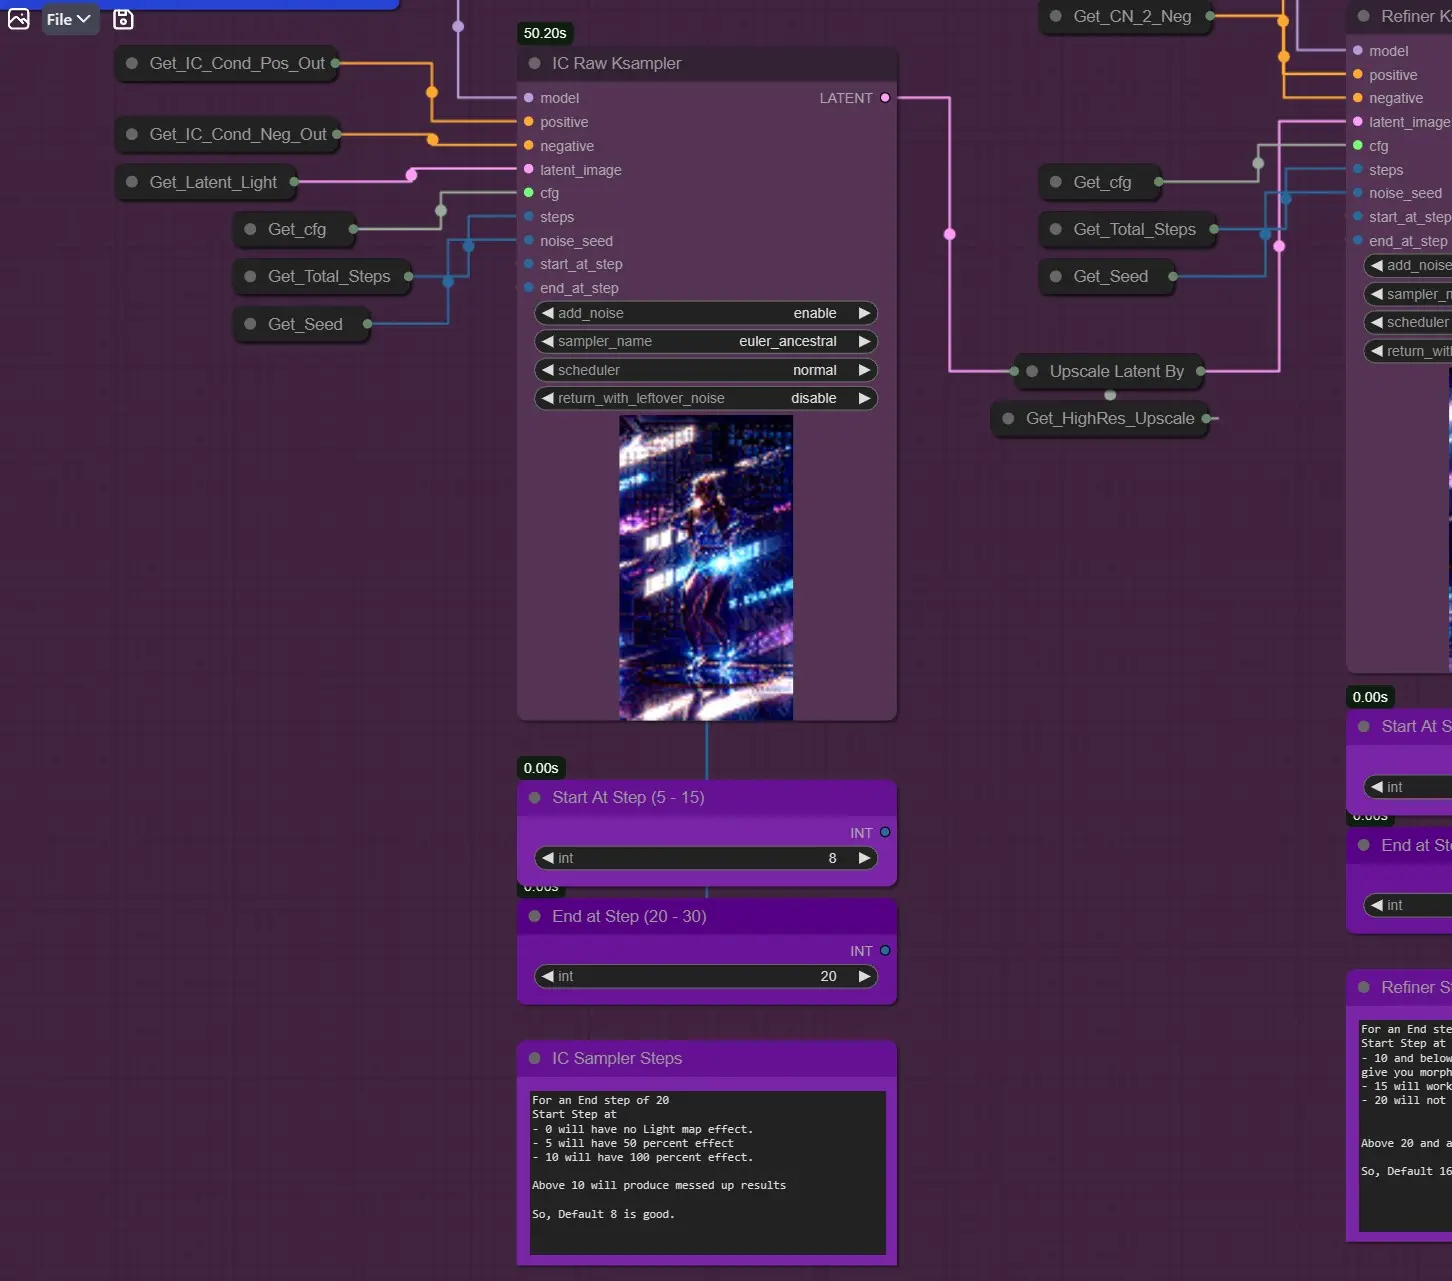
IC Raw Ksampler: Unlike any other sampler it is starting at step 8 instead of zero, due the IC-Light Condition (The frames are denoised from 8th Step)
- For example, an End step of 20
- Start Step at
- 0 will have no Light map effect.
- 5 will have 50 percent effect
- 10 will have 100 percent effect.
- So, about 3-8 is a good value to test from.
When Generate New Background is TRUE, you can go Lower than 5 for Better Results
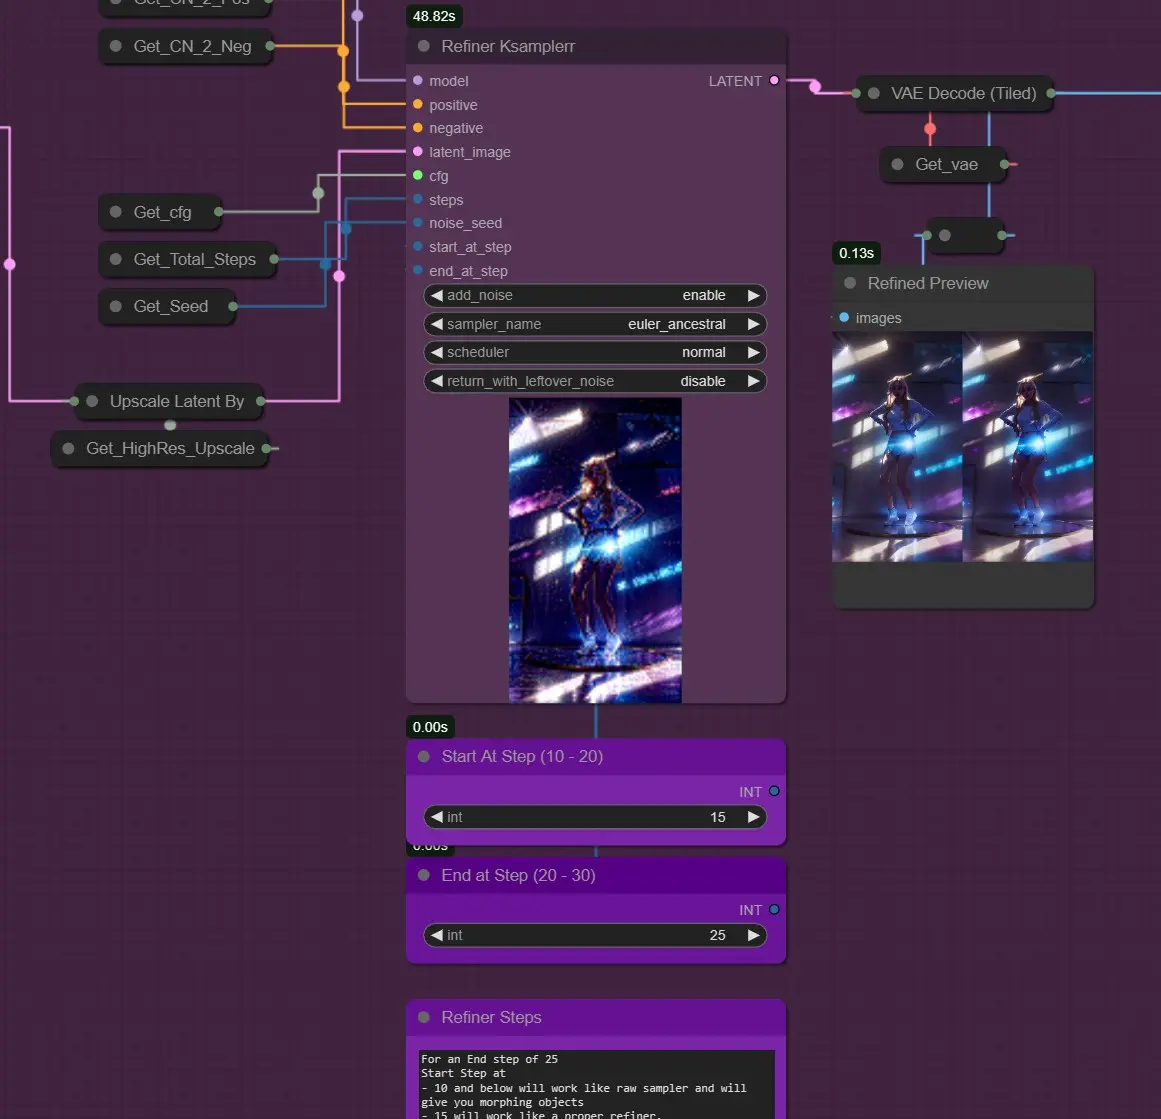
- Ksampler Refine: It works like a Img2Img Refiner After IC raw sampler.
For an End step of 25
- Start Step at
- 10 and below will work like raw sampler and will give you morphing objects
- 15 will work like a proper refiner
- 20 will not work properly
- Above 20 and above will produce messed up results
- So, Default 16 is good.
Face Fix
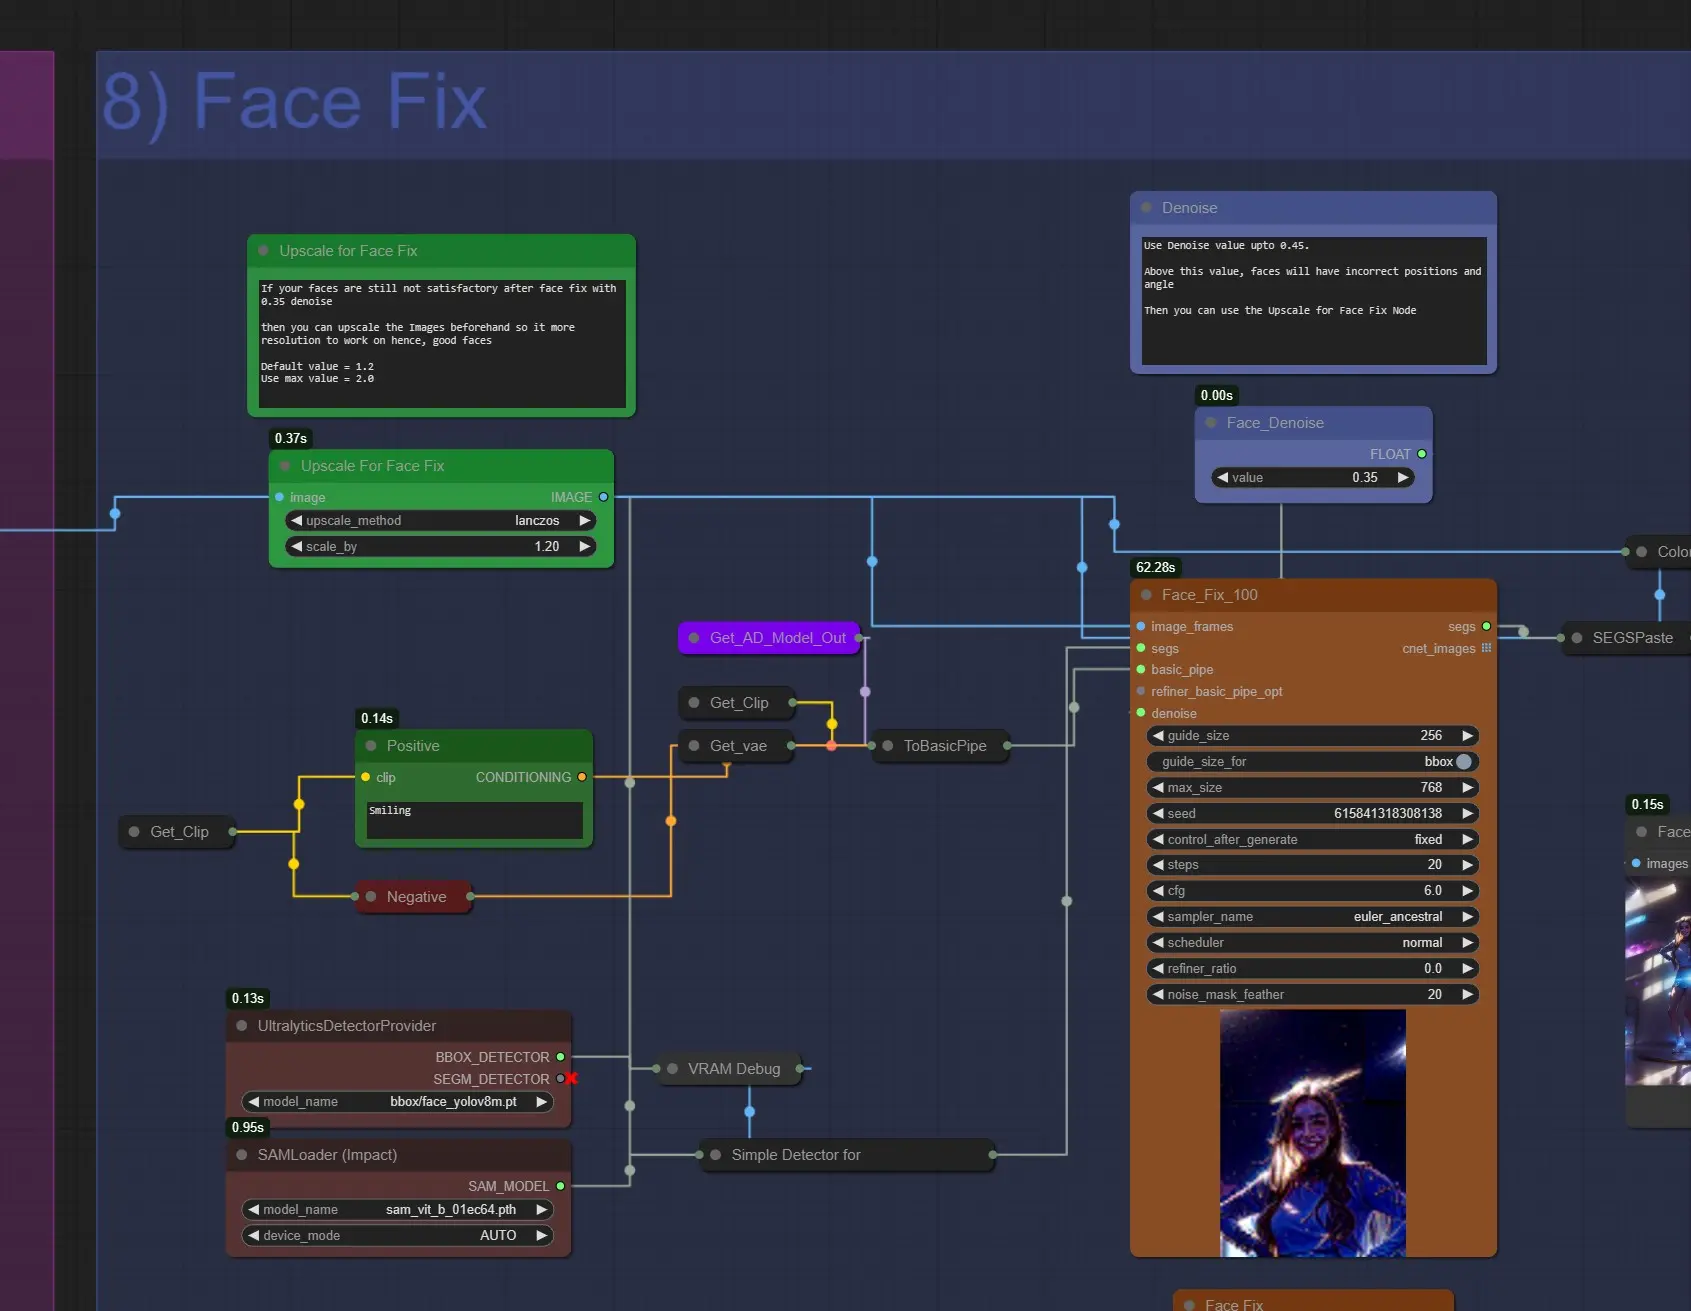
- Upscale For Face Fix: If your Faces are not satisfactory after face fix, you can upscale it to about 1.2 to 1.6 to have better faces.
- Positive Prompt: Here you can write the prompts for the face. It’s set to “smiling” by default. You can change it.
- Face Denoise: Use Around, 0.35 – 0.45. On higher face may render incorrectly and also sliding faces issue may arise.
Saving
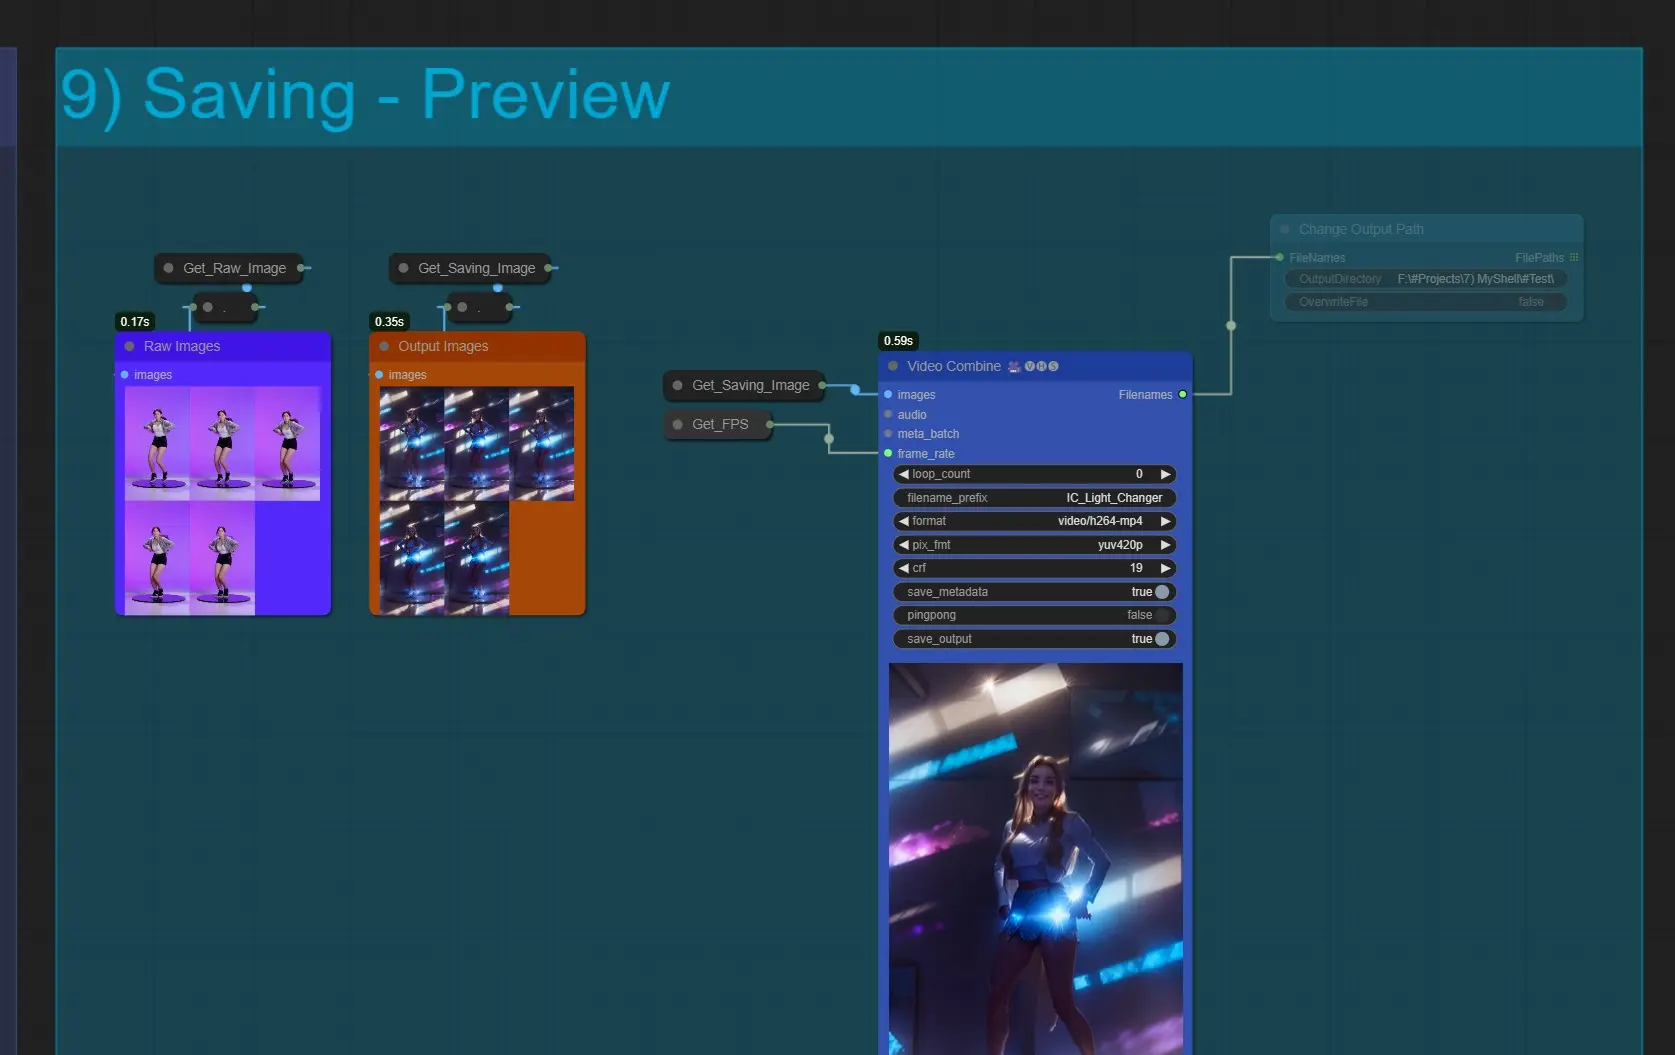
- Video Combine: This will export all the frames in a video format. If this node fails why combining that means there are too much frames, and it is running out of ram. Reduce the frames load cap if it happens
- It will save into ComfyUI > Outputs by default.
- Change Output Path: Unmute this node, if you want to save the output to a custom save location
About this workflow’s Author
Jerry Davos
- YouTube Channel: https://www.youtube.com/@jerrydavos
- Patreon: https://www.patreon.com/jerrydavos
Contacts
- Email: davos.jerry@gmail.com
- Discord: https://discord.gg/z9rgJyfPWJ